Resistance is, indeed, futile. I now have a new homelab server and its name is borg, partly because it is a rough cube ~22 cm on a side:
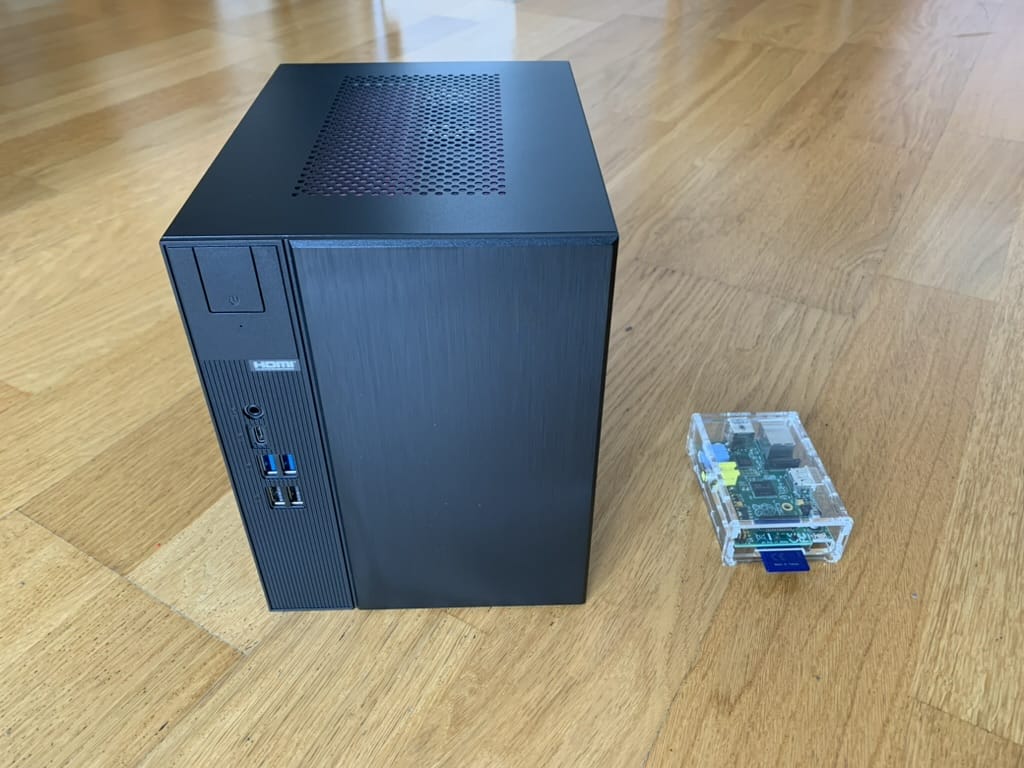
This is a massive upgrade from my last PC build, and I expect to use it to run a multitude of different environments (which is another reason for the name).
Update: Assembling this mid-Winter turned out to be a misleading proposition, since come late April I realized that putting the machine in a 30oC closet would raise some challenges. See the bottom of the post for how I worked around that.
Bill of Materials
Since this is shaping up to be a long post, I’m going to start with the BOM, because I know that’s what a lot of people will be curious about.
There’s a story about why I picked each and every one of these parts, but the general theme here was “bang for the buck” instead of bleeding edge:
- CPU: Intel i7-12700K (with Iris Xe graphics).
- SSD: Sabrent 2TB PCIe 4.0 (plus a Crucial 1TB I already had).
- RAM: 2xCorsair Vengeance LPX 64GB (3200Mhz DDR4, which is relatively cheap these days–and yes, I got 128GB of RAM).
- GPU: GeForce RTX 3060 (12GB GDDR6, HDMI 2.1, and just 20 cm in length).
- Wi-Fi/Bluetooth: AC8265 (just because I might need it in the future).
- Cooler: Noctua NH-L9i-17xx (which I love to bits).
- Case and Motherboard: ASRock DeskMeet B660 (which really ties the whole thing together).
Thanks to various deals and some choice compromises this was roughly EUR 1300, which would be half to a quarter of a top-tier, bleeding edge “gaming PC” (depending on it using previous or current generation components) and about on par with a Mac Mini with an entry-level M2 Pro chip.
But let me explain why this came about, because I’ve been wanting to build one for a couple of years now.
Rationale
My computing landscape is highly compartmentalized:
- Windows for work (with some
WSLto keep me sane), which is currently circumscribed to my work laptops. I do have a couple of personal Windows VMs around, but I don’t use them unless there’s some file format weirdness I need to deal with or I want to experiment with Windows on ARM. - Mac and iOS for anything that really matters to me personally (writing, photography, research, correspondence, personal projects, etc.).
- Linux for CAD, electronics and everything else, including mainstream development and high-powered compute–but preferably accessed remotely, and stuck away in a server closet next to my NAS because I abhor any sort of noise in my office.
But Linux has been taking over more and more of my pursuits, and I have been wanting a new machine for well over a year, during which time I slowly distilled my requirements onto a set of boxes I wanted to tick:
- Significant step up in compute power from
rogueone, my currentKVM/LXChost. - Discrete GPU, preferably an NVIDIA one so I could finally have an ML sandbox at home (
CUDAis the standard, whether I like it or not). - Proportionally more RAM and fast storage than an average PC (closer to workstation-grade, but without breaking the bank).
- Relatively low power consumption (this one was tricky).
- Smallest possible footprint (even harder, considering most PC cases are huge).
I didn’t really want to have a fire breathing monster, just a fast Linux machine I could use remotely to do CAD, catch up on the machine learning stuff I used to do a couple of years back at work, and maybe, just maybe, run PC games and stream them to my living room1.
I also wanted something that would last me (hopefully) a long time, which includes being able to do some maintenance in this age of sealed, non-user-serviceable machines.
Among other things, I wanted this to have the potential to be the last non-ARM machine I would ever buy, while being a good enough alternative to a possible future Mac desktop.
Also, I didn’t want it to be hideously expensive–I don’t have the money to splurge on a high-end gaming PC (or the time to enjoy it), and it wouldn’t be responsible of me to do so with the economy tanking.
But I did want to get something that could help me relax a bit and, given my passion for low-level hardware and virtualization shenanigans, be fun to tinker with in that regard.
The Alternatives
Since I prefer small, compact machines, I spent a long time (well over a year) surveying the mini PC landscape, especially the ones with Ryzen APUs–which of late means essentially the Ryzen 6800H and 6900HX2.
I had some hope those might be a viable way to either get something small enough (and quiet enough) to put on my desk or replace rogueone in my closet, but I eventually came to a few inescapable conclusions:
- The vast majority of mini PCs out there right now are using laptop components wrapped in proprietary cooling solutions that are often overwhelmed and noisy.
- The most interesting systems cost serious money. A great example is the Minisforum HX99g, which includes a decent discrete (but mobile) GPU besides the iGPU baked into the 6900HX die, but flies past the EUR 1000 mark.
- There are very few (if any) long-term reviews of those things, and after my recent experiences with ordering hardware directly from China6, I didn’t want to risk it–I’ll leave that to people with disposable income.
So in the end, I realized that a “good enough” mini PC would still be pretty expensive and maybe a little risky, without providing me with significantly powerful hardware.
A Meatier Solution
The tipping point came when I came across the ASRock DeskMeet B660 and X300 cases, which allowed me to build a pretty compact machine (around twice the volume of rogueone) using standard, easy to find desktop components and a desktop GPU.
There are a few compromises, though:
- The motherboard is custom (but lets you use desktop DDR4 DIMMs and has two M.2
NVMEslots in the Intel version). - You’re capped to a (nominal) 65W of TDP, which in my case meant I would not be able to use the top tier of previous generation AMD CPUs.
- You can only use GPUs up to 20cm in length–but, on the other hand, the built-in PSU is more than enough for anything that fits into that volume.
Surprisingly, the airflow is great, because the PSU fan actually brings in cold air and helps cool the CPU:
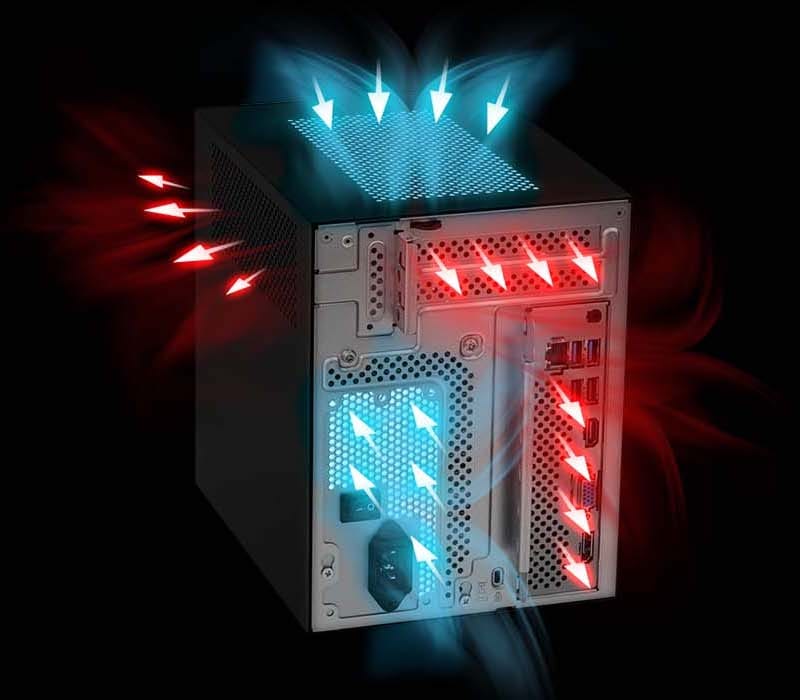
Small volume, decent cooling, ability to use standard desktop parts… I was sold.
Team Blue-Green
Given that the AMD version of the case felt a little gimped, that was the final argument against my original intent of going with an all-AMD system, and I ended up going with an Intel/NVIDIA combo:
- For CPU, I picked an i7-12700K because it has the most cores I could fit into a 65W TDP, was sensibly priced, and is a massive upgrade from the i7-6700 inside
rogueone. - For the GPU, I ended up picking a GeForce RTX 3060 because it both fits into the case and happens to come with 12GB VRAM, which is quite nice to have for
CUDAandPyTorch.
This particular CPU is a big improvement not just in overall compute but also in graphics performance–I wanted integrated graphics as well in case I had to do PCI passthrough, but I wasn’t expecting the Xe iGPU to be as good as it turned out to be.
Assembly
Putting everything together took less than an hour. I had to re-open the case a few days later to add the last chunk of RAM and the M.2 Wi-Fi adapter, but it was all very straightforward:

The only thing I got wrong was that I had to move the DIMMs one slot over, because the motherboard labeling is, in typical PC fashion, inconsistent, and the lower-numbered slot pair was not the one to use by default…
But after a quick POST test I was able to slot in the PSU, slide in the motherboard cage into the main case, and was ready to go.
Lights Out Management
Since I had been planning this for a long while, I had previously put together a custom PiKVM that, fortuitously, was finished a couple of days before:
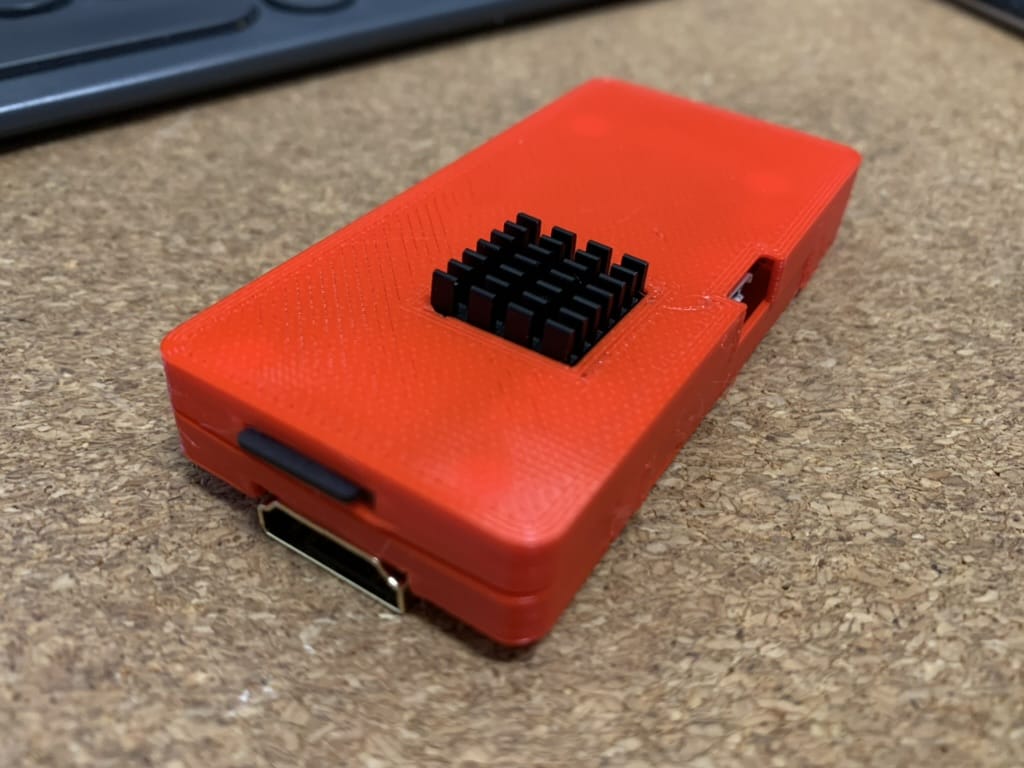
With this neat little gadget I can both turn on and shut down the machine remotely, have it boot off an ISO image resident on the Pi (I actually bootstrapped the machine from my iPad), and, of course, perform any management activities except a hard power down (which I theoretically could if I wired a few GPIO pins, but I’m not going to bother).
As a bonus, and thanks to having set a custom EDID on its HDMI port, this also tricks the GPU into believing it has a 1920x1080 monitor attached, which is a common need when you try to run a headless system with an NVIDIA GPU3.
Proxmox
Although I spent the past few years living off KVM and LXD on barebones Ubuntu, I decided to go with Proxmox because it works fine with both LXC and VMs and covers most of my needs:
- I want to be able to share both CPU and GPU cores easily across multiple Linux development sandboxes, and re-allocate resources on the fly. Using
LXCis the simplest and easiest to manage approach7, besides having the least overhead. - I also want to be able to spin up the occasional “real” VM and have the option of doing
PCIpass-through in the future (which is one reason why it’s handy to have both an iGPU and a discrete GPU). - Finally, I intend to have a Proxmox cluster in the future (when I get around to reinstalling
rogueonefrom scratch), and being able to migrate sandboxes across with a click is a very attractive proposition.
GPU Sharing and CUDA
I don’t really want to set up PCI passthrough for the GPU just yet, though. If I do that I will also have to bypass it at the host level and tie it down to a VM, and the only way to share it across multiple environments would be something like vgpu_unlock, which I don’t have the time to try right now.
In comparision, sharing a GPU in an LXC environment is very easy: the host kernel loads the drivers, creates the requisite /dev entries, and you then bind mount those inside each container and add a matching copy of any runtime libraries that may be required by applications inside the container.
And you can have any number of containers running any number of applications on the GPU–they’re all just independent processes in the same hardware host, so resource allocation is much smoother.
However, the details are… Subtle. For starters, you can’t use the latest NVIDIA host driver–you need to get the CUDA driver packages for your host distribution, which in my case was here:
Also, you need to make sure the LXC host and guest binaries are the exact same version. And even though the DKMS kernel module packages install correctly, you need to make sure the Proxmox host loads all of them:
# cat /etc/modules-load.d/nvidia.conf
nvidia-drm
nvidia
nvidia_uvm
…and creates the correct device nodes:
# cat /etc/udev/rules.d/70-nvidia.rules
# Create /nvidia0, /dev/nvidia1 … and /nvidiactl when nvidia module is loaded
KERNEL=="nvidia", RUN+="/bin/bash -c '/usr/bin/nvidia-smi -L && /bin/chmod 666 /dev/nvidia*'"
# Create the CUDA node when nvidia_uvm CUDA module is loaded
KERNEL=="nvidia_uvm", RUN+="/bin/bash -c '/usr/bin/nvidia-modprobe -c0 -u && /bin/chmod 0666 /dev/nvidia-uvm*'"
Accessing the GPU inside LXC Guests
Then comes the “fun” part–you need to get those device nodes mapped into your container, which means you have to look at the host devices and figure out the node IDs for cgroups.
In my case, ls -al /dev/{dri,nvidia*} showed me the correct device numbers to use:
# ls -al /dev/{dri,nvidia*}
crw-rw-rw- 1 root root 195,   0 Feb 17 20:43 /dev/nvidia0
crw-rw-rw- 1 root root 195, 255 Feb 17 20:43 /dev/nvidiactl
crw-rw-rw- 1 root root 195, 254 Feb 17 20:43 /dev/nvidia-modeset
crw-rw-rw- 1 root root 508,   0 Feb 17 20:43 /dev/nvidia-uvm
crw-rw-rw- 1 root root 508,   1 Feb 17 20:43 /dev/nvidia-uvm-tools

/dev/dri:
total 0
drwxr-xr-x  3 root root        140 Feb 17 20:43 .
drwxr-xr-x 22 root root       5000 Feb 17 20:43 ..
drwxr-xr-x  2 root root        120 Feb 17 20:43 by-path
crw-rw----  1 root video  226,   0 Feb 17 20:43 card0
crw-rw----  1 root video  226,   1 Feb 17 20:43 card1
crw-rw----  1 root render 226, 128 Feb 17 20:43 renderD128
crw-rw----  1 root render 226, 129 Feb 17 20:43 renderD129

/dev/nvidia-caps:
total 0
drw-rw-rw-  2 root root     80 Feb 17 20:43 .
drwxr-xr-x 22 root root   5000 Feb 17 20:43 ..
cr--------  1 root root 237, 1 Feb 17 20:43 nvidia-cap1
cr--r--r--  1 root root 237, 2 Feb 17 20:43 nvidia-cap2
These can exposed to a container like so:
# cat /etc/pve/lxc/100.conf | grep lxc.cgroup
lxc.cgroup.devices.allow: c 195:* rwm
lxc.cgroup.devices.allow: c 226:* rwm
lxc.cgroup.devices.allow: c 237:* rwm
lxc.cgroup.devices.allow: c 508:* rwm
…but need to be bind mounted to the right locations inside the container:
# cat /etc/pve/lxc/100.conf | grep lxc.mount
lxc.mount.entry: /dev/tty0 dev/tty0 none bind,optional,create=file
lxc.mount.entry: /dev/nvidia0 dev/nvidia0 none bind,optional,create=file
lxc.mount.entry: /dev/nvidiactl dev/nvidiactl none bind,optional,create=file
lxc.mount.entry: /dev/nvidia-uvm dev/nvidia-uvm none bind,optional,create=file
lxc.mount.entry: /dev/nvidia-uvm-tools dev/nvidia-uvm-tools none bind,optional,create=file
lxc.mount.entry: /dev/nvidia-caps/nvidia-cap1 dev/nvidia-caps/nvidia-cap1 none bind,optional,create=file
lxc.mount.entry: /dev/nvidia-caps/nvidia-cap2 dev/nvidia-caps/nvidia-cap2 none bind,optional,create=file
lxc.mount.entry: /dev/dri dev/dri none bind,optional,create=dir
Note:
/dev/nvidia-caps/nvidia-cap1and2currently don’t show up inside the container as device nodes, which is something I will look into later and update this accordingly. Also, beware that in Proxmox 8 you will need to usecgroup2instead ofcgroup.
Truth be told, LXD does this a lot easier than LXC, especially the next part: you need to remap the GIDs for video, render and other typical groups so that they match the host:
# cat /etc/pve/lxc/100.conf | grep lxc.idmap
lxc.idmap: u 0 100000 39
lxc.idmap: g 0 100000 39
lxc.idmap: u 39 44 1
lxc.idmap: g 39 44 1
lxc.idmap: u 40 100040 65
lxc.idmap: g 40 100040 65
lxc.idmap: u 105 103 1
lxc.idmap: g 105 103 1
lxc.idmap: u 106 100106 65430
lxc.idmap: g 106 100106 65430
The syntax for this is atrocious (it’s actually simple, but cumbersome because you have to do the mappings and breaks in sequence), but fortunately there’s this great little helper script:
Unfortunately, you need to specify the uid and the gid even if you only need to map the gid, which is kind of stupid.
Anyway, after a little while I had CUDA working inside two LXC containers, and tested it with Blender:

Hardware Accelerated Remote Desktop
Getting my thin client setup to work was… pretty trivial, and tremendously satisfying, since xorgxrdp-glamor worked out of the box in a fresh Fedora container.
It was so fast that it took me a while to figure out it was the Xe iGPU doing all the work, even though the NVIDIA utilities work perfectly:
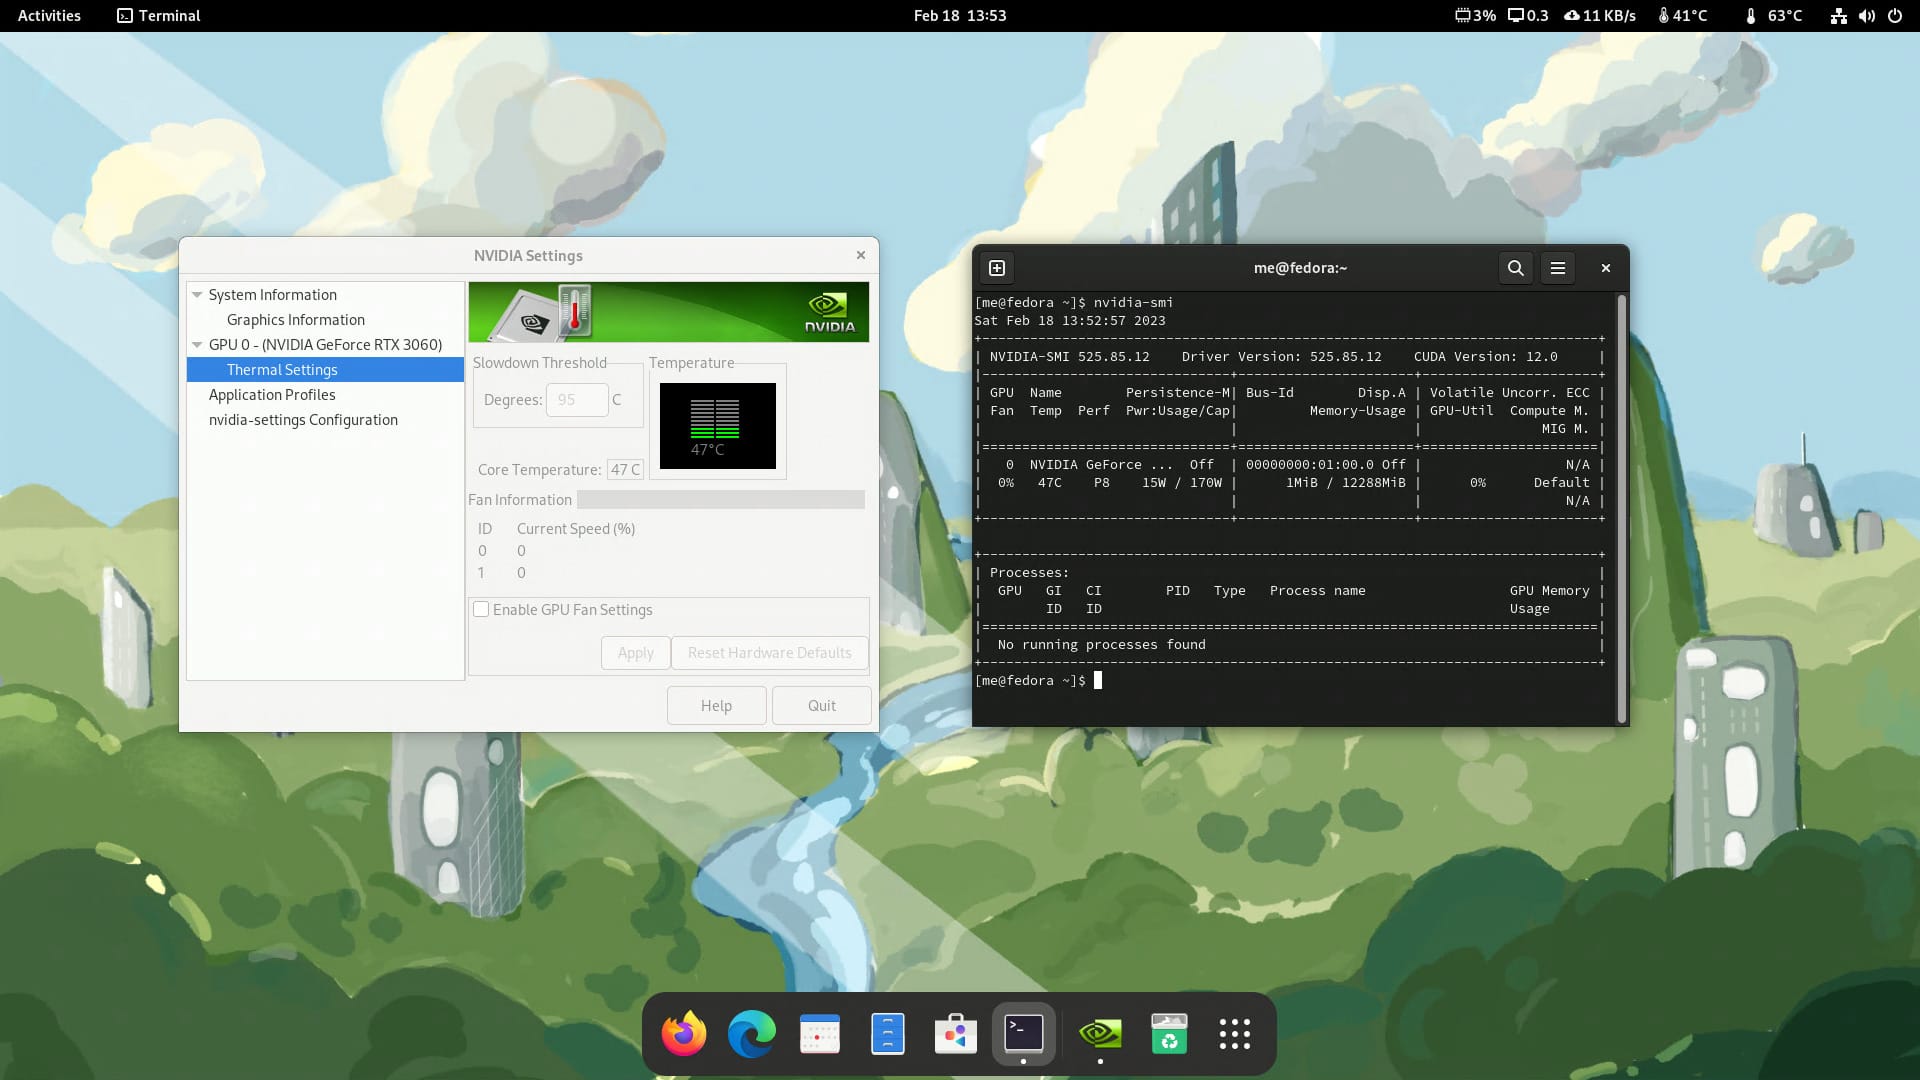
This is fine for my use case, but getting the NVIDIA card to render the desktop is something I would like to get to work for Steam–it runs, but renders using the iGPU and thus can’t really run or stream AAA games like this.
Investigating GPU Switching
I then tried using PRIME (which is a typical solution for hybrid laptop designs), but it doesn’t really work for me–partly because xrdp requires specific NVIDIA patches, and partly because nobody really considered this kind of setup, so behavior is… inconsistent at best:
# The basics
DRI_PRIME=pci-0000_01_00_0 __VK_LAYER_NV_optimus=NVIDIA_only __GLX_VENDOR_LIBRARY_NAME=nvidia glxinfo | grep 'OpenGL renderer string'
OpenGL renderer string: NVIDIA GeForce RTX 3060/PCIe/SSE2

# gxgears runs and shows up on nvtop
DRI_PRIME=pci-0000_01_00_0 __VK_LAYER_NV_optimus=NVIDIA_only __GLX_VENDOR_LIBRARY_NAME=nvidia gxgears -info
Running synchronized to the vertical refresh.  The framerate should be
approximately the same as the monitor refresh rate.
GL_RENDERER   = NVIDIA GeForce RTX 3060/PCIe/SSE2
GL_VERSION    = 4.6.0 NVIDIA 525.85.12
GL_VENDOR     = NVIDIA Corporation
(...)

# Reports using NVIDIA, shows up on nvtop, sometimes works, sometimes renders a black window
__NV_PRIME_RENDER_OFFLOAD=1 __GLX_VENDOR_LIBRARY_NAME=nvidia openscad

# Freezes RDP session
__NV_PRIME_RENDER_OFFLOAD=1 __GLX_VENDOR_LIBRARY_NAME=nvidia microsoft-edge

# Freezes RDP session
DRI_PRIME=pci-0000_01_00_0 __VK_LAYER_NV_optimus=NVIDIA_only __GLX_VENDOR_LIBRARY_NAME=nvidia microsoft-edge

# Reports using Intel, does not show up on nvtop
__NV_PRIME_RENDER_OFFLOAD=1 __GLX_VENDOR_LIBRARY_NAME=nvidia firefox

# Core dumps, even if we also set __VK_LAYER_NV_optimus=NVIDIA_only
__NV_PRIME_RENDER_OFFLOAD=1 __GLX_VENDOR_LIBRARY_NAME=nvidia firefox
And yes, I know about Bumblebee, but can’t get it to work in my setup.
Intel QuickSync and VA-API
While fiddling with the above, I realized that Firefox in my Fedora workspace was complaining about lack of accelerated video decoding, which was weird (especially considering the iGPU was running the virtual display).
Strangely, Firefox in an Ubuntu LXC didn’t complain, but wasn’t even using the GPU (which is likely due to it being an XFCE workspace without a compositor). Something else I need to check, I suppose.
But on either kind of container, ffmpeg worked fine with VA-API or NVENC and transcoded some test files impressively fast (well, compared to what I was used to).
I eventually realized it was Fedora’s fault and fixed it via RPM Fusion, but this is another example of the general weirdness of Linux hardware acceleration support.
I also enabled Intel chipset offloading for some operations:
cat /etc/modprobe.d/i915.conf
options i915 enable_guc=3
Post-Install and Workload Migrations
After setting most things to my liking, I spent a couple of evenings doing a few tests, the first of which was to get Stable Diffusion going (with pretty good results, I should add), and began moving over my current workspaces and VMs one at a time.
Migrating LXD to LXC
This was pretty straightforward: lxc publish generates an image of an existing container, which you then export into the filesystem.
The one catch is that, before copying to Proxmox, you need to prune /dev and tweak the tar pathnames:
lxc publish xfce-jammy
# check the export
lxc image list
+-------+--------------+--------+-------------------------------------+--------------+-----------+-----------+------------------------------+
| ALIAS | FINGERPRINT  | PUBLIC |             DESCRIPTION             | ARCHITECTURE |   TYPE    |   SIZE    |         UPLOAD DATE          |
+-------+--------------+--------+-------------------------------------+--------------+-----------+-----------+------------------------------+
|       | 9f1da769e1a4 | no     | Ubuntu jammy amd64 (20220403_07:42) | x86_64       | CONTAINER | 2624.91MB | Feb 15, 2023 at 6:36pm (UTC) |
+-------+--------------+--------+-------------------------------------+--------------+-----------+-----------+------------------------------+
# find a quiet place to work in
cd /tmp
lxc image export 9f1da769e1a4da26fa4afa17dc9c7bb001eec54d98a8915c8431aa37232459f8
mv 9f1da769e1a4da26fa4afa17dc9c7bb001eec54d98a8915c8431aa37232459f8.tar.gz xfce-jammy.tar.gz
# extract it - you should get a rootfs folder
tar xpf xfce-jammy.tar.gz
# prune devices
rm -rf rootfs/dev
tar cpzf xfce-proxmox.tar.gz -C rootfs/ .
You then upload the result to /var/lib/vz/template/cache/ on Proxmox, create a new container with that tarball as the template, and start it.
Migrating VMs
This is a little trickier because it depends on the original hypervisor and hardware settings, but the storage is also an issue for two reasons:
- Proxmox uses
LVMvolumes and not disk image files. - The default install has limited scratch space to import large (>120GB)
.qcowfiles directly.
…so I had to to import one of my Windows VMs via my NAS:
mount -t cifs -o username=foobar //nas.lan/scratch /mnt/scratch
# go to existing KVM host and copy the .qcow image into the NAS share
# go back into Proxmox and simultaneously create a new VM and import .qcow into LVM
qm create 300 --scsi0 local-lvm:0,import-from=/mnt/scratch/win10.qcow2 --boot order=scsi0
I then went into the web UI, clicked on VM 300, and set the OS type and other settings accordingly. I could have done that right in qm create (and will eventually update this with a full example), but it was just simpler to do it this way.
The end result, after getting the VM to boot (which in this case actually meant switching the disk to ide0), adding a network interface, and tweaking other settings, was this:
# cat /etc/pve/qemu-server/300.conf
agent: 1
audio0: device=ich9-intel-hda,driver=spice
boot: order=scsi0
cores: 8
ide0: local-lvm:vm-300-disk-0,cache=writeback,size=128G,ssd=1
memory: 8192
meta: creation-qemu=7.1.0,ctime=1676739618
name: win10
net0: virtio=A6:98:D4:C2:AC:3B,bridge=vmbr0,firewall=1
numa: 0
smbios1: uuid=9759a0e4-9be1-495c-8e79-312416bd5468
sockets: 1
vga: virtio
vmgenid: 75c9ec31-d2fe-42fd-bb57-4f63f112735d
Side Quest: Dual Booting into Steam
Until I sort out how to get Steam to use the NVIDIA GPU inside a container, I did the pragmatic thing and just set up a minimal install of Windows 10 on the second NVME drive (see, that second slot is really handy) and set it up to use AutoLogon:
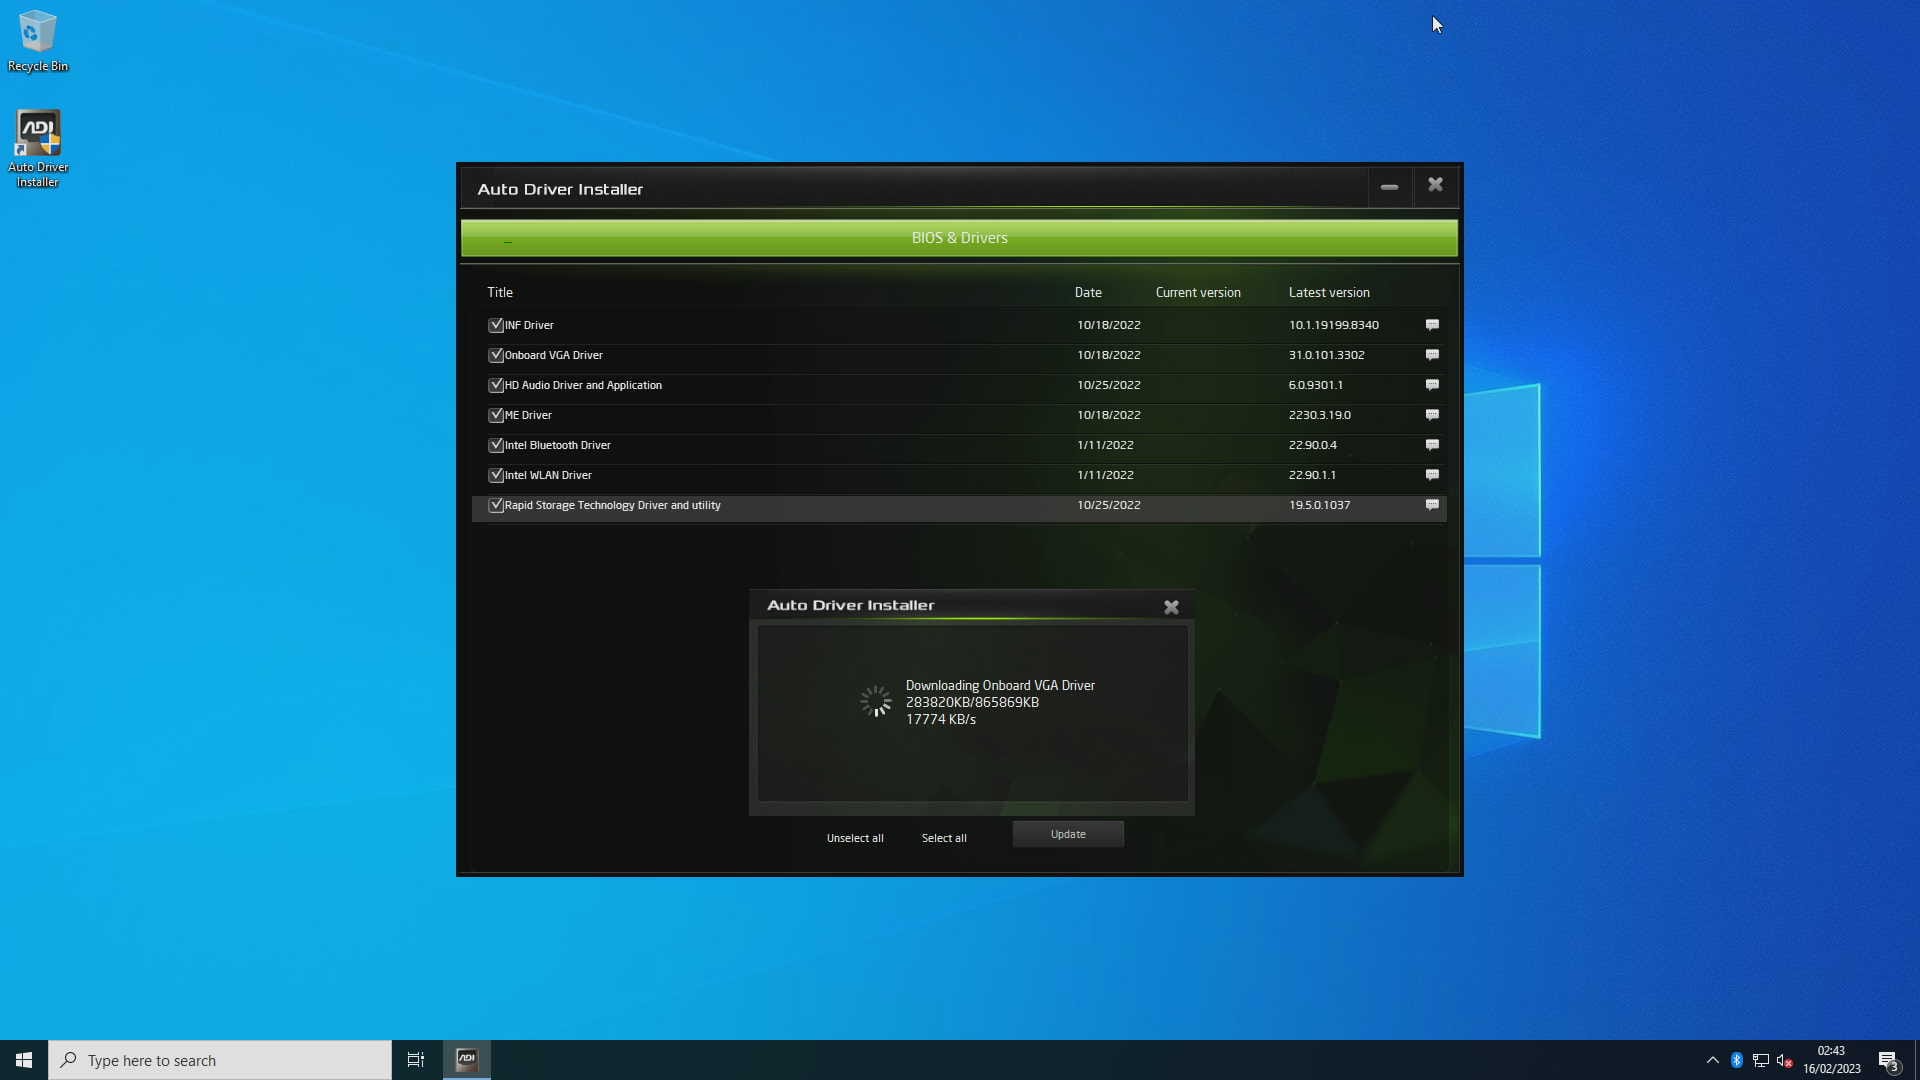
Gaming was always a secondary goal, but this way it’s trivial to hop into the PiKVM, reboot the machine and press F11 to boot off the Windows drive–and if I have the time, I will eventually automate that.
I did get Steam Link to work in an LXC container via the iGPU, but rendering and streaming anything more demanding than Celeste is right out, and when trying to use PRIME to force it to use the NVIDIA card I also came across a number of bugs regarding Big Picture Mode that make me think it will be a while until I can take full advantage of Proton and do without Windows on this machine altogether.

Controller input under Linux was also a bit strange (likely because LXC adds to the complexity here–I remember Steam requiring some udev entries at some point in the past), so for the moment I think I can live with dual boot.
And the Steam Link experience is great: I get a rock solid 60fps when playing things like Horizon Zero Dawn at full HD via my NVIDIA Shield with DLSS and Quality settings4, and I don’t think I’ll need to go beyond that for PC gaming5.
Conclusion
I’m very happy with the way this build turned out. I didn’t break the bank, things are very snappy, everything in the machine runs below 40C at idle/low load (except the secondary NVME drive, which will be getting a heatsink ASAP), and the build is altogether quieter than I expected.
The only downside was that I had to pause other personal projects to get it done, but considering the current industry context, it was a welcome distraction and a chance to polish some decade-old skills.
I have the little cube temporarily set up in my office right under my desk, and the only fan I can hear with low to moderate load is the PSU, so I would probably recommend this as a desktop machine as well if, unlike me, you don’t hate fan noise with a passion.
Now to start cleaning up rogueone and plan for the physical swap…
Update: Maybe a Bit Toasty
Come late April, I realized that I was having occasional crashes, and decided to investigate. To my dismay, memtest86 was failing.
Fortunately, since I have temperature sensors throughout the house, it wasn’t hard to figure out what was going on.
- First off, outside temperatures went from 7-10oC when I first assembled it to 17-20oC, which meant that my server closet (a repurposed pantry with little ventilation) went up well past 25oC and would reach 30oC during working hours.
- This was largely because
borgwas contributing to the thermal load–the heat it generated was vented out of the case, sure, but was not going anywhere. - Since I had filled all four available
DIMMslots (for a grand total of 128GB), the CorsairRAMwas densely packed and, withXMPenabled, was unable to cool off effectively. - To ASRock’s credit, an
i7is not recommended for this case, either.
So I started charting temperatures and fan speeds and messing about with various environmental factors (my closet has a steep temperature gradient, so I moved borg to the bottom, but that only slowed down heat buildup, and case orientation didn’t make much difference either).
Keeping the closet door open sort of worked, but light workload temperatures were hovering near 50oC, so I resorted to disabling XMP and tweaking the CPU fan curve. I also learned that the GPU fan kicks in when it reaches 56oC and is a bit of an all-or-nothing proposition.
I then investigated a few ways of cooling the machine further:
- I 3D printed my own
RAMcooler with 2x40mm “silent” fans, and it worked well enough for me to enableXMPagain, but heat buildup was still a problem inside the closet. - I undervolted the CPU (by 100mV) to see if it made any difference in heat buildup under load (not much, to be honest).
- I then 3D printed another fan bracket, but this time to have a forced exhaust out through the
GPUvent. In practice that helped cool theGPU, and cooling the motherboard was still a problem. - So I took a Dremel to the
PSU, removed the fan grill (which restricts airflow too much) and replaced the stock fan with a Noctua NF-A12–and plugged that in as thePWMchassis fan.
This last trick was crucial, since the base PSU fan is not PWM controlled (something that, in retrospect, seems like an easy improvement for ASRock to make). Doing this and removing the grill was literally the icing on the cake–it allows for much more efficient cooling on demand, and replaced the only fan in the system that was audible on idle.
So after patiently testing it with various things (from my Stable Diffusion sandbox to games streamed to my living room), everything seems fine now, and I have two ways I can use the machine:
- In my closet as originally intended, with the extra
RAMcooler andGPUexhaust fans fitted. It will run fine, but maybe a little too warm. - At my desk, squirreled behind my tall monitor and without any extra fans (except the
PSUmod). This is a much cooler location than the closet overall (and has air conditioning to boot).
I’ve opted for the latter for the moment (just because I have other things to do than carting it to and fro), and even though it’s the only actively cooled machine in the office right now, I can barely hear it unless it’s under load.
I’ll revisit this in a month or so when Summer starts swinging round.
Update, December 2025: I have finally solved all the thermal issues I had with it via a series of small mods (see the backlinks below), but this month I had to replace the Noctua NH-L9i-17xx](ASIN_ES:B09HCLB7M3) since it froze up beyond repair (I am in the process of revisiting my homelab metrics, so this was a great reminder I needed temperature charts).
-
I can barely find an hour a week to play anything and there are already too many consoles in the house, but I started collecting Steam freebies a few years back, so my kids might as well start enjoying them. ↩︎
-
Given the great experience I’ve been having with my Lenovo Ideapad 5, I was willing to risk using
PyTorchwithROCm… Maybe it’s a good thing I didn’t, though. ↩︎ -
Yes, I planned that far ahead. Two years is enough to plan for a lot of contingencies. ↩︎
-
I’m a bit sad that my Apple TV 4K can’t apparently stream as smoothly as the NVIDIA Shield, but it might just be a matter of tweaking the settings a bit. ↩︎
-
Or streaming some ancient console emulators, which is something else I’ll be looking into once I have the time to play with EmuDeck. ↩︎
-
You can read my reviews of the Retroid Pocket 3 and the Kingroon KP3S Pro, both of which were obsoleted a month after they were bought and have essentially zero support. And the current Cambrian explosion of mini PCs is also tainted by this trend of small, unreliable production runs and quick obsolescence… ↩︎
-
I’ve been using
LXCsince 2011, so yeah, I think I know what I’m doing. ↩︎