 Rui Carmo
I guess it’s time for another hardware review. For my birthday late last year, I did something I never do: I pre-ordered an untested, unreviewed 3D printer–the Kingroon KP3S Pro.
My rationale at the time was roughly as follows:
- My Prusa was vastly improved by upgrading to Klipper, but I wanted a more modern printer that could print both faster and with a bit more quality(my Prusa lacks a heated bed and removable nozzles, among other niceties).
- A Voron would take up a lot more volume than I can currently spare, especially while building it (which might take a while). It would make for a great Summer project, but also an expensive one–and I can always wait until kits come down in price.
- The original KP3S is a very popular budget printer that has been modded in various ways, can already run Klipper and was lauded for its solid build quality.
- The new Pro model matches the KP3S’ all-metal construction and adds linear rails for the X and Z axes, as well as getting rid of the external PSU.
- Also, the thing is tiny, especially when compared to a Voron. And, at least for now, space is at a premium in my office.
So for less than 200 Euro, I would be getting an all-metal printer with a build that is roughly comparable to the RatRig V-Minion (minus a premium extruder and hot-end) and that I could tweak a bit without much hassle.
I ordered one in October, and have been messing about with it since November alongside my Prusa:

Component Quality and Pre-Order Blues
Assembling it was trivial, as was getting it to work with Octoprint. However, there were a few things that I found rather annoying.
For starters, the PSU fan makes a considerable amount of noise (which seems to be a common complaint) and is always on–so much so that I thought it was faulty, complained to Kingroon (to pretty much zero effect, I should add) and started researching replacements within an hour of assembling it:

I carefully dripped some WD40 into the fan, but it didn’t do much. Raising the printer on foam pads did a lot more for the noise than anything else.
Given that the stepper motors are almost completely silent, this is just a shame for Kingroon and feels like a missed opportunity for the sake of saving a few bucks on the PSU.
Another thing that many reviewers have pointed out is that the filament path is somewhat nonsensical, with the runout sensor bolted to the side of the printer (near the barcode on the X-axis) and a reverse Bowden tube (that doesn’t even attach properly) running from there to the extruder.
I decided to just skip it and set the filament spool above the printer, which is more manageable anyway–but I did cut a short length of teflon tube to guide the filament in at the top of the extruder.
That Beta Feeling
Also, shortly after mine arriving, I found out that Kingroon was making available an Y-axis upgrade kit with dual linear rails. which was… annoying. Why didn’t they design the thing properly in the first place?
And, sure enough, before Christmas Eve, I found out that they were shipping an “S1 Pro” version with built-in rails, which was, well, even more annoying (and reminiscent of my plight with the Retroid Pocket 3).
So I likely won’t play pre-order roulette again to sponsor beta products, at least not with Chinese manufacturers.
Hardware and Firmware
But I did order the Y axis upgrade (as well as a 3D Touch probe and some spare heat blocks and nozzles), and I must grant that the printer is, indeed, quite nice to use in practice.
My machine is still running the stock firmware, but with a high flow nozzle (see below) and moderately tuned settings, it can already print way faster than the Prusa, and I can’t wait to see what I can do with Klipper.
The Y-axis parts arrived within a couple of weeks and were easy to install, but I should point out that the finish was a bit shoddy: The new Y-axis stopper is a full centimeter off, which means that I will have to design a spacer of some sort to be able to use the entire print bed.
As to firmware, even though it seems to be Marlin firmware with a custom UI, I can’t find an official Kingroon firmware source tree anywhere. There are a lot of non-pro KP3S modded GitHub repositories, though, and it is essentially the same printer, so I assume it should be easy to find something tweakable if I wanted to stay on Marlin firmware.
Control Board and LCD
While trying to sort out my PSU fan I took a good look at the control board, which is using one of the cheap STM32 replacements (a GD32 family chip):

This used to be a problematic chipset a year or so ago from what I can see of the Klipper commit logs, but apparently not anymore.
From my research so far, the only thing that I might lose by upgrading to Klipper on this board is support for the onboard touchscreen (even though to be honest it has little to recommend it), but I’m investigating whether someone has written code for it yet (even if only as a passive display).
Software and Print Profiles
I didn’t bother with anything on the shipped SD card, and just set up the printer directly in both SuperSlicer and Cura (using the original KP3S profile in the latter), both connected to Octoprint.
I’ve had zero issues other than the usual retraction tuning, and I also had to tweak my starting Gcode to do an initial filament purge along a different axis than the one on the Prusa because of the wonky Y-axis stopper.
Over the past few weeks, I have been progressively tweaking a set of print profiles for both precision printing and fast drafts without any fuss – I intend to experiment with a 0.2 nozzle soon, and the stock 0.4 one works very nicely with a 0.28 layer height for functional parts.
But print quality has, overall, been excellent with PLA, likely due to the sturdiness of the machine and the smoothness of the linear rails.
PETG is a bit all over the place at the moment because I haven’t tuned things properly, so I am still printing that material mostly on the Prusa, but I expect it to turn out at least as great on the Kingroon.
Mods and Upgrades
I did buy the KP3S Pro with the intent of tweaking it (although I was certainly not expecting to replace the entire Y-axis…), but only minimally. So I already changed a few things:
Print bed
My KP3S Pro shipped with a textured glass bed. You’ll see YouTube reviews and some folk who got a flexible PEI sheet, but, again, I was not so lucky (there wasn’t even an option for one when I ordered).
One of the “catches” of the KP3S Pro is that the 210x210mm bed size is atypical, so I decided to order two sheets of GR4/FR10 (i.e., garolite, which is essentially layered fiberglass) cut to size from an AliExpress vendor.
I went with 210x210x4mm to match the glass thickness, and ordered both green (flat) and black (slightly textured on one side) panels.
After a bit of experimentation I decided to stick with the black one for the moment, since (at least with PLA) initial layers stick very well and parts pop off cleanly as the bed cools.
I also got a 3D Touch probe, but haven’t yet set it up since I intend do do that when I install Klipper.
Swapping the Nozzle and Heatbreak
Besides a set of cheap brass nozzles and replacement heatblocks, I also bought an all-metal heatbreak, since although I have no intention of printing ABS, I do have a lot of PETG filament, and some of it prints better in the 220-235oC range.
And since in early January I clogged the KP3S Pro extruder with Sunlu matte white PLA (which I’ve named “the filament from hell”, since the thing is chalky and hellish to print), I decided to swap the whole thing–nozzle, heatbreak, etc.
The timing was good, since over the holiday break I had gotten a couple of 0.4 and 0.6 “high flow” CHT clone nozzles to test.
If you’re not familiar with these, what happened is that CHT patented a “high flow” design that forces the filament through three convergent openings in the nozzle to maximize the filament surface area that is in contact with hot metal by doing some sophisticated drilling.
But some clever Chinese folk realized they could achieve the same effect with a (apparently simpler and cheaper) copper insert instead, and are selling these at way cheaper prices:

So I bought both V8 and MK6 nozzles, since I am planning to upgrade my Prusa with a new extruder ASAP1. And the results on the KP3S have been very encouraging indeed (the video above was shot while printing with one).
Extruder Maintenance and Heatbreak Swap
As to unclogging the extruder and exchanging the heatbreak, disassembling the toolhead is reasonably straightforward but somewhat annoying since Kingroon decided to use three different screw sizes.
But once you remove the metal cowl and another set of screws, the extruder mechanism mechanism is easy to clean, although a bit too plasticky for my liking:

I couldn’t easily get the heating element off the original heatblock, so I kept it and just replaced the heatbreak and nozzle–only to realize that once fully screwed in, the new heatbreak was offset a couple of tenths of millimeter from the cooler axis, which caused the ends of new filament to catch on it and jam.
So much for manufacturing tolerances, I guess.
I fixed that by filing the heatbreak inlet–I inserted it into an electric drill, took a conical file and slowly widened the hole a little, creating a smoother gradient:
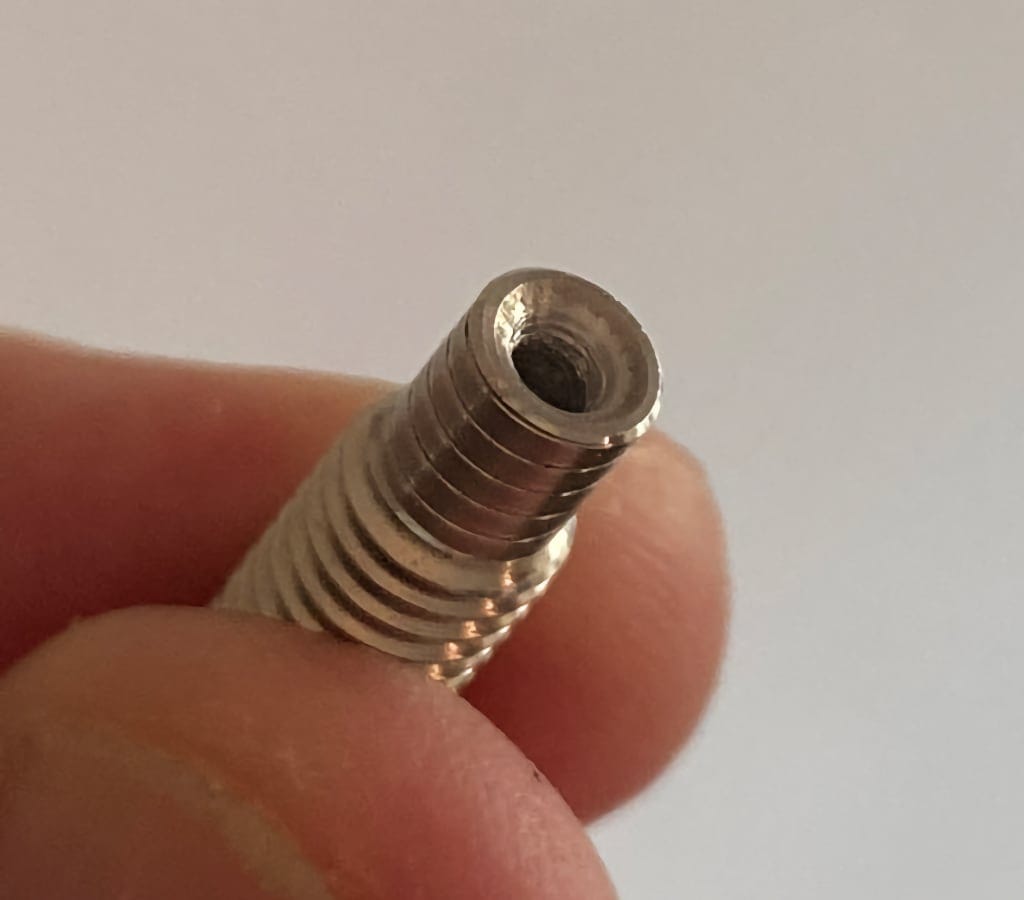
Now the filament doesn’t jam and goes directly through.
Likes and Dislikes
It’s been three months of use and several functional parts printed, so I think I now have a well-rounded opinion of the KP3S Pro.
Things I like
- Very nice print quality (almost no ringing, even at the speeds I’m pushing it to).
- Has become my go-to printer for both quick drafts and final, quality prints.
- The metal build, even considering it is a cantilever, is very sturdy.
- I love the silent stepper motors.
- The bed is easy to level manually (it’s rather small, so there’s very little in the way of warping).
- Relatively easy to disassemble and maintain, at least so far.
- Quality of life improvements compared to my Prusa: compactness, all-metal frame, heated bed, swappable nozzles.
- Plenty of potential to tweak it to print even better and faster.
Things I dislike
- No Open Source firmware tree I can find. Seriously, people, is it that hard?
- Lack of attention to detail (power cord on the side, filament sensor placement, Z axis stopper screw design, wonky LCD UX, multiple screw sizes for any kind of maintenance).
- Kingroon really ought to have stabilized the design before shipping, I feel like I got an early prototype (even if it is a decent one).
- That noisy PSU fan. It’s either a QA issue or just a very poor component sourcing decision.
- The build quality, despite sturdy, could be better (the bed is very slightly misaligned along the Y axis, and the linear rails upgrade didn’t help much, although it was an opportunity to realign the Y extrusions a bit).
- The bed springs are a bit meh, and the adjustment wheels can be fiddly (perhaps that’s because the springs could be better).
- The extruder feels cheap.
So, would I buy one again?
Almost certainly yes, but only three to six months after it shipped, to avoid BOM reshuffles and make sure I didn’t have to compensate for a wonky product lifecycle.
And still, for the price, I don’t think I can complain–and I have to wonder if they could pull off a compact CoreXY machine with a similar sturdiness2.
Next Steps: Klipper Prep Work
Like I said above, I haven’t set up Klipper on it yet, but it will likely happen soon (probably during Carnival or Easter breaks, since I like to take my time for doing all the tuning involved).
In the meantime, and since I don’t really expect to be able to make use of the built-in LCD, I picked up a couple of cheap TFT touchscreen-and-box combos that actually have decent Open Source drivers (always a good thing to check first if you intend to have something that lasts3) and installed KlipperScreen on both:

The screen won’t win any awards for responsiveness, but then again neither would the built-in Kingroon one, and these things aren’t high precision, low latency devices like a phone. It’s… fine.
I have been using one on my Prusa for a couple of months since I might as well run both printers the same way, and have the other ready for when I decide to tackle the upgrade.
Conclusion
The KP3S Pro, even in the somewhat unfinished shape mine turned out to be, makes for a nice, compact and fast printer that works fine out of the box even without any modifications.
I don’t know if I would recommend it to someone as a first printer given all the above, but I can understand why some people would given the print quality I’ve gotten out of it in the meantime.
But as a (relatively) no fuss hardware platform and a testbed for unambitious mods, I think it is a pretty good deal–as long as you make sure to get the updated version, and assuming Kingroon makes some improvements on component sourcing (shipping a properly silent PSU, for starters).
-
I actually ordered a new extruder for the Prusa from E3D for Christmas, but the Royal Mail strike caused it to be lost in transit, so I am trying to get a replacement as soon as I can get the shipment acknowledged as lost. ↩︎
-
I would love to try out a CoreXY machine that can fit into a square that is roughly 45cm on a side, since that is roughly the space my Prusa currently occupies (and the depth of the furniture it rests on). ↩︎
-
I also snapshotted the repository to my private Gitea instance, just in case. ↩︎