Following the MacBook Pro debacle and the current lack of prospects for desktop Macs, I decided I wasn’t going to wait around for Apple. So after looking at other OS options I started researching the current state of the art in Hackintosh land and looking into compact desktops.
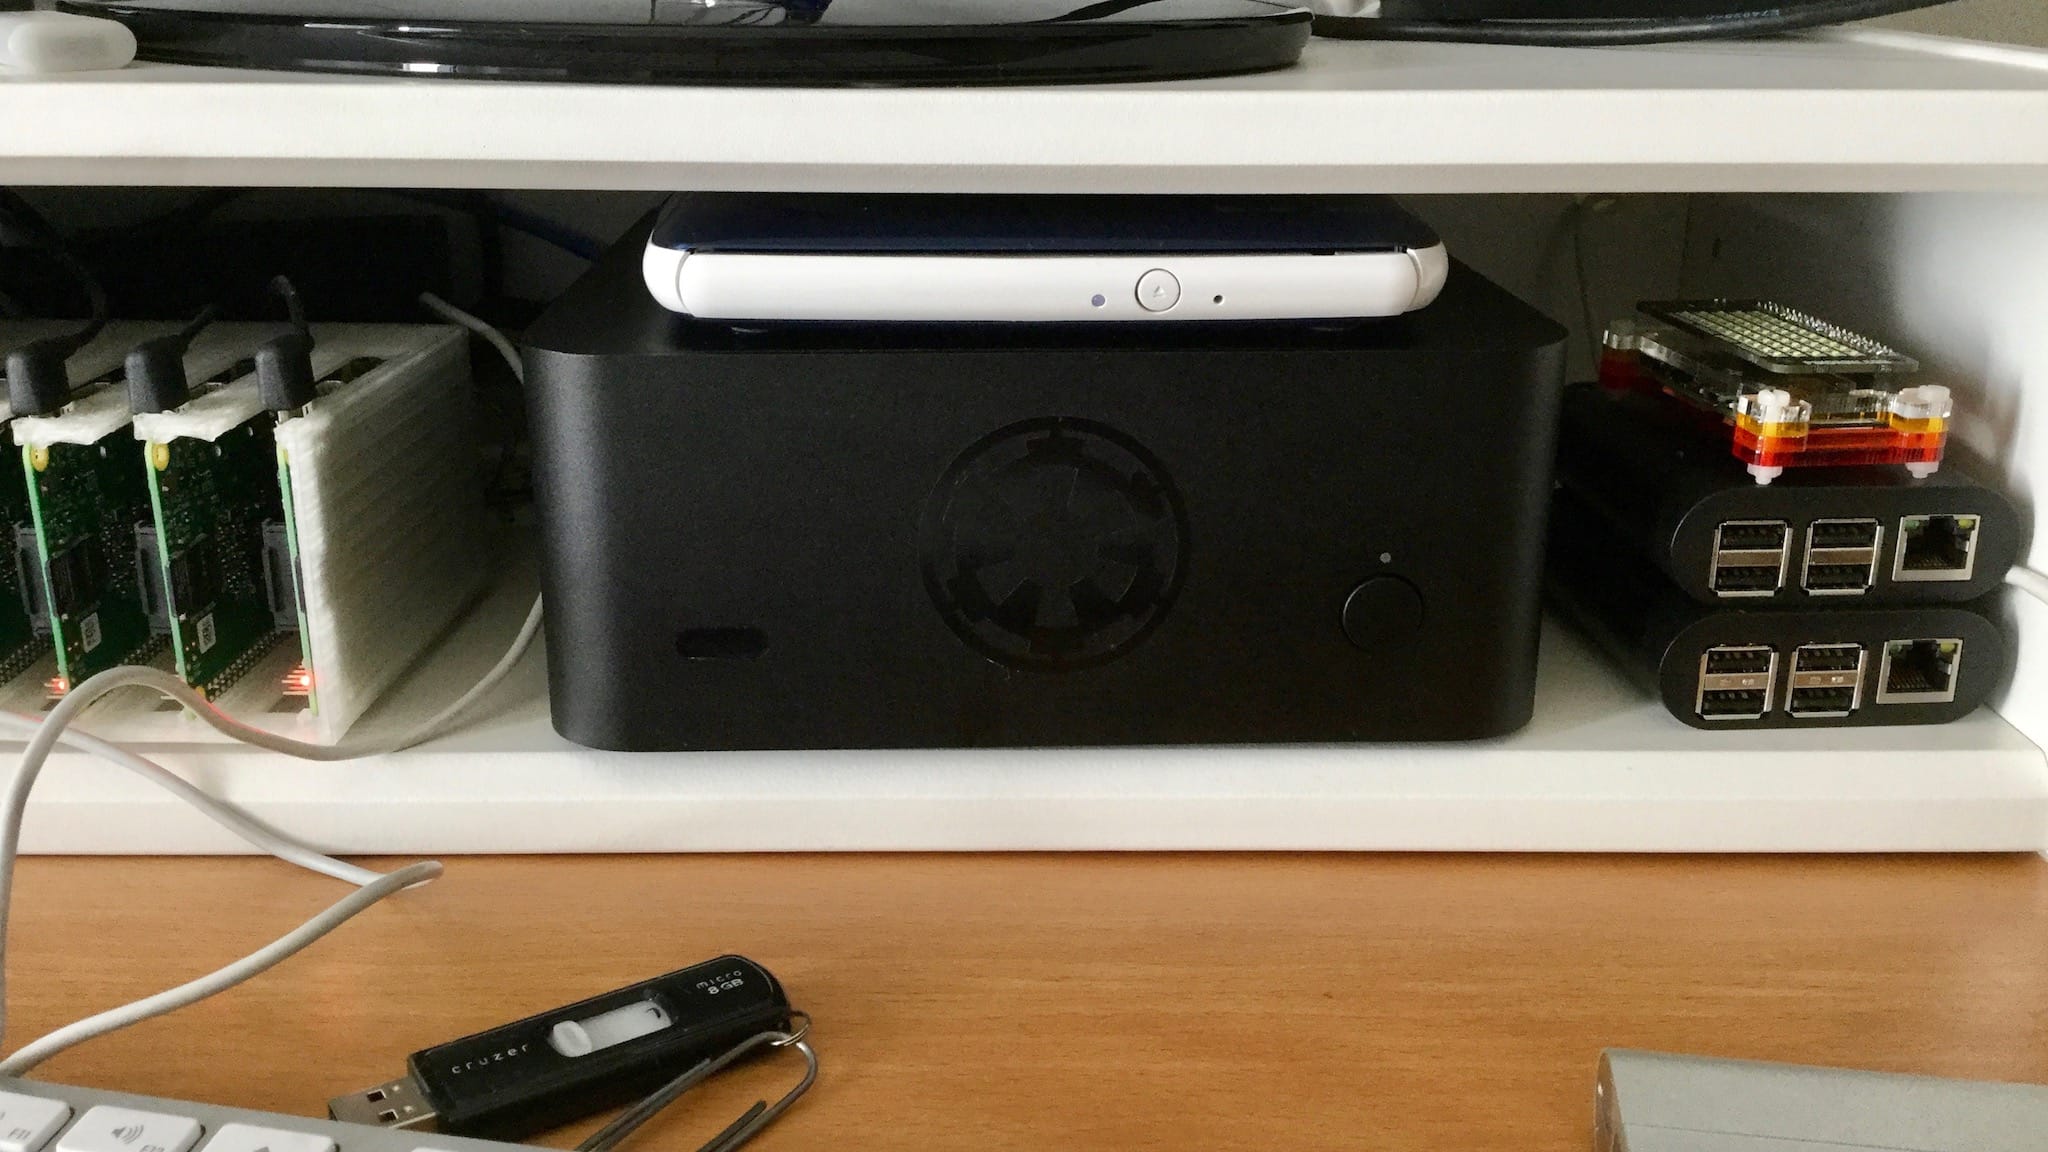
I eventually decided to build myself a new machine for Christmas, and run macOS on it even if it’s a bit of a walk on the Dark Side. Naturally, given the timing and context, I decided to call it Rogue One:

I’ve run Hackintoshes before – I actually installed macOS on quite a few machines over the years, both to better understand the internals (which Amit Singh’s book lays out beautifully) and for the sheer fun of figuring out how to get it to run on different hardware.
One of my most successful Hackintoshes was a Dell mini 9 that I used for quite a while (a very popular and flexible little machine), and even though there is a certain amount of tinkering involved in running a Hackintosh, right now the gains in terms of price, performance and expandability seem likely to outweigh the inconvenience – and in my case, given the the disrepair of Apple’s desktop line and the fact that I’ve been running a six-year-old Mac mini in my home office, the prospect of waiting for new hardware that matched my needs (and paying through the nose for it) was simply intolerable.
Use Case
First, let’s revisit my use case.
My work entails running an odd mix of Office, Docker (which I currently run on remote VMs) and a lot of terminal windows and browser tabs. I seldom run a complete IDE locally (I rely on vim and Visual Studio Code for most of my coding, and fire up VMs to use bigger IDEs). I also have an “emergency” Windows VM on my Mac mini, but it’s a pain to use due to the limited CPU power.
So when I have to work from home and have to run Windows stuff the Mini is not really enough anymore and I tend to just Remote Desktop into my laptop or a remote VM and use them through my dual screen setup. It works well enough, but is not ideal.
For hobbies, I tend to be a little more demanding. For instance, I tend to rebuild the Android source tree every few months, so a beefy CPU comes in pretty handy.
Besides coding I do a fair amount of photo processing, a little video editing (mostly trimming phone clips and using Motion for fancier title animations), and the occasional 3D/graphics hack. I keep meaning to spend some quality time using Blender, but, again, my mini has trouble coping.
Whatever I end up using, however, I’m very picky about size and noise. I favor small, quiet, compact machines with plenty of standard ports, for two reasons:
- I gave up on all-in-one devices years ago because they tend to turn into expensive boat anchors and I like the freedom to pick my own displays.
- I use an IKEA RAMSÄTRA media shelf as a monitor stand, in which my mini and my Raspberry Pi cluster fit perfectly, along with external disk drives and other peripherals.
The Perfect Match
As it turns out, other, snazzier folk have blazed this trail before – I speak of none other than SnazzyLabs, who famously built a $682 Skylake Hackintosh that is quite close to the volume of a Mac mini with a set of components that made it an El Capitan “golden” build, i.e. one where hardware support is as good as it gets.
That build eschews a dedicated GPU in favor of a compact form factor that actually fits on my shelf/stand with just enough clearance for airflow and cabling – in fact, it even requires less room for cabling than my Mac mini because I can get rid of the DisplayPort to DVI dongle I use for my secondary monitor.
As a nice bonus, this configuration also makes for an excellent home server and media center (if you’re into that sort of thing), since it has an SPDIF optical audio port besides the dual HDMI connections. If I ever decide to stop using this as a workstation, I can re-purpose it and use whatever software I want, although its most likely role in the long term (assuming that Apple resurrects its desktop line and that I recant from my sins) is as a general-purpose Linux server.
Shopping Around
The SnazzyLabs guys have a parts list on their original post, but I made a few changes – I upgraded the CPU to an i7, picked a black case, added an extra fan (which they don’t list on their parts list but which you can see in their build pictures) and took advantage of the shipping costs to get myself a few extras I needed for the office.
Total cost? €913,36 including VAT (without shipping) for the machine itself.
The difference between that and the $682 from SnazzyLabs amount to differences in retail pricing, sales taxes and my choice of an i7, but the interesting point here is that this is around €200 cheaper than the current top-tier Mac mini, which clocks in at €1.133,92 with half the RAM and a 2.8 GHz, previous generation dual-core i5.
That mini is, extrapolating from CPU-only benchmarks, somewhere between 2-2.5x slower than my build, although any such figures should be taken with a large dollop of salt.
Besides the core build, I also spent roughly €130 extra on a USB 3.0 hub, a new webcam and a set of speakers instead of going for 32GB of RAM.
This is still cheaper than that Mac mini (which has a 1TB Fusion Drive), but I could add an extra HDD and still come out slightly ahead (I actually did, but the 500GB HDD I used was a spare from another machine and doesn’t really count).
My friends and colleagues kept pointing out that a larger case (and sticking to the stock CPU cooler) would be much cheaper, but I merrily ignored them and stuck to the SnazzyLabs shopping list.
I purchased most of the components on Amazon Germany except the CPU, RAM and SSD, which I got at PCDIGA because it was both faster and cheaper – but I compiled a full parts list at the bottom of the post, to make it easy for you to track down all the parts regardless of your geographical location.
My advice is for you to shop around, especially where it concerns the CPU. Just keep in mind that the fan and case thermals are best suited for 65W TDP chips.
The Wi-Fi card (which is necessary to replace the one that ships with the motherboard) was the only bit that was hard to track down. It took two extra weeks to arrive, so I spent them running Elementary OS, which supports all the hardware flawlessly out of the box – it was honestly quite hard to let go of that setup and install macOS instead.
Build Internals
So, again, the one significant change I did was getting an i7 CPU (a 3.4GHz one, rated at 65W TDP to match the original thermal profile).

Storage and RAM are both things I can upgrade down the line, so I went with a 250GB SSD, a 500GB HD (for full volume cloning, which is my first line approach to disaster recovery) and 16GB of RAM.
Those 16GB are the only thing I had second thoughts about, but the price point for 32GB DDR4 was a bit excessive and I was originally trying to keep the core build under €800. In the end, I decided to spend the difference on a few extras.
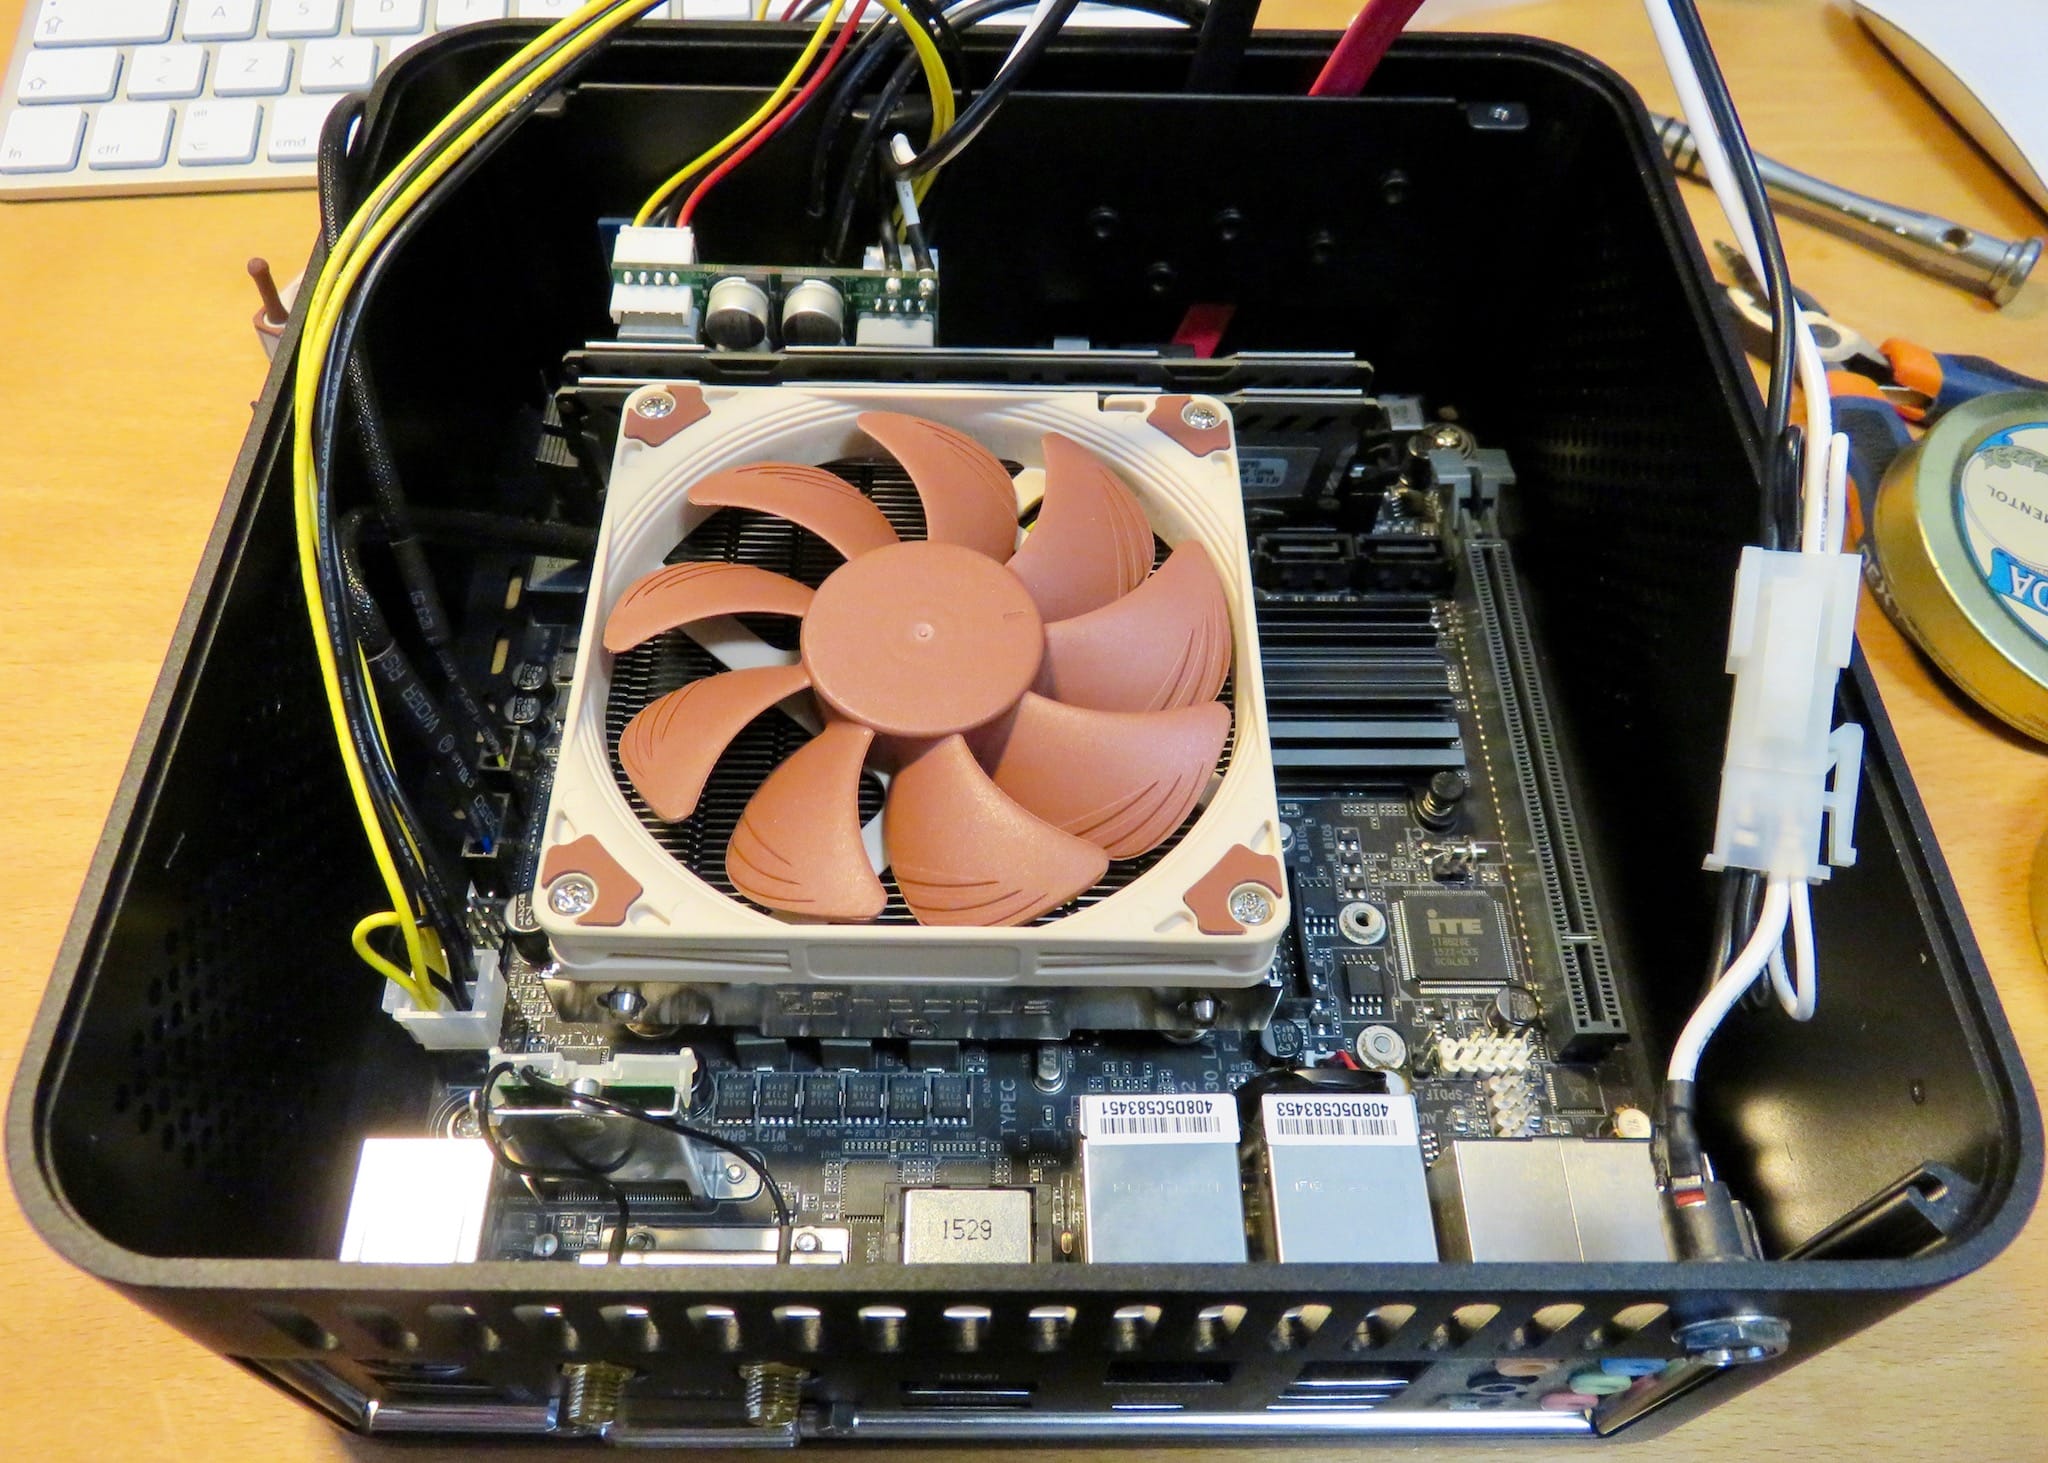
Another compromise was sticking to the Intel HD 530 integrated graphics to fit into the smaller case. That seems to be OK in principle, since the 530 is roughly three times as fast as the GeForce 320M on my ancient Mac mini and can theoretically run dual 4K monitors (once I sort out a few things).
Like the folk at Snazzylabs point out in their video, this build isn’t going to earn any awards for pretty insides:
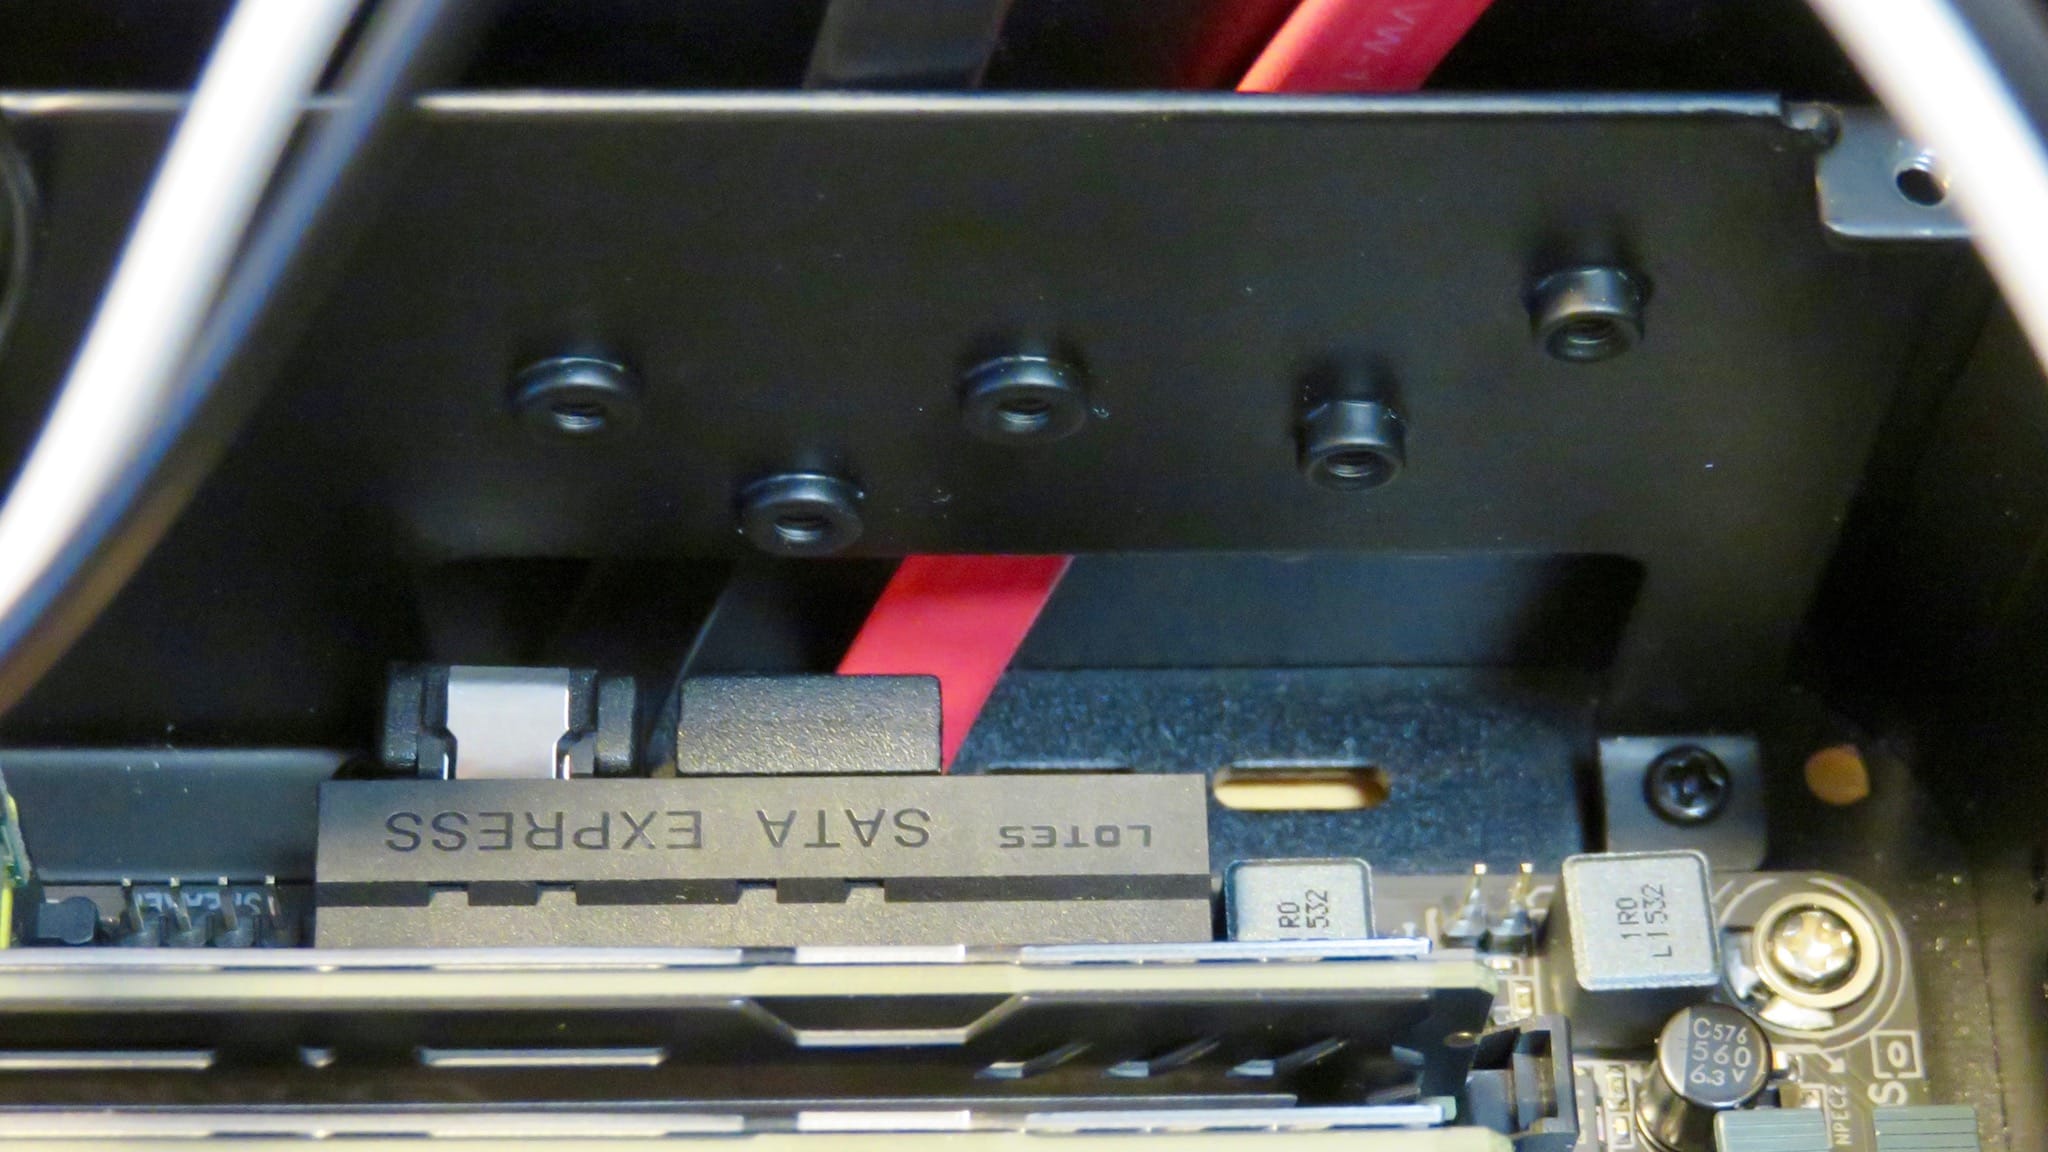
I had to resort to running the SATA cables between the front of the case and the front panel strut, and sorting out the rest of the cabling required me to unscrew the motherboard a half dozen times and re-run everything until it was to my liking. With a little skill, you don’t have to remove the support, and the cables have enough clearance to be plugged in before you slide in the motherboard.
Another thing I had to do was to get a Y-splitter for powering the drives, which are mounted horizontally on a plate that faces down onto the CPU fan:
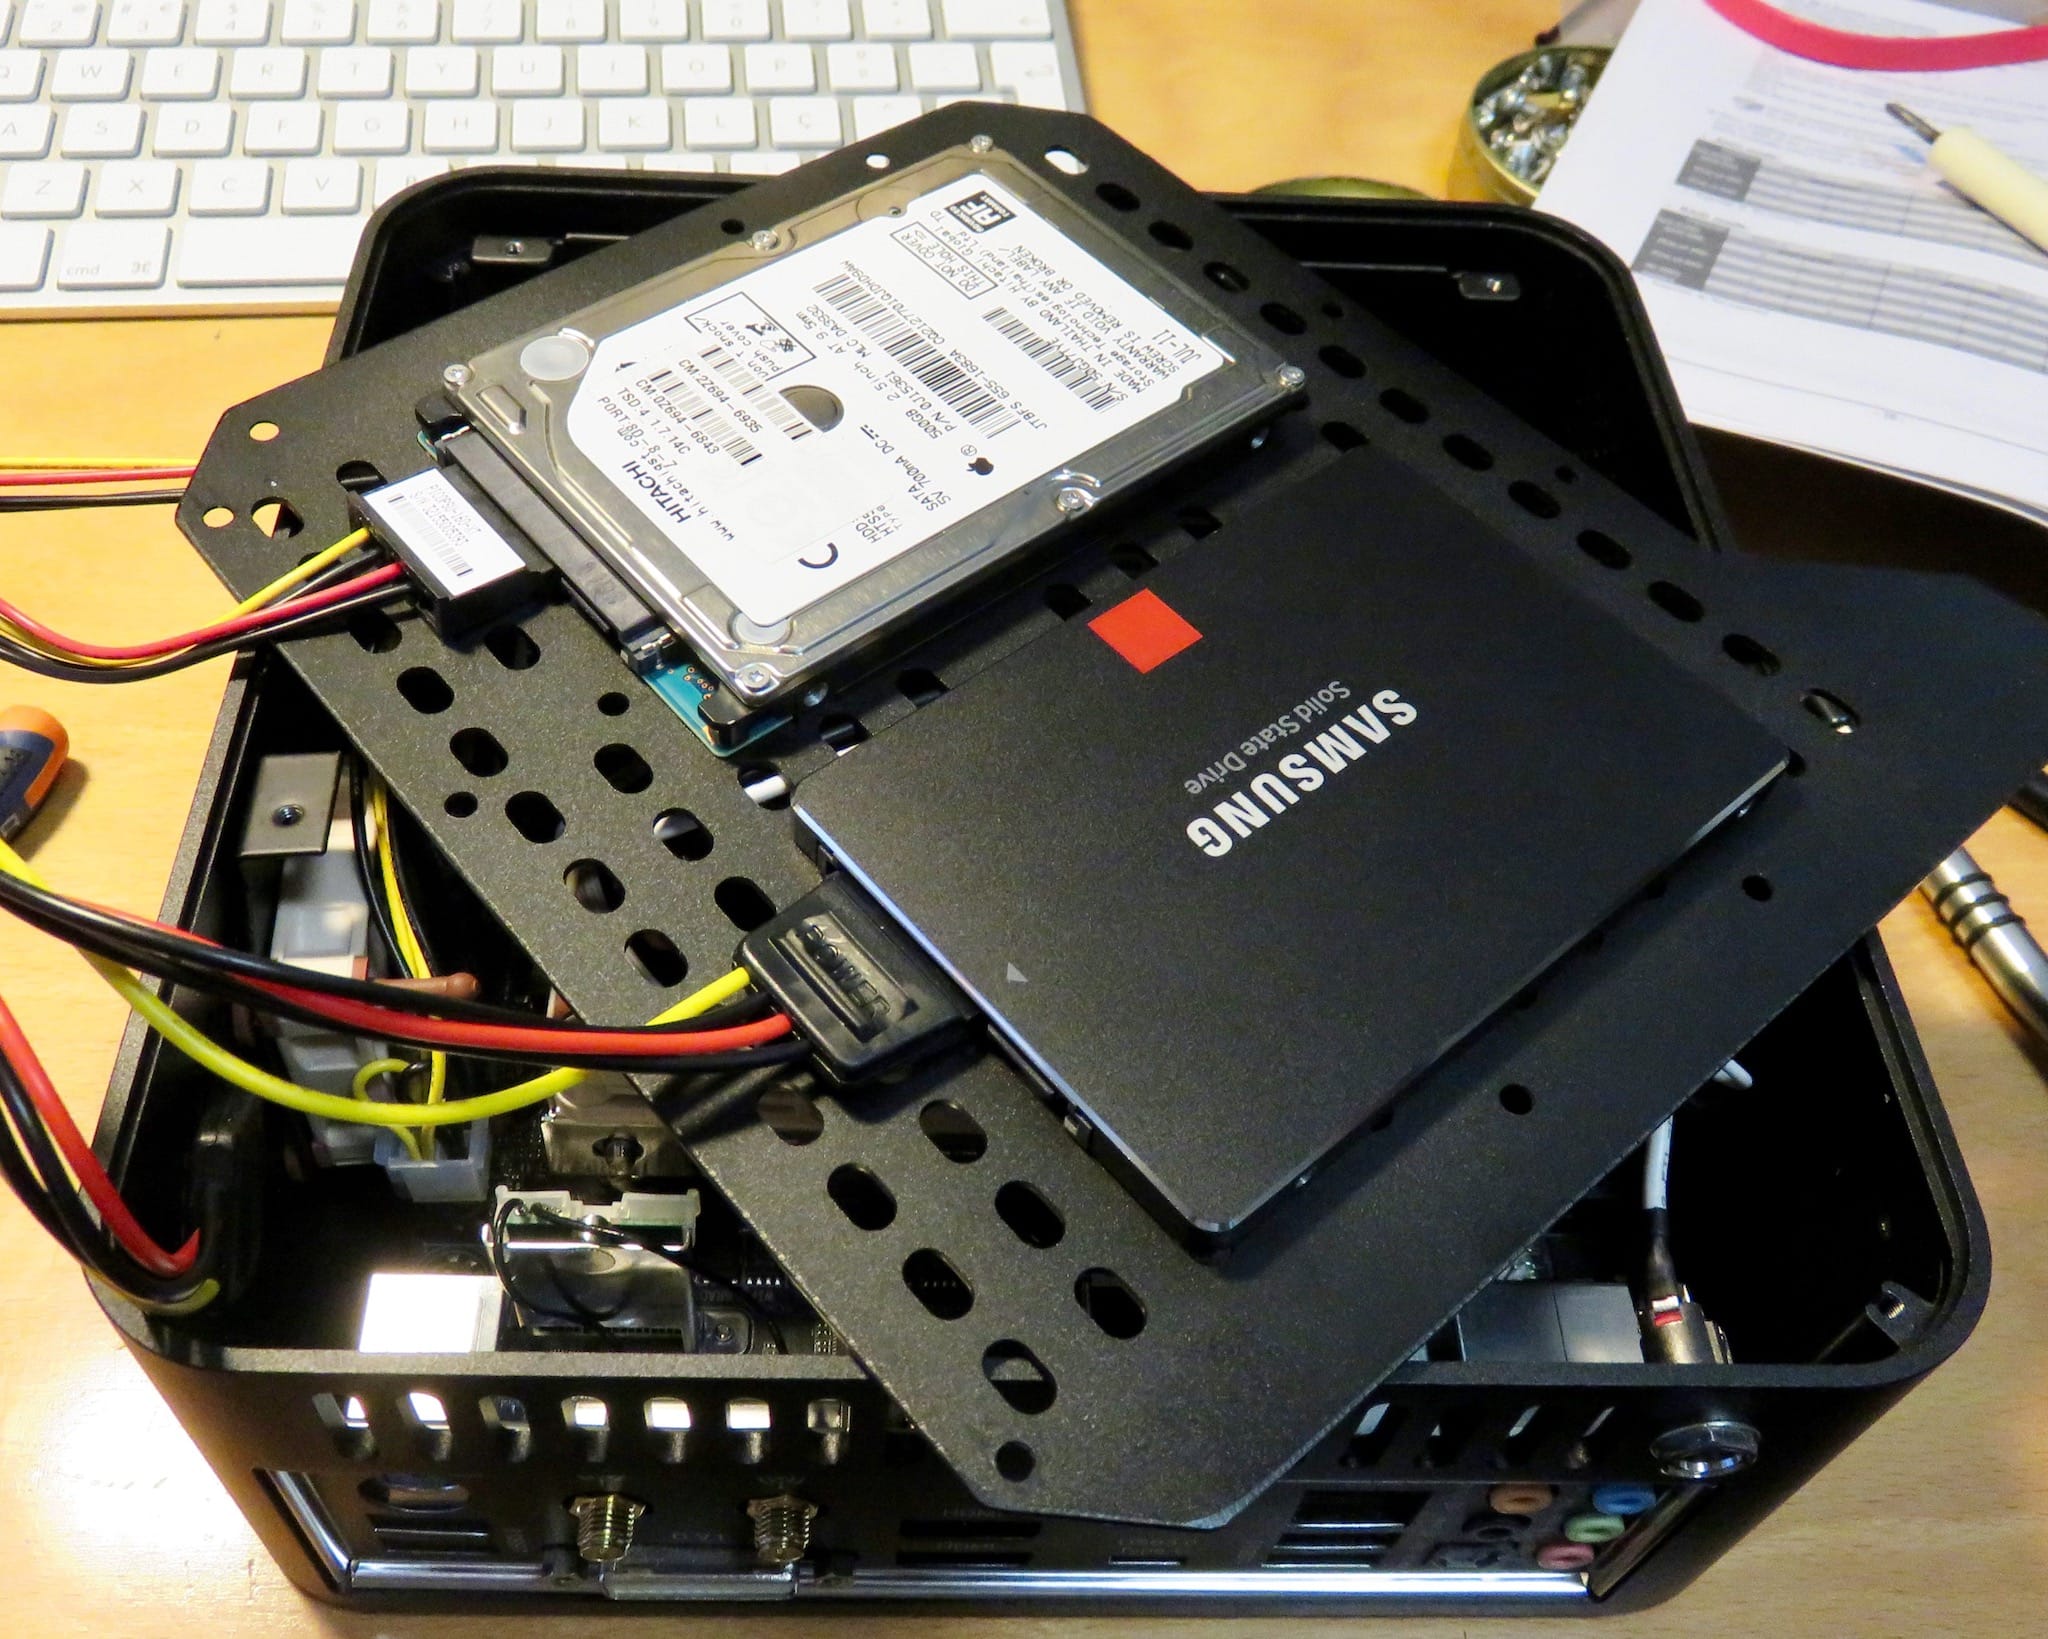
The end result is manageable, although I had to add a couple of cable ties. Again, not pretty, but then again I don’t intend to open this up anytime soon.
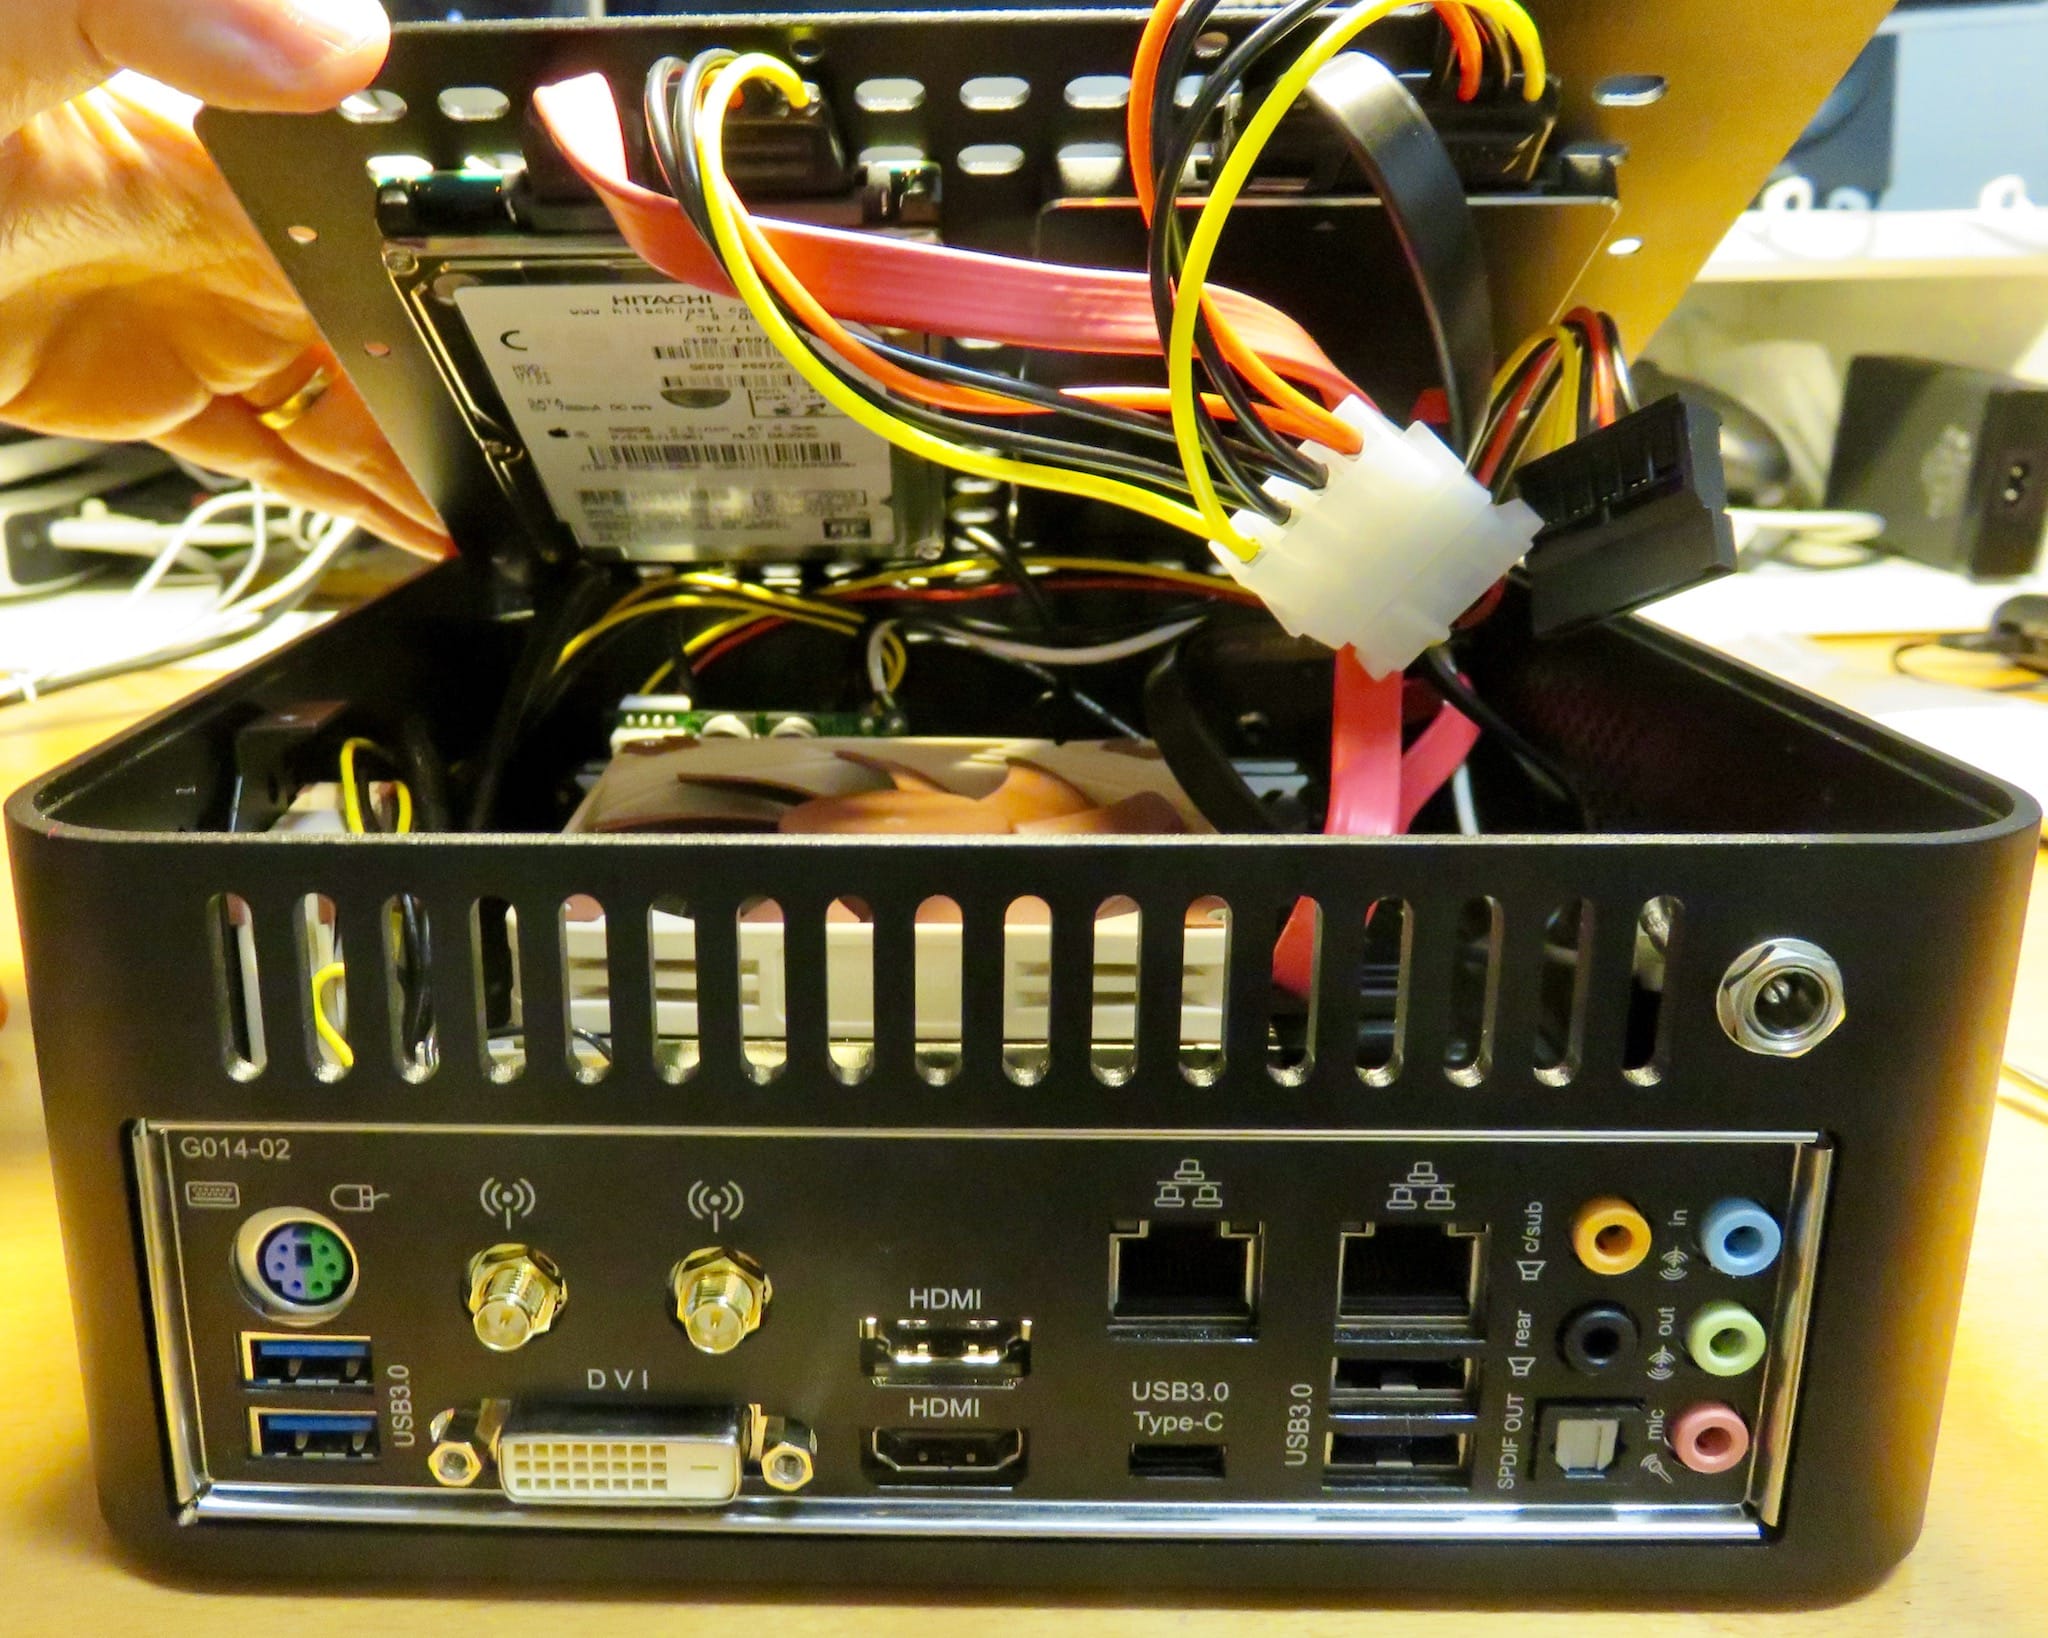
A nice thing about the motherboard is that it has a USB-C port (no Thunderbolt 3, alas) as well as 4 type A USB 3 ports and three independent video ports. It’s not completely future-proof, but it’s hip enough for my current needs.
On the outside, though, I can’t complain, and it feels a lot like the NeXT Cube – a cool, solid hunk of metal with a slight texture to it.
Installing macOS
Given the current state of the art, getting the machine to work was no trouble at all. However, things have moved on since Snazzylabs did their build – this hardware might have been a golden build under El Capitan, but under Sierra I have four things to cope with:
- No FileVault
- Sleep causes the internal LCA 1150 audio to fail
- The machine does not wake up from “deep” sleep
- No dual display support at boot
The first was about expected, and, technically FileVault does work – it’s just that when I boot to the login screen I have no working input devices, and hence can’t type my password.
This is fixable, but likely to require both a fair bit of tinkering and some compromises regarding Bluetooth peripherals, so I’m going to leave it for last – I intend to keep using my Bluetooth keyboard, mouse and trackpad, and although all my Macs have run FileVault, I am (reluctantly) willing to forego it on a desktop.
Loss of audio is not an insurmountable problem for me since I’ve been using an USB audio dongle with my Mac mini for a while (because the audio jacks are hard to reach given the way I have to run the cabling for it). I intend to get the internal audio fixed (and it is a known, well documented issue), but I’ve been focusing on the last two problems, which seem to be interconnected.
I can sort of wake the machine by hitting a key or using the trackpad (Bluetooth keeps working in that regard), but I get no display output. My current working theory is that the Sierra HD 530 driver seems to have trouble believing it actually has more than one display and fails to correctly initialize the output ports, and that those conditions are similar to booting except that the bootloader has already gotten one output going.
I eventually got things stable to a point where I can get dual displays going by plugging in the second display soon after boot, but this is obviously not an ideal solution.
Otherwise things are working smoothly (I even upgraded to 10.12.2 the other day). I haven’t tested iMessage and other aspects that rely on futzing with the hardware system definitions and serial numbers, but the EFI patches I applied are reported to do the trick, so I’m not worried.
Either way I now have a nice, rewarding puzzle to tide me over during holiday break, and I can always fire up Elementary and witness the power of a fully armed and operational UNIX workstation (if you’ll pardon the pun) that can confidently go up against pretty much any modern desktop Mac – if there was such a thing right now.
Shopping List
The following are affiliate links. I added both UK and DE for European customers because prices (with shipping) for me tend to have enough variation that I end up buying stuff from both stores throughout the year.
Amazon US:
- Motherboard: Gigabyte H170N-WIFI Socket 1151
- CPU: Intel Core i7-6700 3.4GHz 65W TDP (I initially looked at the 4.0GHz one, but that would be 91W TDP and would mess up the thermals)
- RAM: Crucial 2x8GB DDR4 2400
- SSD: Samsung 256GB 850 Pro
- CPU Fan: Noctua NH-L9i (well worth the price, extremely quiet)
- Case: Streacom ST-F1CB WS Black Aluminum Case (I prefer black, and the unused IR sensor slot is less noticeable)
- Case Fan: Noctua NF-A4x10 40mm (this wasn’t on the SnazzyLabs parts list, but I got it just to be on the safe side)
- Internal PicoPSU: 160W 12V DC/DC ATX PicoPSU
- External PSU: 120W 12V 10A (ugly as sin and huge, but that’s life in the PC world)
- Wi-Fi/Bluetooth: Broadcom BCM94352z DW1560 NGFF
I also got a few extras as add-on items::
- Extra SATA power cable: Molex to 2xSATA 15pin (for the secondary internal drive)
- External Hub: Anker Ultra Slim 4-Port USB 3 Hub (because I needed more than 4 USB A ports, and this makes it easier to get to them)
- USB Flash Drive: Toshiba 16GB USB Flash Drive (I have dozens of large SD cards, but oddly enough no large pendrives)
…and a few other things to upgrade my existing setup:
- Logitech Z333 Speakers (I have no speakers on any of my monitors)
- Logitech USB HD Pro C920 Webcam (I spend a lot of time on Skype for Business)
Amazon UK:
- Motherboard: Gigabyte H170N-WIFI Socket 1151
- CPU: Intel Core i7-6700 3.4GHz 65W TDP
- RAM: Crucial 2x8GB DDR4 2400
- SSD: Samsung 256GB 850 Pro
- CPU Fan: Noctua NH-L9i
- Case: Streacom ST-F1CB WS Black Aluminum Case
- Case Fan: Noctua NF-A4x10 40mm
- Internal PicoPSU: 160W 12V DC/DC ATX PicoPSU
- External PSU: Leicke 120W 12V 10A
- Wi-Fi/Bluetooth: Broadcom BCM94352z DW1560 NGFF
Extras:
- Extra SATA power cable: Molex to 2xSATA 15pin
- External Hub: Anker Ultra Slim 4-Port USB 3 Hub
- USB Flash Drive: Toshiba 16GB USB Flash Drive
- Speakers: Logitech Z333
- Webcam: Logitech USB HD Pro C920
Amazon DE:
- Motherboard: Gigabyte H170N-WIFI Socket 1151
- CPU: Intel Core i7-6700 3.4GHz 65W TDP
- RAM: Crucial 2x8GB DDR4 2400
- SSD: Samsung 256GB 850 Pro
- CPU Fan: Noctua NH-L9i
- Case: Streacom ST-F1CB WS Black Aluminum Case
- Case Fan: Noctua NF-A4x10 40mm
- Internal PicoPSU: 160W 12V DC/DC ATX PicoPSU
- External PSU: Leicke 120W 12V 10A
- Wi-Fi/Bluetooth: Broadcom BCM94352z DW1560 NGFF
Extras:
- Extra SATA power cable: Molex to 2xSATA 15pin
- External Hub: Anker Ultra Slim 4-Port USB 3 Hub
- USB Flash Drive: Toshiba 16GB USB Flash Drive
- Speakers: Logitech Z333
- Webcam: Logitech USB HD Pro C920