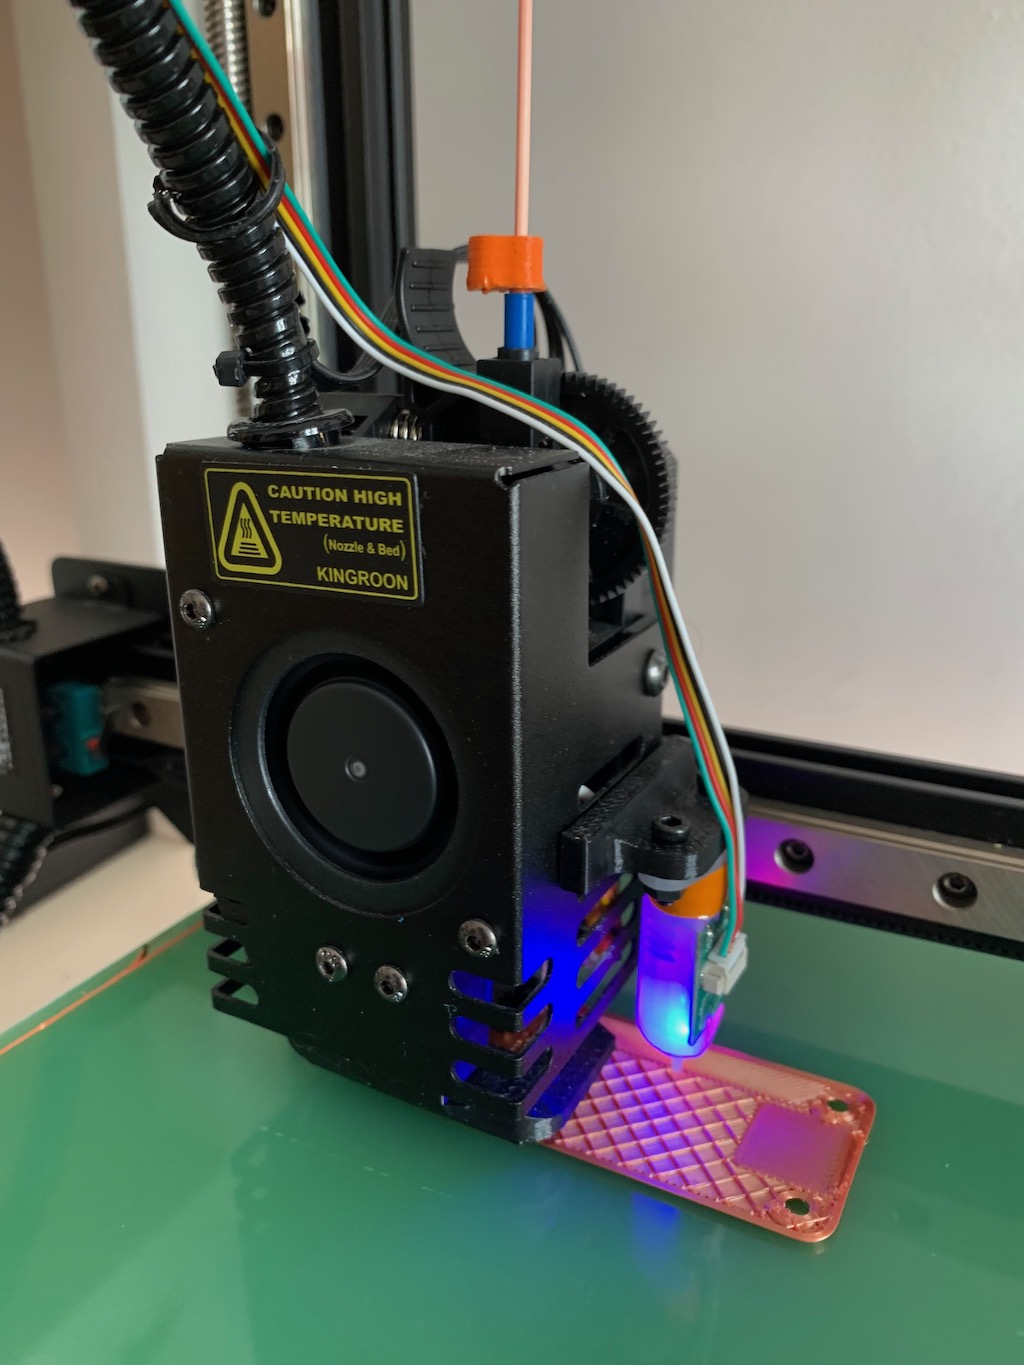
It’s been nearly a year since I ordered the KP3S Pro, and a slight twinge of shame finally got me to pull the trigger, upgrade it to Klipper and install the probe that I ordered with it over Summer break.
Wiring the 3D Touch to the KP3S was trivial, since the board has a dedicated connector for it. Kingroon’s site has adequate shots of the connectors, too, so the longest part of the process was running the wiring through the existing loom. I had already done that a month or so in advance, including printing and fitting a probe mount and improved blower (I have the models linked in my KP3S resources page).

The printer itself has no hardware mods of note, and my previous post covers everything–in short, when I got it I ordered a full metal heat break and got third-party Chinese CHT clone nozzles for increased flow, so most of what I did during Summer was upgrading the firmware and tuning the entire thing.
Setting Up Klipper
Since my board has an STM32F103, I had to build Klipper as if it was targeting a vanilla Robin Nano board:
make menuconfig

[*] Enable extra low-level configuration options
    Micro-controller Architecture (STMicroelectronics STM32)  --->
    Processor model (STM32F103)  --->
[ ] Only 10KiB of RAM (for rare stm32f103x6 variant) (NEW)
[ ] Disable SWD at startup (for GigaDevice stm32f103 clones)
    Bootloader offset (28KiB bootloader)  --->
    Clock Reference (8 MHz crystal)  --->
    Communication interface (Serial (on USART3 PB11/PB10))  --->
(250000) Baud rate for serial port
(!PC6, !PD13) GPIO pins to set at micro-controller startup

make
./scripts/update_mks_robin.py ./out/klipper.bin ./out/Robin_nano.bin
I then dropped the .bin in an SD Card to upgrade the printer itself, and I was set–this is the only real difference from the Prusa as far as upgrades go.
KlipperScreen
Since Klipper does not support the built-in LCD, I have to use KlipperScreen. That’s no problem since thanks to all my years of tinkering I have enough Raspberry Pi 3Bs to spare, so I run each printer individually off a tidy little case that uses these LCD display drivers (my model uses the MHS35 variant).
I had already gotten them earlier in the year and they are cheap and effective, but be warned that the touchscreens aren’t anything to write home about, and there is also no support for turning off the backlight (I tried fiddling with the drivers, but the hardware doesn’t seem to support it at all).

Configuration and Tuning
Regarding the configuration itself, all I needed to do to get started was grab a reference file off the Internet and tweak some things. Three of them are worth noting here:
- Reversed one of the steppers (there is some variance in models, and Kingroon keeps making changes to their lineup and components every couple of months, so that was predictable).
- Tuned the extruder steps/mm (twice, since I got it subtly wrong the first time and it was messing up my flow rate tweaks).
- Upped
max_acceland tweaked the Z stepper rotation.
The 3D Touch probe just worked, which was great (although of course I had to tweak offsets, etc.). Given that I use 200x200x4mm fiberglass sheets (aka garolite) for the bed and they tend to be very flat the probe doesn’t have a lot of work to do, but it’s still useful to account for the minor gradient that is implicit in the cantilever arrangement.
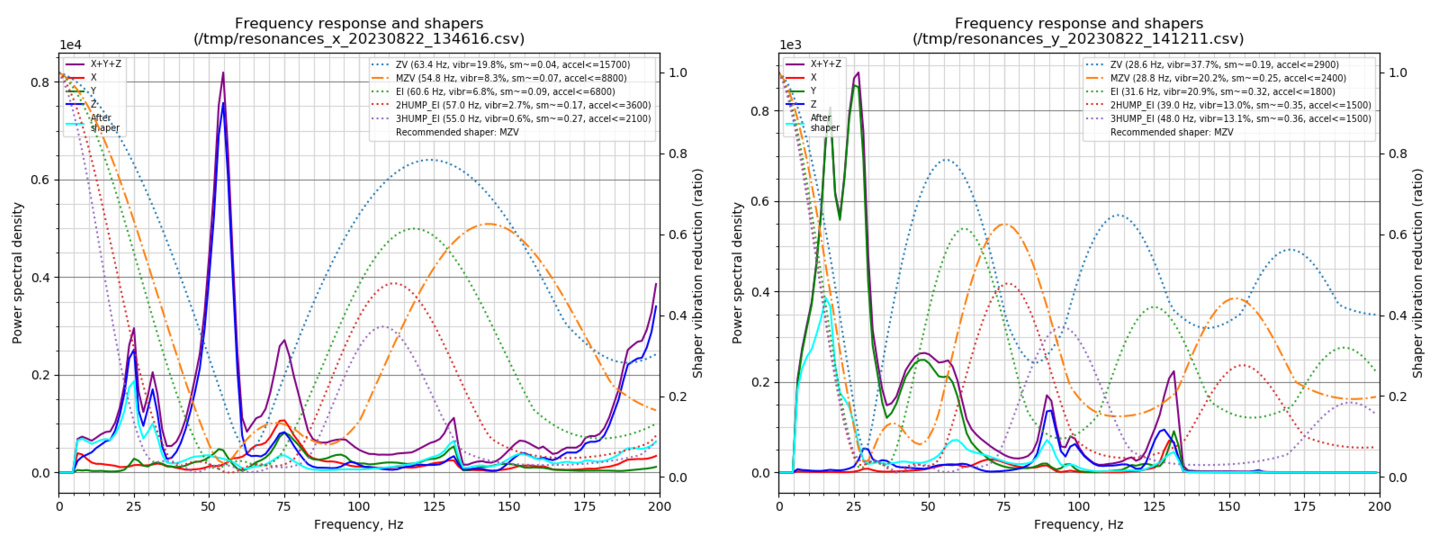
Other than that, tuning the printer followed the usual process–the Klipper documentation is still your best guide here, and after geometry, extruder and probe calibration I had the occasion to use the USB accelerometer I built with a TINY2040 back in April:

The files for the case and cover are up on Github, if you’re interested.
And just for the record, these were the input shaping calibration results:

Another thing I tried was reproducing the dynamic mesh auto-leveling setup I have been using on my Prusa, but it seemed to mess with starting offsets, so my fiberglass bed now sports a couple of battle scars.
Slicer and Filament Improvements
Serendipitously, OrcaSlicer 1.6.4 came out while I was doing this, so I started using its calibration tools as well. That turned out to be a mixed bag of sorts, since despite attempting to match settings with SuperSlicer I only got more aggressive, faster (but lower quality) prints out of it. For some reason, even normal supports came out weird.
Some good came of it, though. As I refined and compared my SuperSlicer settings I noticed, among other things, that I was not using the new Arachne slicing engine, and that some of my filament was not properly calibrated (I had to tweak the flow rate, since I had some old settings in there to compensate for the Prusa extruder) – plus some of my filament is just plain old.
To counteract the latter, I got a Sovol dual spool dryer on promo, which is doing wonders for my PETG prints even though I keep all my filament in airtight enclosures with car grade dessicant bags.
Once I fixed all these niggles, print quality went up quite substantially, and since all I’m missing in SuperSlicer right now are tree supports, I am likely to stick with it even though there’s been a marked lack of updates (or even any recent development).
Conclusion
Given the explosive evolution of the 3D printer market over the past year, I’m still happy I got the KP3S even though the amount of features and functionality you can get at a slightly higher price point is pretty insane right now.
I’ve found this to be a solid machine from a build perspective, and even though Kingroon keeps launching new and improved models so fast that (like me) you’re likely to buy something that is nearly obsolete by the time it arrives, I think it was good value for money considering the hardware, and, for me, being able to upgrade it to Klipper and have full control of the firmware and features is a huge plus that will extend its lifespan (perhaps as much as my Prusa).
The only mechanical issue I’ve had so far with the printer (and only running Klipper) is that the Y axis seems prone to skipping, as I had a couple of layer shifts during some speed testing. But tightening the Y axis belt and tweaking the acceleration limit seems to have fixed it.
I’m very happy with the results of this upgrade speed-wise, since I can now print functional parts (typically 0.28mm layer height) very reliably at speeds up to 250mm/s, whereas my aging Prusa can only get up to half that.
And I am getting very nice quality at 75% and 50% speeds (at least with PETG and matte PLA - silk PLA is still a major nuisance).
Next Steps
Besides the minor chore of setting up new Klipper-flavored printing profiles, I’m still sorting out a few quality of life improvements (like macros for filament swap and purge), but otherwise I think the printer is in a good place.
In the long term, I am still interested in getting a CoreXY machine. And the recent announcement that Creality is finally allowing root access on their K1 series is very interesting considering both the overall popularity (and lifespan) of their machines and the fact I now have a little more room.
I’d love to get my hands on one, but I can’t justify the expense right now–so the next printer project (which I hope won’t take an entire year) is replacing the extruder on my Prusa, for which I’ve already started designing the parts required.
Until then, there is a lot more stuff to do (and eventually write about).