 Rui Carmo
It’s been a long while since I last wrote about a piece of music gear (and there are quite a few I got in the intervening years that I have been meaning to write about), but I recently got my hands on the ESI Xsynth and despite only having spent a few weeks with it, I thought I’d write a quick review.
Disclaimer: ESI sent me a review sample of the Xsynth free of charge (for which I thank them), and as usual this article follows [my review policy][eview policy].
Hardware
The product page has a list of detailed specifications, but there are five things worth highlighting and that I found particularly interesting:
- Two octave (25 key) keyboard with polyphonic aftertouch
- 3-oscillator polyphonic (10-voice) synth that has a modulation matrix and several effects that can be applied to both the synth engine and aux input
- A built-in audio interface that can record the synth engine and aux in directly to a Mac (or iPad) via USB-C
- MIDI in and out ports interfaces with 3.5mm TRS jacks (so it can also act as a MIDI interface for other devices)
- Built-in arpeggiator, glide, and hold functions, as well as minimalist pressure-sensitive modulation and pitchbend controls
All of it in a surprisingly compact and portable package that only needs a USB-C connection to work. No battery, but the power draw is low enough that you can use it directly with an iPad without needing anything but a cable.
The device feels solidly built, with a mix of stylized metal and plastic that looks and feels nice–at 387mm x 148mm x 27mm with slightly over half a kilo (634g) in weight, it certainly feels solid enough to take on the road, and given that the encoders are fairly compact and don’t protrude much, I would have no qualms about tossing it into a backpack or laptop bag.
Keyboard
The keyboard was a bit of a surprise for me, since for some reason I was expecting mini keys–instead, what you get is a two-octave set that matches the general dimensions of a normal keyboard (which is great if you have trouble switching between mini keys and regular keyboards), although the mechanism and feel is rather different.
I especially like that unlike my Korg NanoKey Studio, both the black and white keys are long enough to interleave and allow you to place your fingers in exactly the same way you’d do it on a regular keybed.
A key aspect is that pressing on the keys anywhere results in a nearly uniform response (velocity and aftertouch-wise). You can tap a key at any corner and it will go down uniformly, which is quite a unique feel, and the evenness of that response makes the the Xsynth feel a lot more usable (and expressive) than the NanoKey Studio or an Akai MPK Mini.
On that topic, the polyphonic aftertouch is a bit of a mixed bag depending on whether you’re used to a piano keyboard or a synth keyboard, since given the keyboard has a very short travel distance, the aftertouch response varies a lot depending on how much pressure you’re used to applying.
Despite having a “real” piano I spend a lot of time on synth keys, so even though I had no trouble with the default velocity curve, aftertouch required some tweaking to work for me to use it effectively–so I recommend using the companion desktop app to tweak things to your liking.
Also, there are no modulation or pitch wheels, just two buttons that are rather short and somewhat unresponsive for my liking. They do work, but I found them somewhat fiddly to use (and, more annoyingly, easy to hit by mistake since, again, I found the orange backlights hard to read).
I spent a while trying out the Xsynth on its own and quickly figured out that I had to use the modulation matrix to send aftertouch values to an oscillator or filter (which not all the built-in presets do), so expect some finagling before you get a result you’re comfortable with.
Both velocity and aftertouch work via MIDI, even though (at least in my case) I have more software with MPE support than “just” aftertouch. In any case, Logic Pro’s Alchemy synth had no trouble with Xsynth input, although, again, a consistent feel was a bit elusive given the limited key travel.
But I can’t think of anything equivalent in this size that has polyphonic aftertouch and all the other features, so I am not complaining too much.
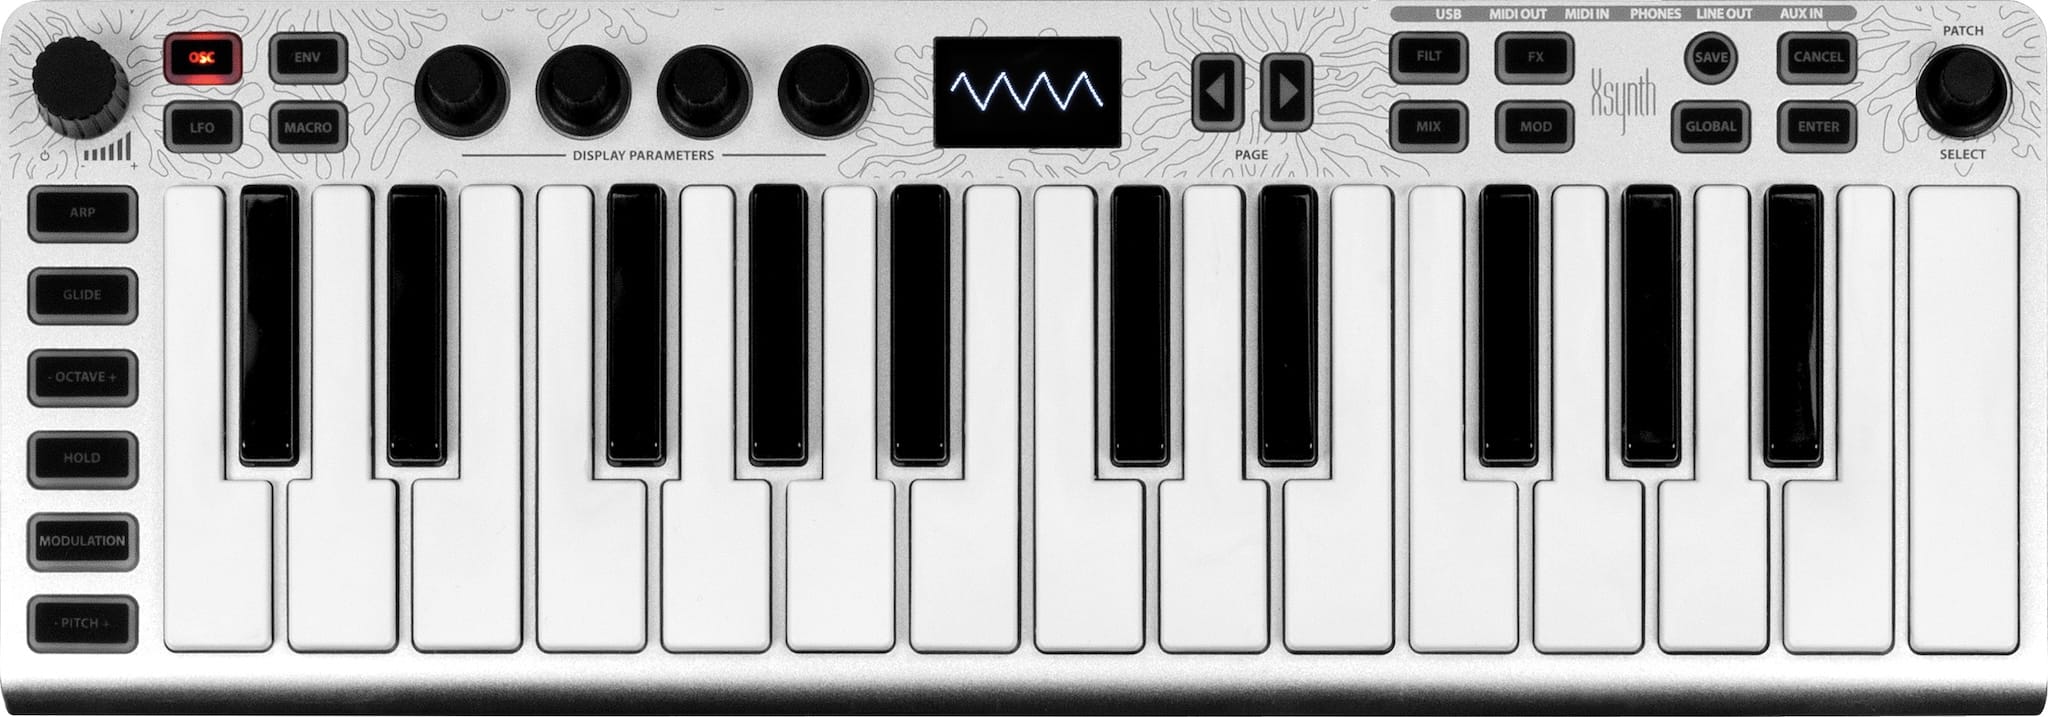
Screen and UI
One of the first things that you’ll notice when you turn on the Xsynth is the built-in OLED screen, which is used to show the current patch, parameters, and other information. It is a fairly small screen, but it is bright and clear enough to be readable in most lighting conditions–much more so, ironically, than the orange backlit buttons, which are a bit dimmer than I would have liked and can be hard to read even in completely dark conditions.
The default setting is to render the current waveform, which for me isn’t overly useful–so I disabled that as soon as I could to be able to always see patch names and parameters:
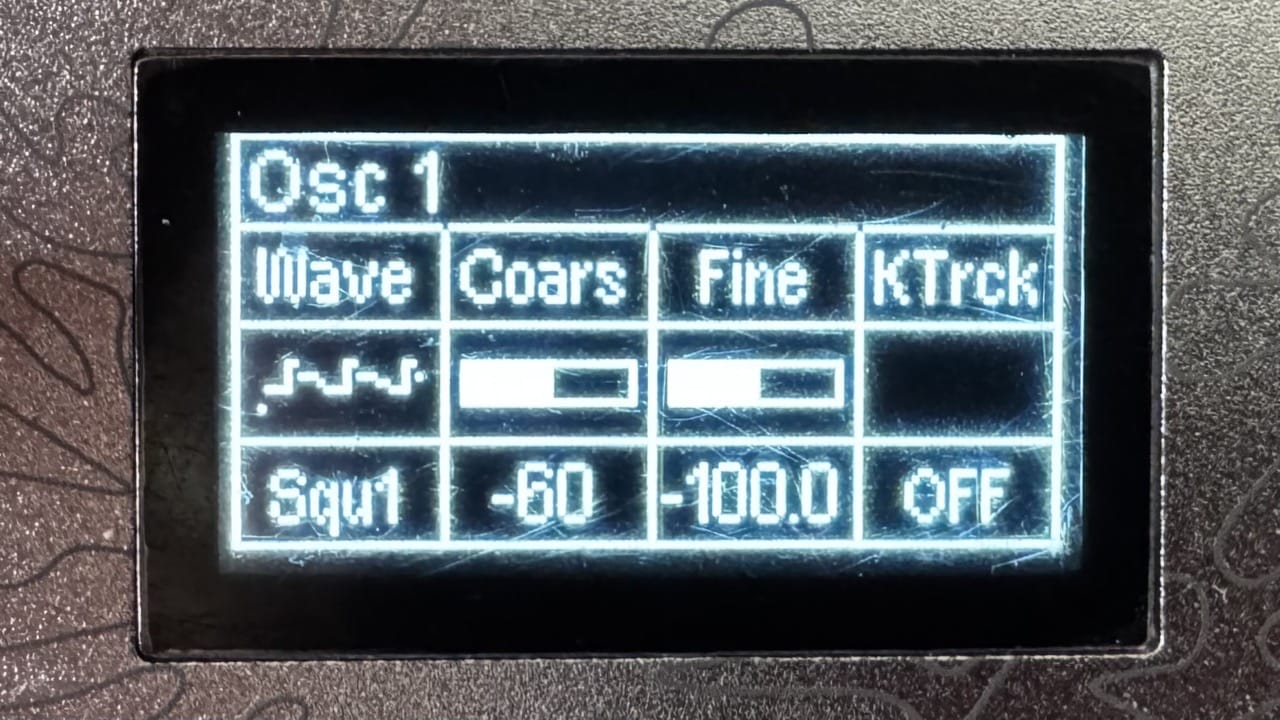
In general, the UI is really straightforward–each of the four left encoders corresponds to a parameter, and you can switch between pages of parameters by hitting the left and right buttons. The far right encoder is used to navigate through patches, and the enter button is used to confirm changes, except in a particular case that gave me a bit of trouble:
You can hit the “Global” to init a patch, and it is far too easy to hit Enter by mistake and completely wipe out the current patch, simply because the “Cancel” button is immediately on top of the “Enter” button and (again) the buttons are a bit dimmer than I would have liked:
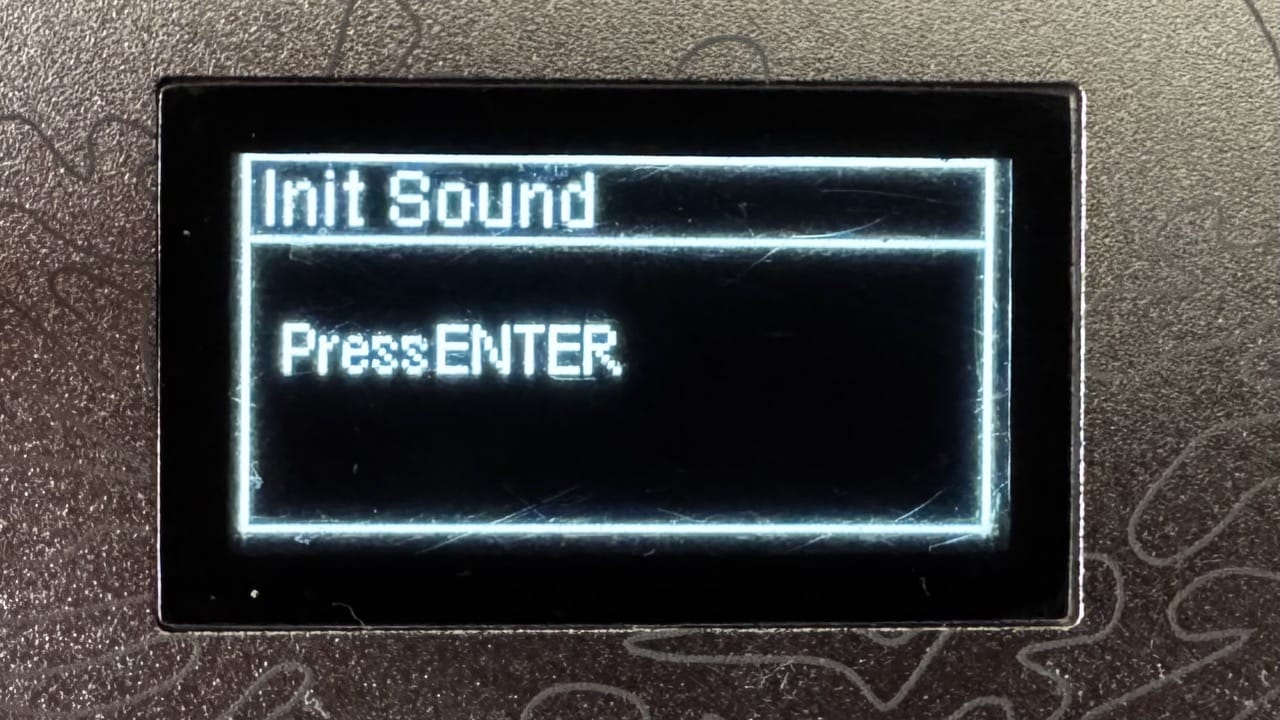
So I ended up wiping out a few factory patches before I got used to this quirk. Strangely enough, saving edits to a patch required me to hit the “Enter” button in some circumstances, which is a bit counterintuitive (I kept hitting it once and then wondering why it didn’t save).
I would have preferred a “hold down X for 2 seconds to confirm” type of confirmation for both resetting or saving patches, or at least a “hold down X + Y to confirm” approach for more destructive actions.
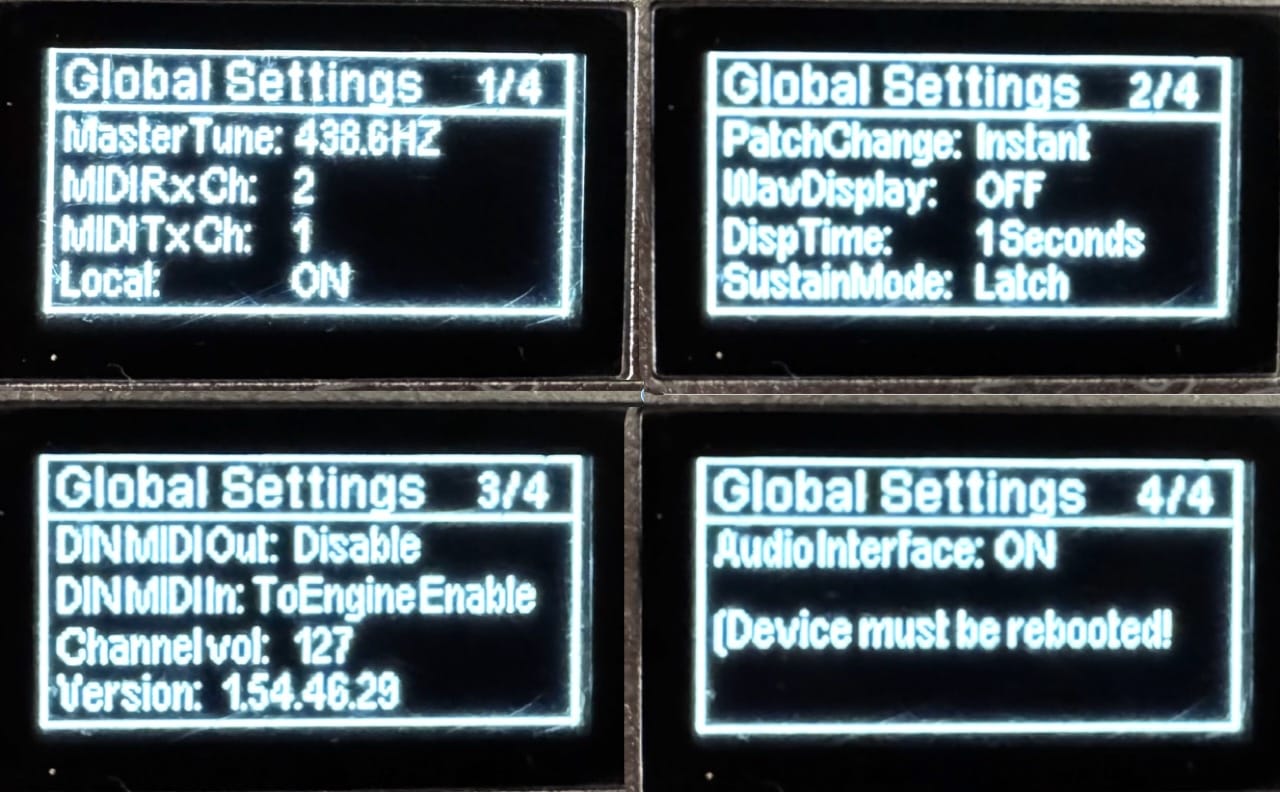
But going back to the Global menu, that’s where you can set up MIDI channels and other parameters, including having local audio on or off, which is useful if you want to use the Xsynth as a MIDI controller only:
Synth Engine and Patches
You get four banks (A-D) of 128 patches, the first two of which have factory presets of various types (bass, lead, pad, etc.). I typically skip over effects and bass patches (it’s just a personal preference), but a few of the leads and pads were quite nice, and I ended up using those as starting points for my own parameter tweaking.
A nice touch is that you can browse through patches using a category mode, which lets you quickly skim through all pads or leads, etc. This is a lot more useful than the usual “scroll through all patches” approach, and it makes it easier to find something that fits your needs.
But there is a surprising amount of flexibility in the synth engine itself:
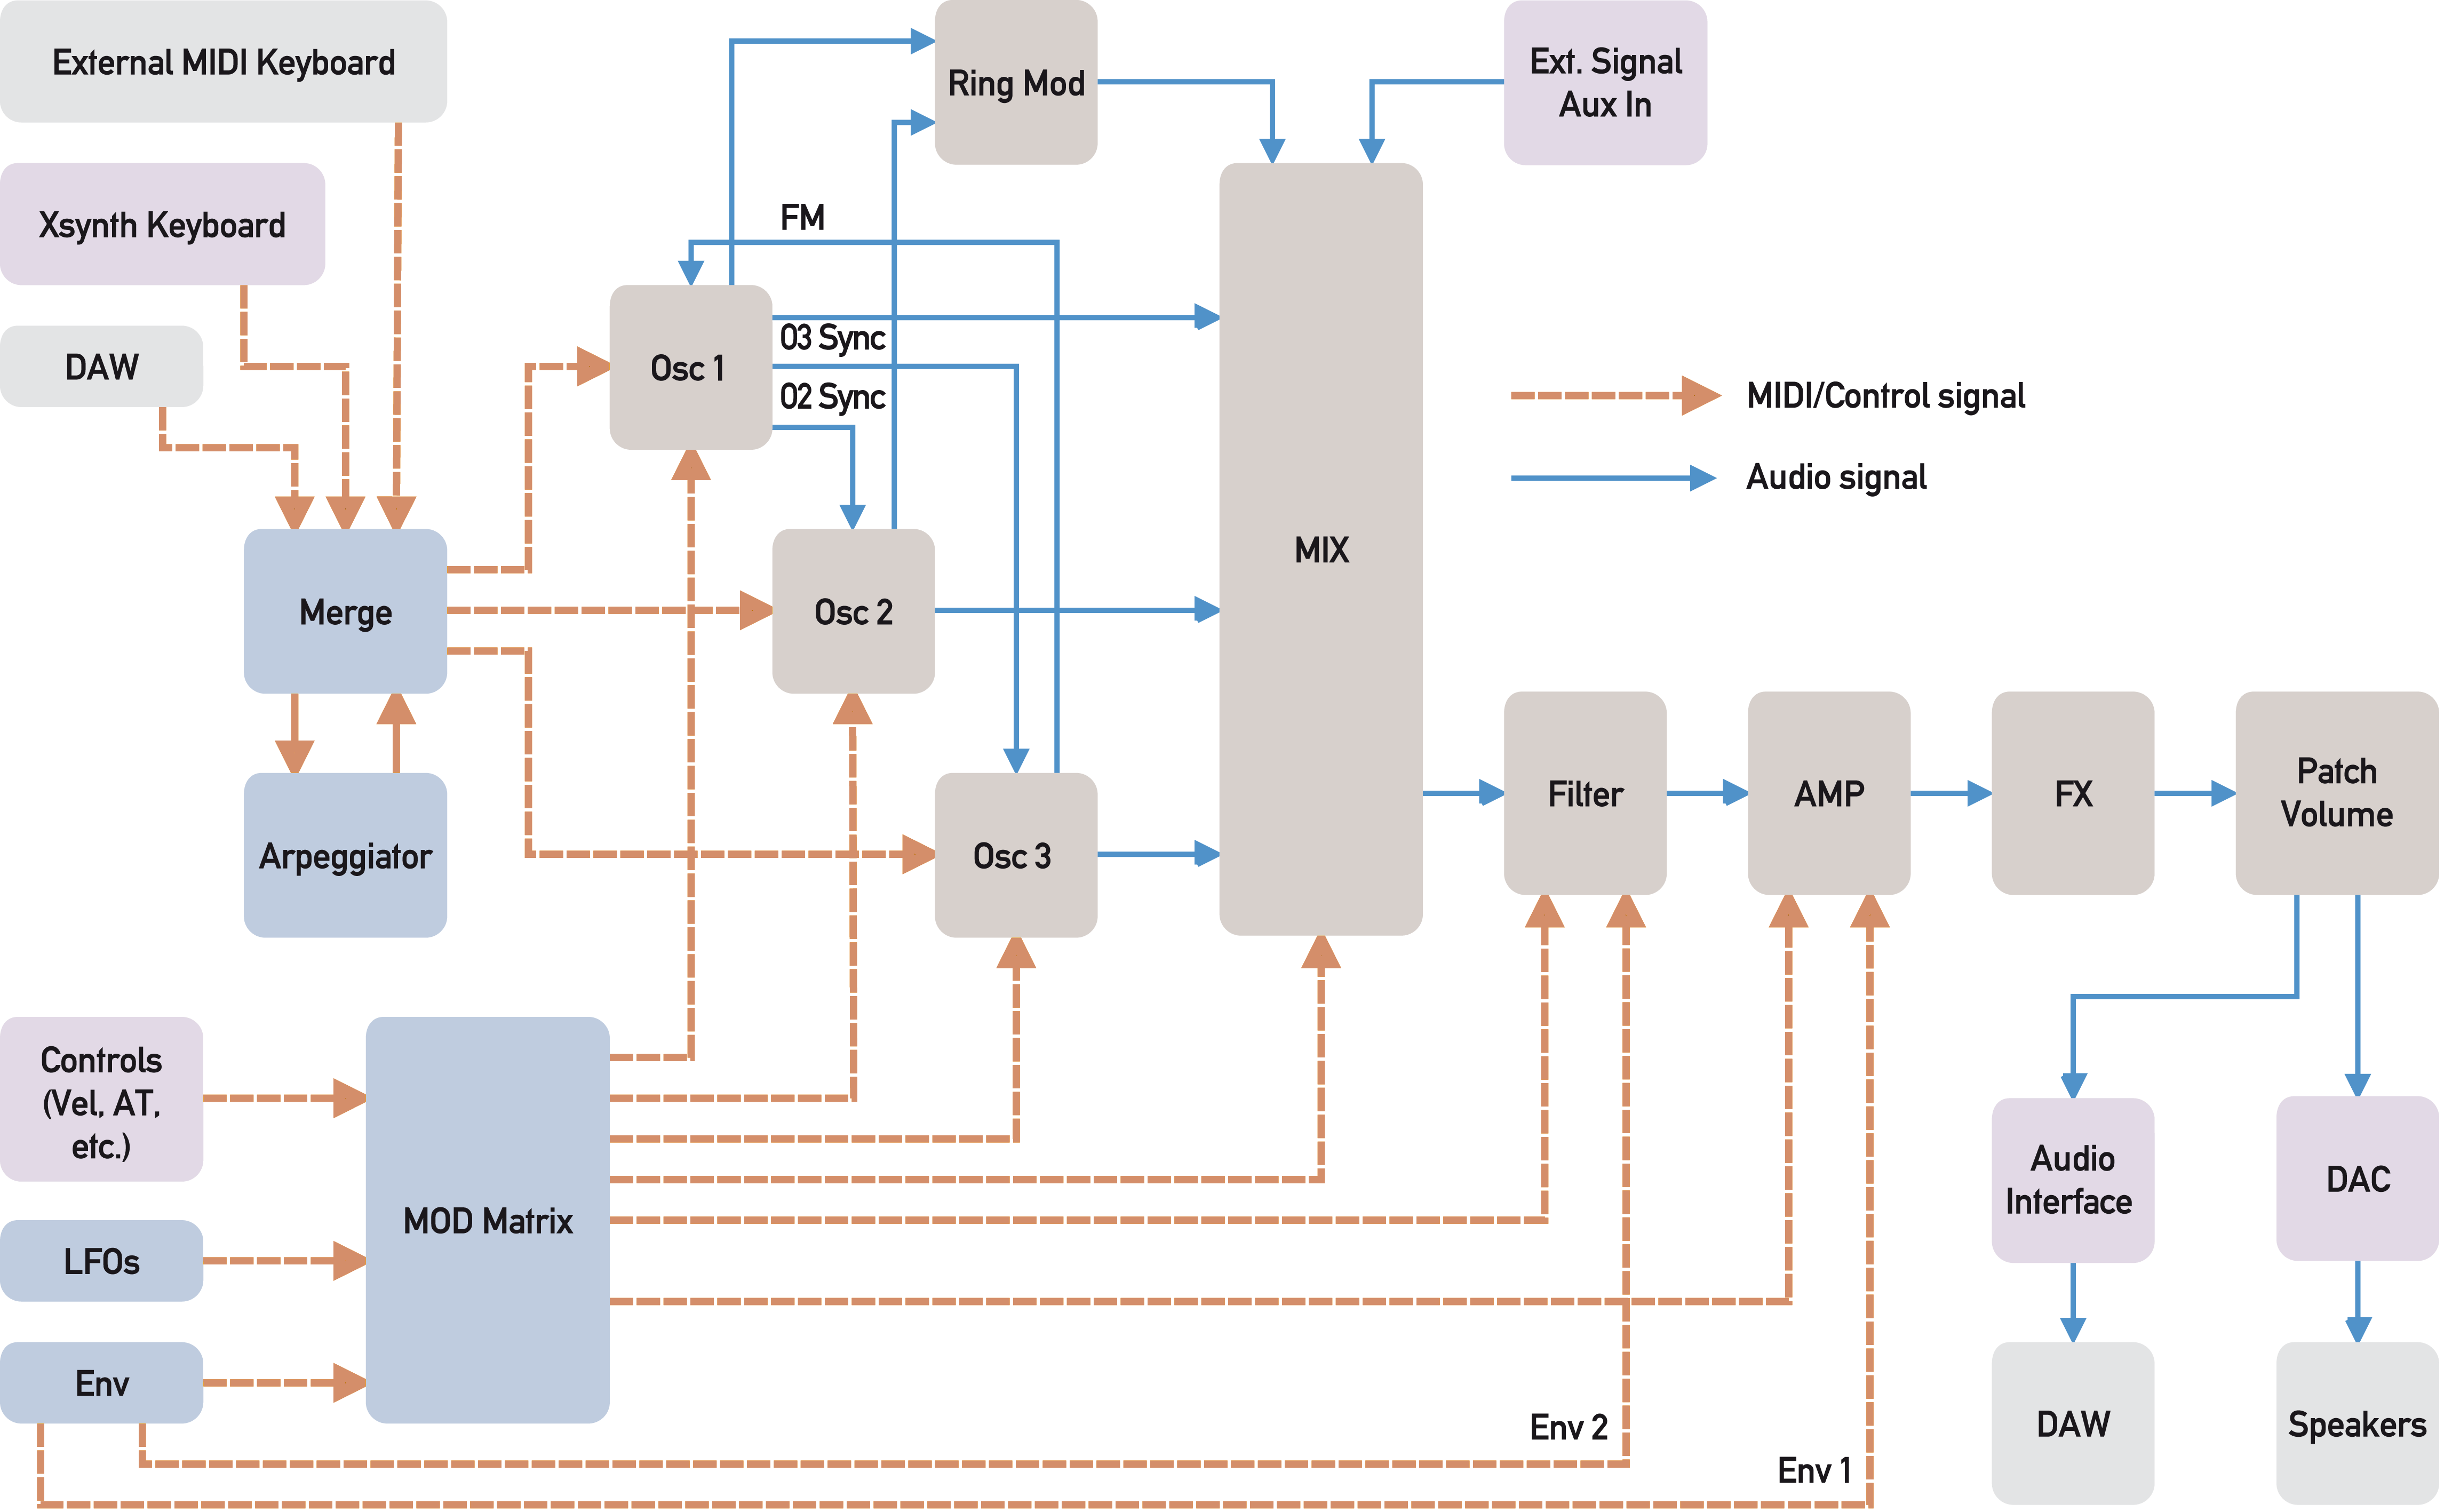
If you look at the block diagram above, you’ll see that the Xsynth does a few interesting things:
- The three oscillators are set up in a Y cascade (with the first one cascading into the second and third), but with feedback from the third oscillator to the first one, and with a separate ring modulator.
- The envelopes and modulation matrix extend from the oscillators through to the filter and amplifier, which I’ve only seen in the Arturia Minifreak (which I’ve never actually written about here either, but which I also have and use).
- The aux input actually goes through the mixer, filter, amplifier and effects chain, so you can use the Xsynth as a simple effects unit for external audio sources, which is a nice touch especially considering that it has a built-in audio interface.
This doesn’t mean that it’s easy to create patches (as with any modern synth, you need to spend a fair amount of time learning the implications of some controls), but it does mean that you can do a lot more with the Xsynth than you might expect.
For me at least, it was much more productive to use the desktop editor to create and edit patches, since it has a much larger screen and a more intuitive interface for editing parameters:
The editor is available for both macOS and Windows, and as a bonus it can also be used to do firmware upgrades and restore factory settings.
Effects
In a nice departure from the usual “effects are a separate box” approach, the Xsynth supports a small set of built-in effects that (as you can glean from the diagram above) can also be applied to incoming audio, and fall into roughly four categories (which are mapped to the four right encoders):
- Distortion (several kinds), Compressor, Auto-Wah, Lo-Fi
- Reverb (Room, Stage, Plate, Spring)
- Chorus and Delay
- EQ (various types, with selectable frequencies)
The reverb is serviceable and the delay works well enough, and I spent a little while trying to get the Auto-Wah (of all things) to work with the aftertouch. So yes, you can have some fun with the effects, but they are not the main selling point of the Xsynth.
Like I mentioned above, the aux input can also be used to process external audio, and they worked fine with my homebrew DX7 clone, which I hooked up to the Xsynth via both MIDI and audio.
Portability and iOS Compatibility
Despite being bigger than I initially expected, the Xsynth feels rugged enough to just drop into a backpack and laptop bag without a lot of concerns, and like I mentioned above, I was able to use it with my iPad Pro 11” with a single USB-C cable and use AUM with it:
I also had no issues using it with GarageBand, and went for AUM mostly because I completely suck at looping and having a keyboard that I can use as an audio interface was a great way to hook up a few of my standalone synths and use them as audio sources for practicing that.
The Xsynth as a Master Keyboard
I also had no trouble using the Xsynth as a master keyboard for my Mac and with Bitwig on a Linux laptop1 and it worked well enough with both Logic Pro and Bitwig.
If you want to use the Xsynth as a master keyboard, you can do so by connecting it via USB to your computer and using Midi CC to control your DAW or other software.
What I found most useful is the ability to have multiple pages of CC assignments for the encoders, which you can switch between by hitting the left and right buttons.
In my case, I set it up to control Arturia’s Analog Lab on my Mac (which really demands eight controls, but it’s workable).
Conclusion
I’ve barely scratched the surface of what the Xsynth can do in a couple of weekends, but one of the reasons I wanted to write this review is to share my initial impressions before Summer vacation starts and I have a bit more time to play with it.
The size and comparative ruggedness makes it quite suitable to use on the go, and I can see myself taking it along with me on Summer break instead of the Korg NanoKey Studio, which can’t do much more than act as a MIDI controller and has no built-in synth engine.
It does have a few quirks, but like Floyd Steinberg, who did a video on it recently, I would rate it an 8/10 (or 4/5 stars, if you prefer that rating system) for its price point and features, especially considering the built-in audio interface and range of effects.
For me, other than the software quirks, the only physical changes I’d make would be switching the orange backlights to white and adding more conventional modulation and pitch controls (perhaps control strips).
Given that I prefer to travel with an iPad, I would love a mini-keys version of the Xsynth that I could pack in roughly the same space as the iPad Pro 11”–I will probably update this review after I have done a couple of trips with it and can figure out whether the full-sized keys make up for their size.
But I am quite happy with the Xsynth overall and look forward to diving deeper into its capabilities in the coming months.