Following up on my recent post on hardware projects, I managed a fair bit of progress in the intervening days.
I also got myself a new soldering station and a slew of protoboards, and am waiting for a set of I2C OLED displays and RP2040 (Raspberry Pi Pico) boards to do some prototyping.
Let There Be… No Noise
I cracked one of the toughest issues for my PICO-8/M8 Tracker build, which was getting rid of the EM noise the Teensy 4.1 generates.
I was shopping for the aforementioned OLED displays on AliExpress, and came across a USB dongle that uses the ADUM4160 chip, which is a USB isolator/repeater specifically designed to pair with some beefy caps and an inductor to eliminate EM noise. It can do USB 2.0 speeds, which is more than enough for audio, and has a rather cute design:
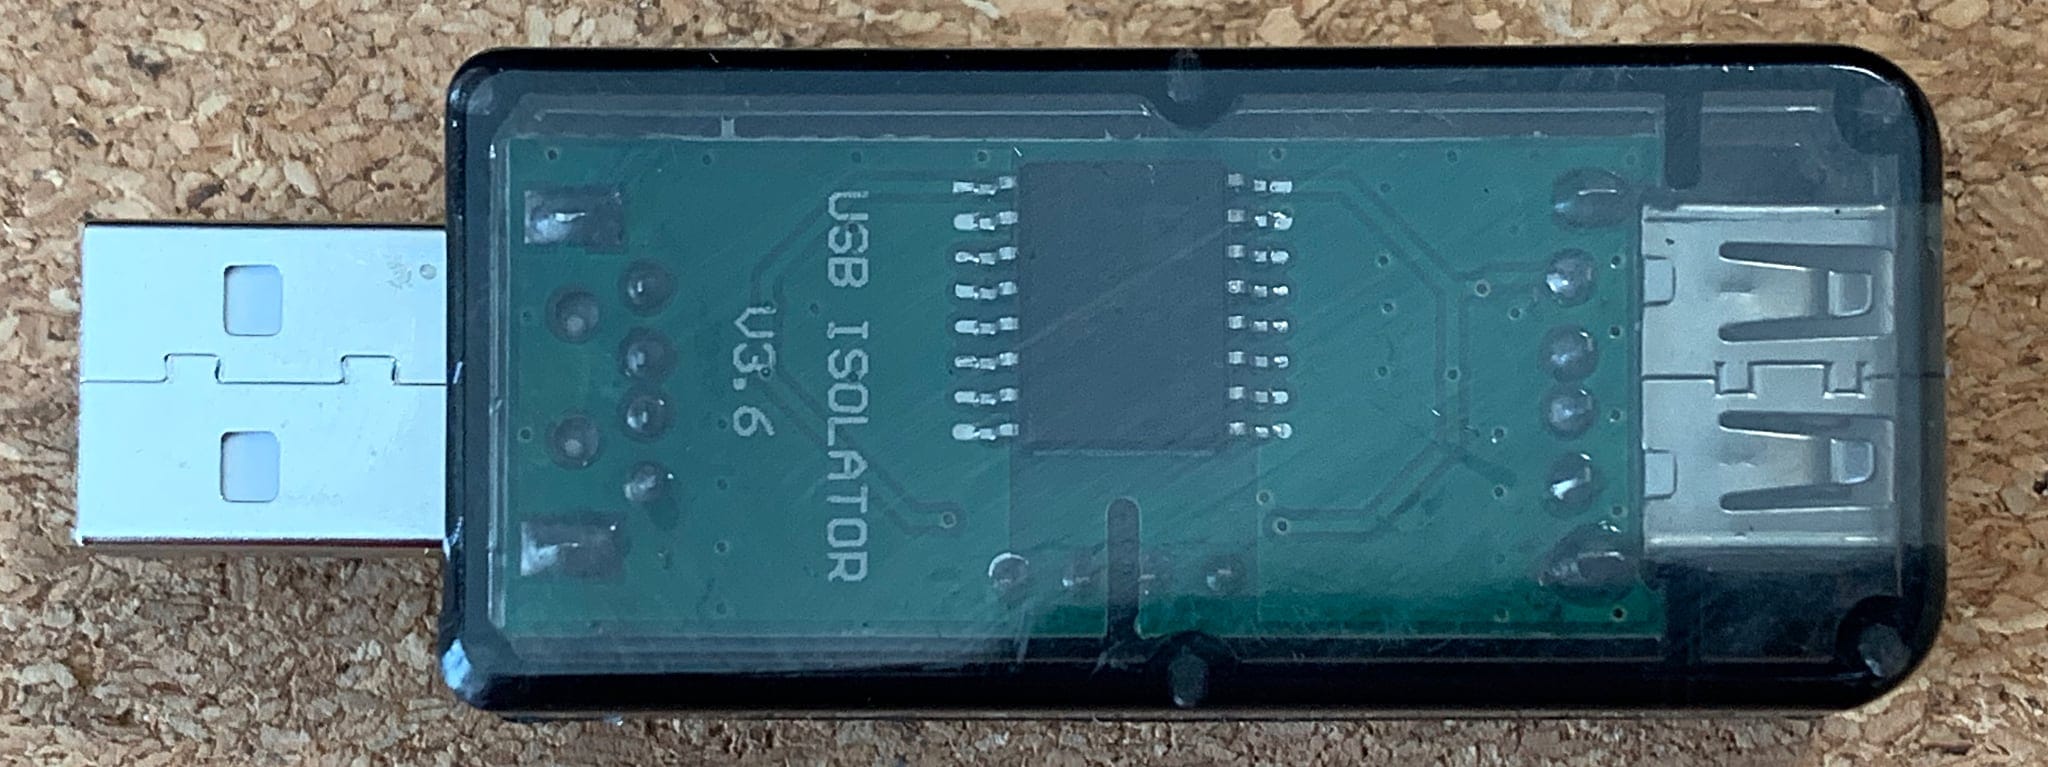
Placed just between the USB audio adapter and the rest, this also removed the (much) smaller amount of EM noise coming from the Raspberry Pi and HyperPixel display.
The tradeoff is bulk–the dongle is nearly the size of the Teensy and twice the length of the USB audio adapter, so it’s another thing to jostle for room inside the case.
I am considering cracking it open and soldering it to a small protoboard along with the audio adapter, but right now I’m just happy I have an effective way to do away with the noise.
Going Linear
I have three other builds on hand: an LCD enclosure, a MIDI controller and a MiniDexed box. But I’ve put aside designing the large LCD/LVDS board enclosure for the moment and have moved on with the smaller cases.
For the MIDI expression controller I am waiting for the OLED amd MCU, but have already sketched out some of the code and modelled the linear pots to tenths of a milimeter in OpenSCAD:
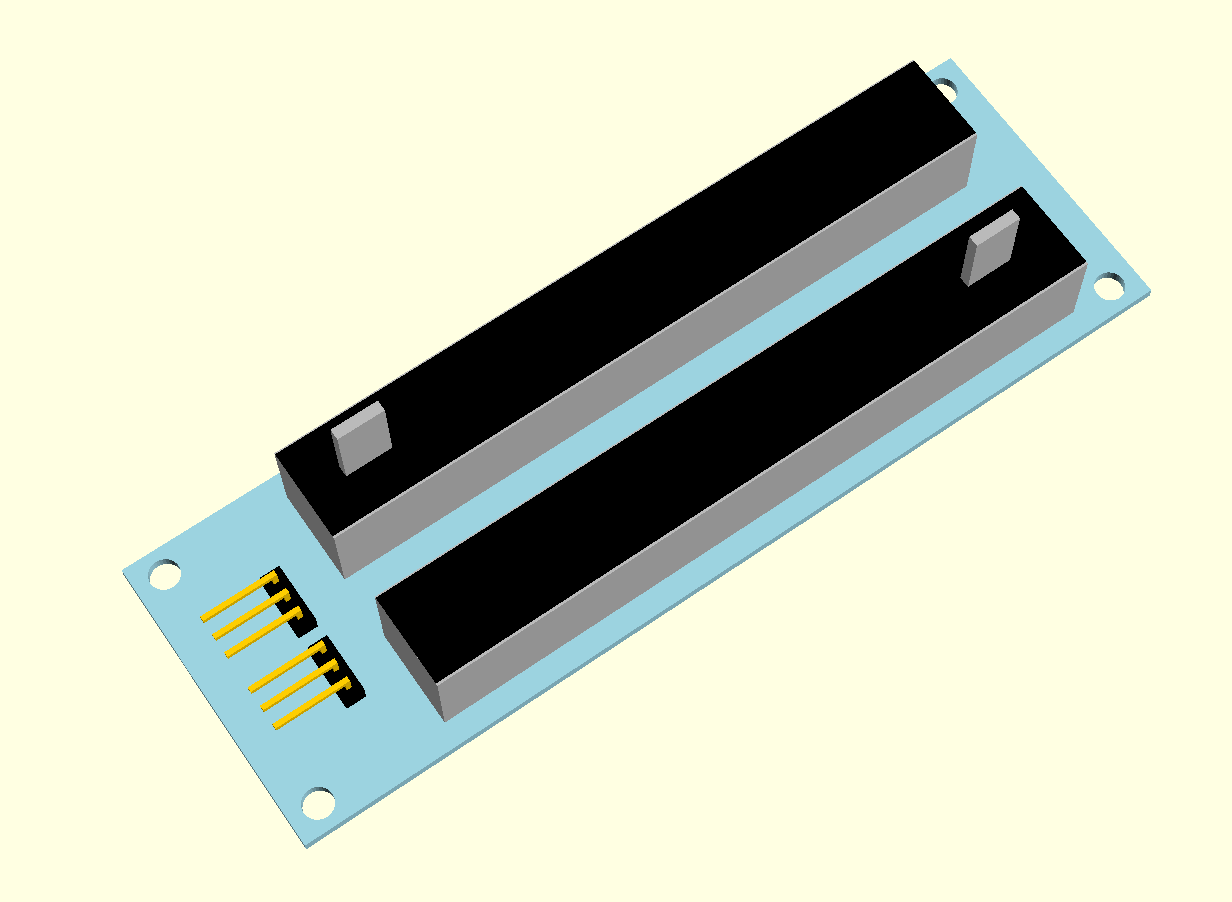
Designing a case for two of these modules should be trivial, but I need the OLED to carve out a viewing window and the RP2048 to place the USB connector.
But I’ve been reassessing how to do cases overall given I’ve had to spend a lot of “quality time” with my 3D printer, and that is mostly due to MiniDexed…
Revisiting MiniDexed
Last month I had already completed my first build of MiniDexed, but using only the Raspberry Pi PWM output.
The Raspberry Pi 3A has more than enough horsepower to run 8 DX7 tone generators plus effects chains, and I was able to hook it up to my iPad and run 8 MIDI tracks through it with very nice results:
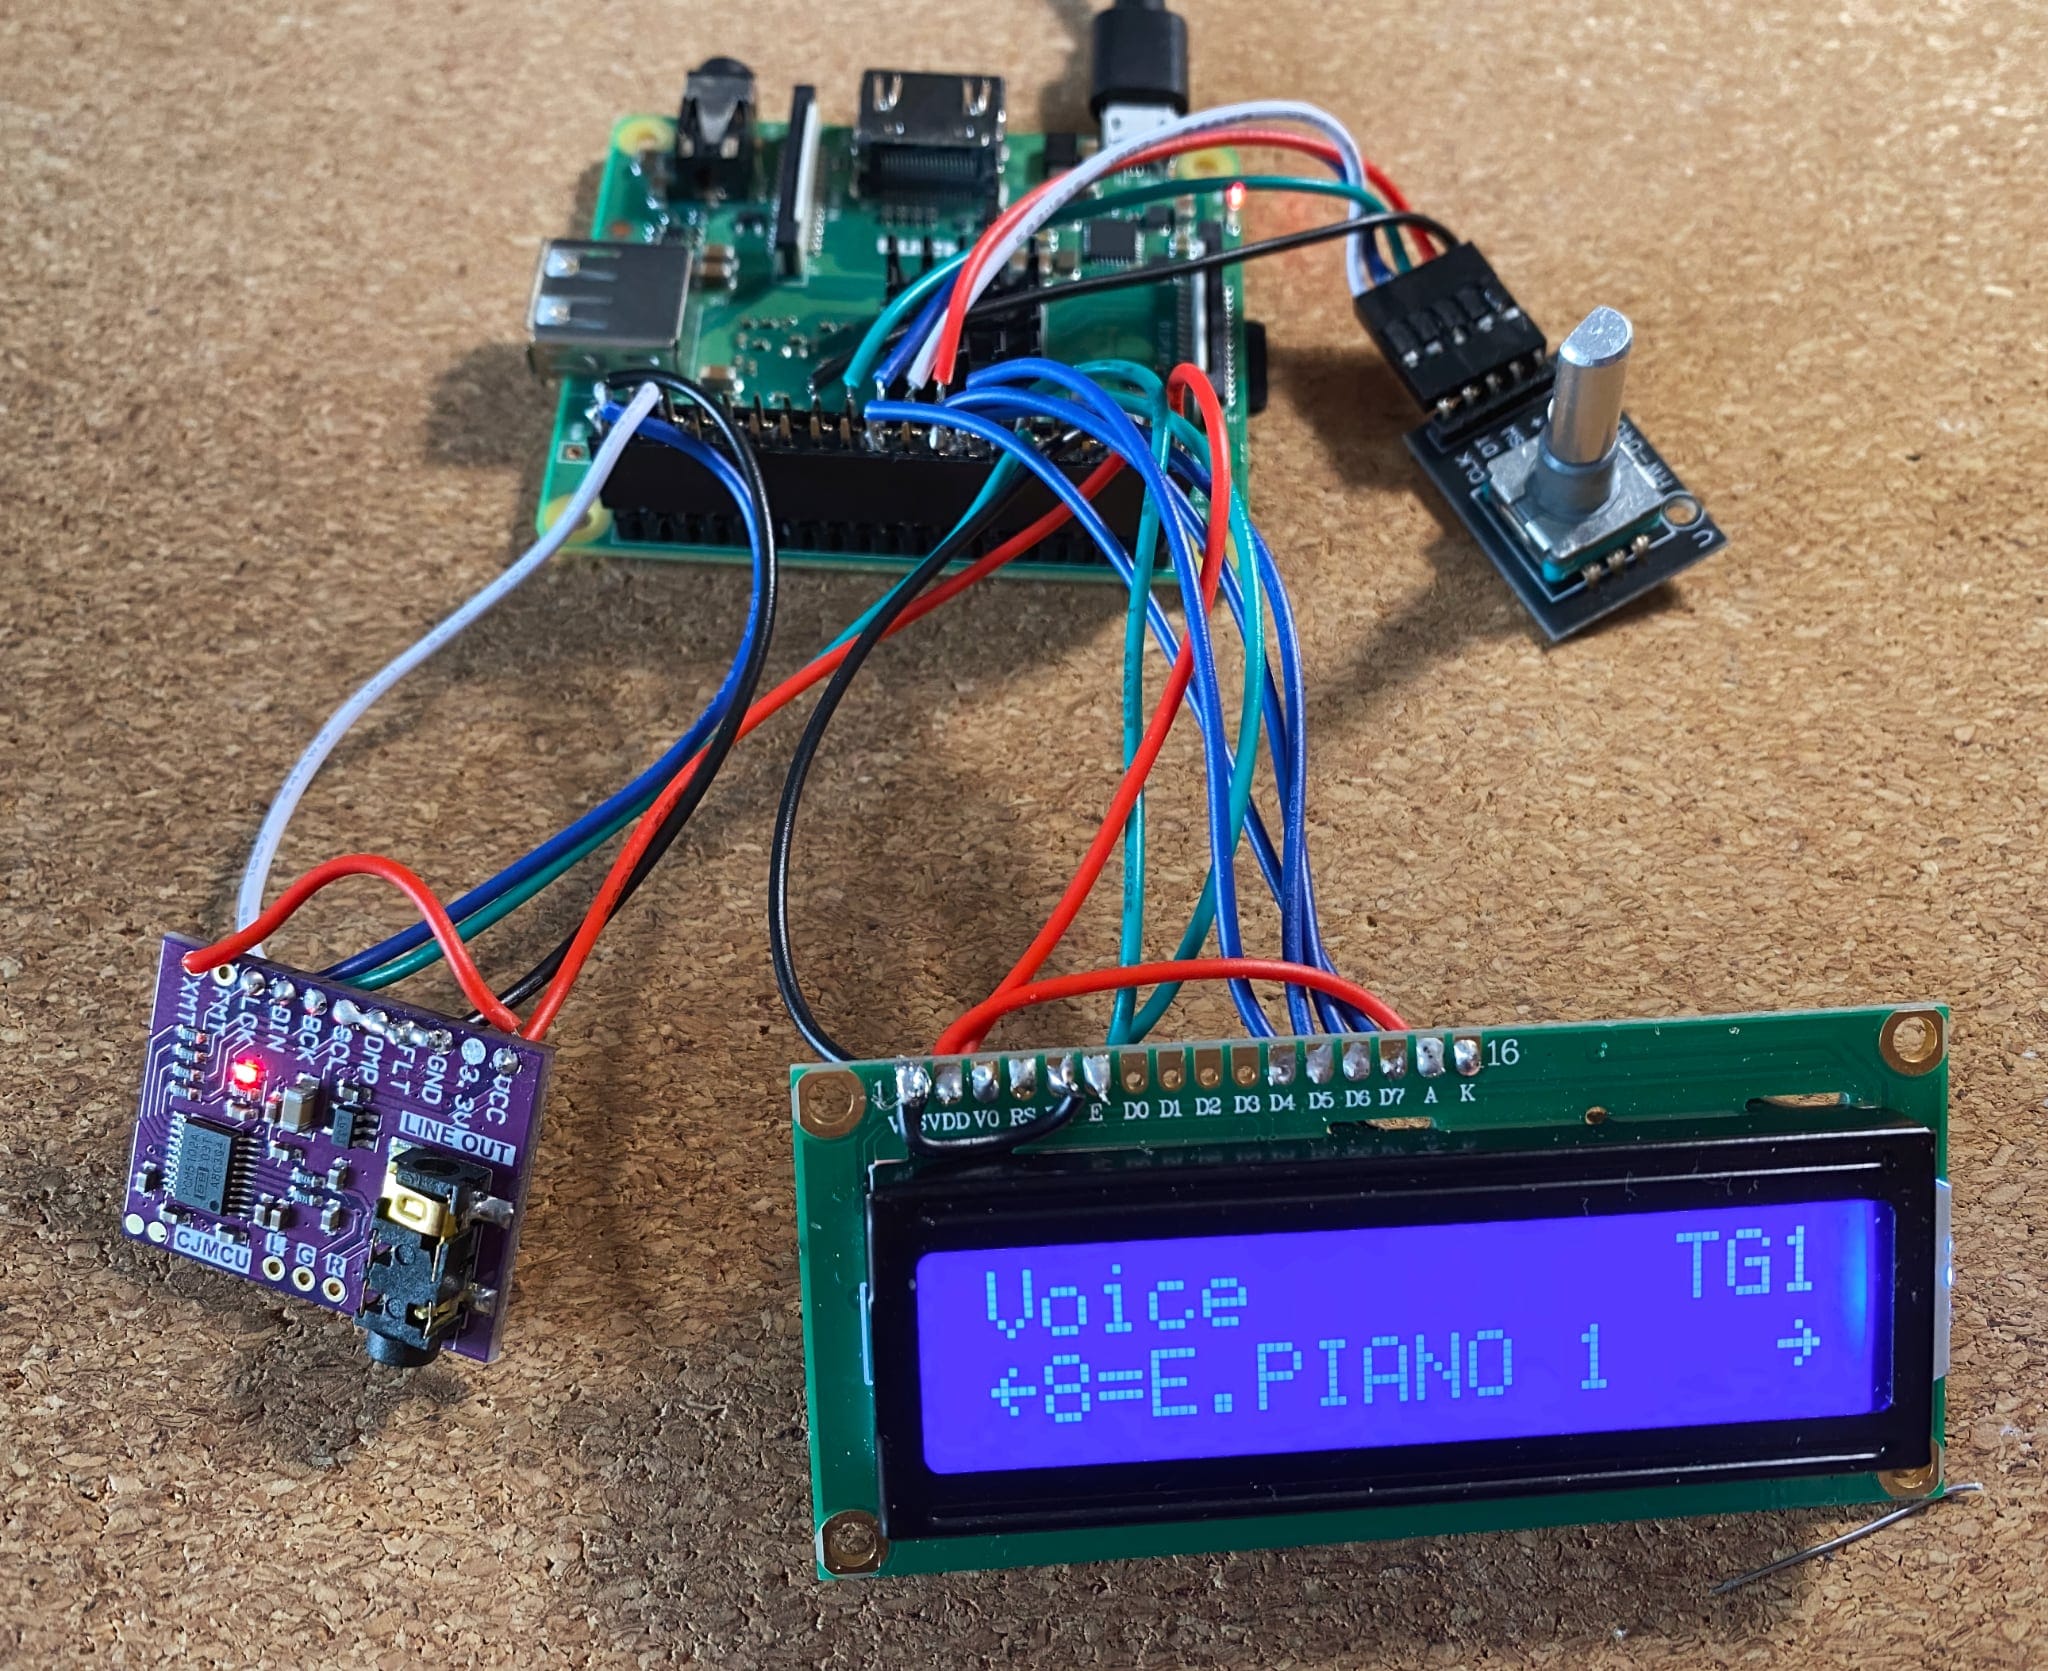
It was especially fun to use this with my Novation Launchpad, and I had a great time sequencing four different synth tracks without a hitch (other than setting them up using the relatively sparse UX, which takes a while).
There are a few software niggles, but they’re being taken care of. However, the case I printed for it still needs work, and that is going to translate across to the other stuff I’m doing.
Case Work
My main concern with the original case design was making it as compact as possible while making sure the rotary encoder knob did not protrude from it in an unsightly manner.
And since the 3A gets a little toasty even with a heatsink, I tried to disguise the top vent with a set of grooves:

However, this does not translate well to PLA, as my ancient 3D printer is somewhat finicky and kept squashing the initial layers regardless of what I did.
And some of the things I designed into the print (like merging the top case vents with some grooves in an attempt to hide them) came out spectacularly bad:
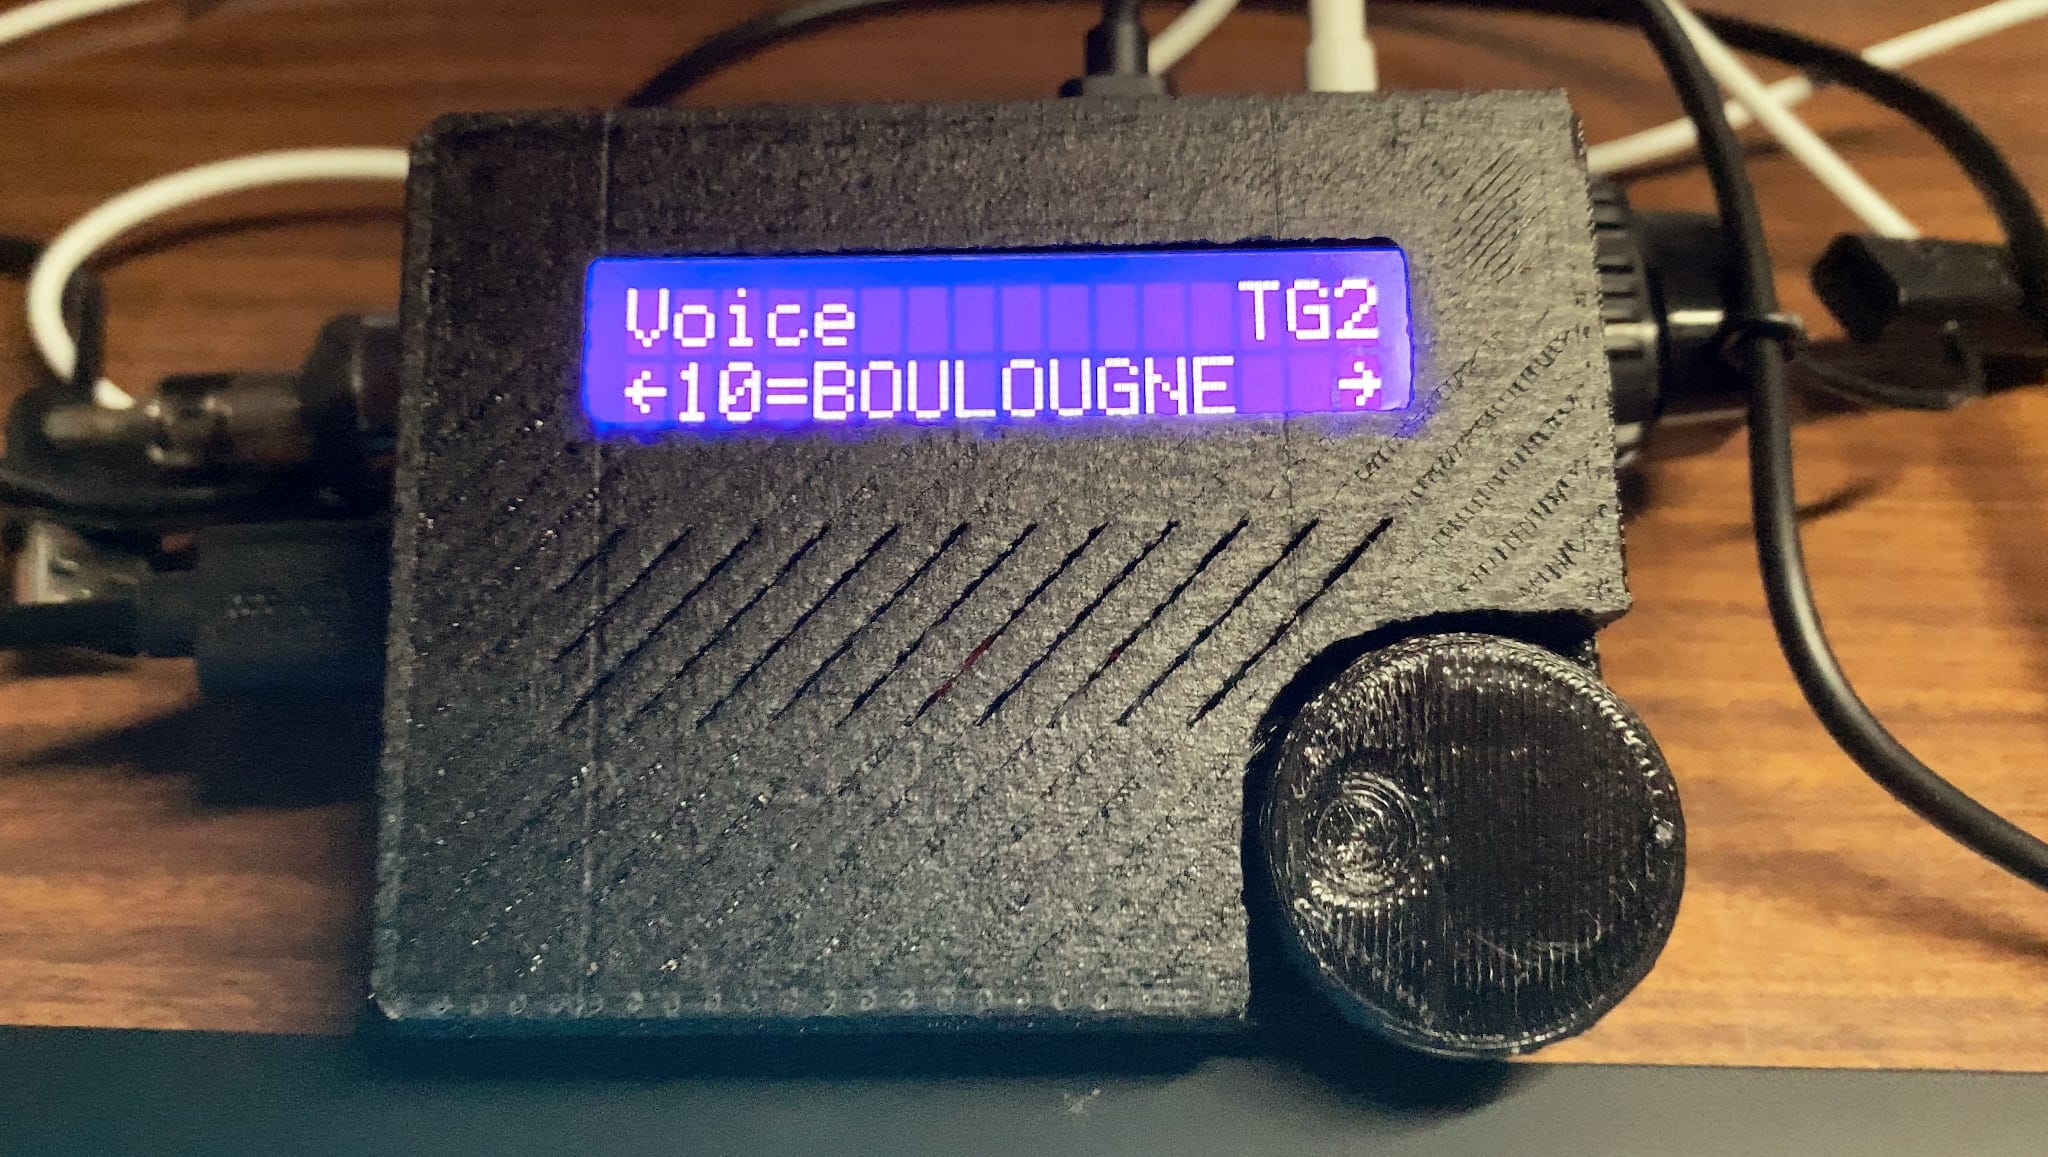
This is partly because FDM/PLA printers (especially ancient ones) are just not able to render that kind of detail properly, and partly because I had unrealistic expectations of how Cura would be able to slice them.
There is also a lot to be said about the way it was designed. I try to build everything using CSG primitives and generic dimensions, but after a while I started hard-coding positions for things and the OpenSCAD file got a little squirrely.
However, this design has three major shortcomings:
- The LCD display is tricky to read when laid out flat (I adjusted the contrast, but it’s a matter of physical viewing angle).
- There is very little room to add a MIDI IN TRS jack and the chunk of protoboard I’m going to build it on.
- I have no nice way to add a couple of buttons to the front (in case I want to run MT32 or SquishBox software).
Fixing The Print
While I pondered a better way, I spent a couple of weekends slowly figuring out how to fix my printing issues with the (admittedly dodgy) black PLA I have and trying out different slicer settings:
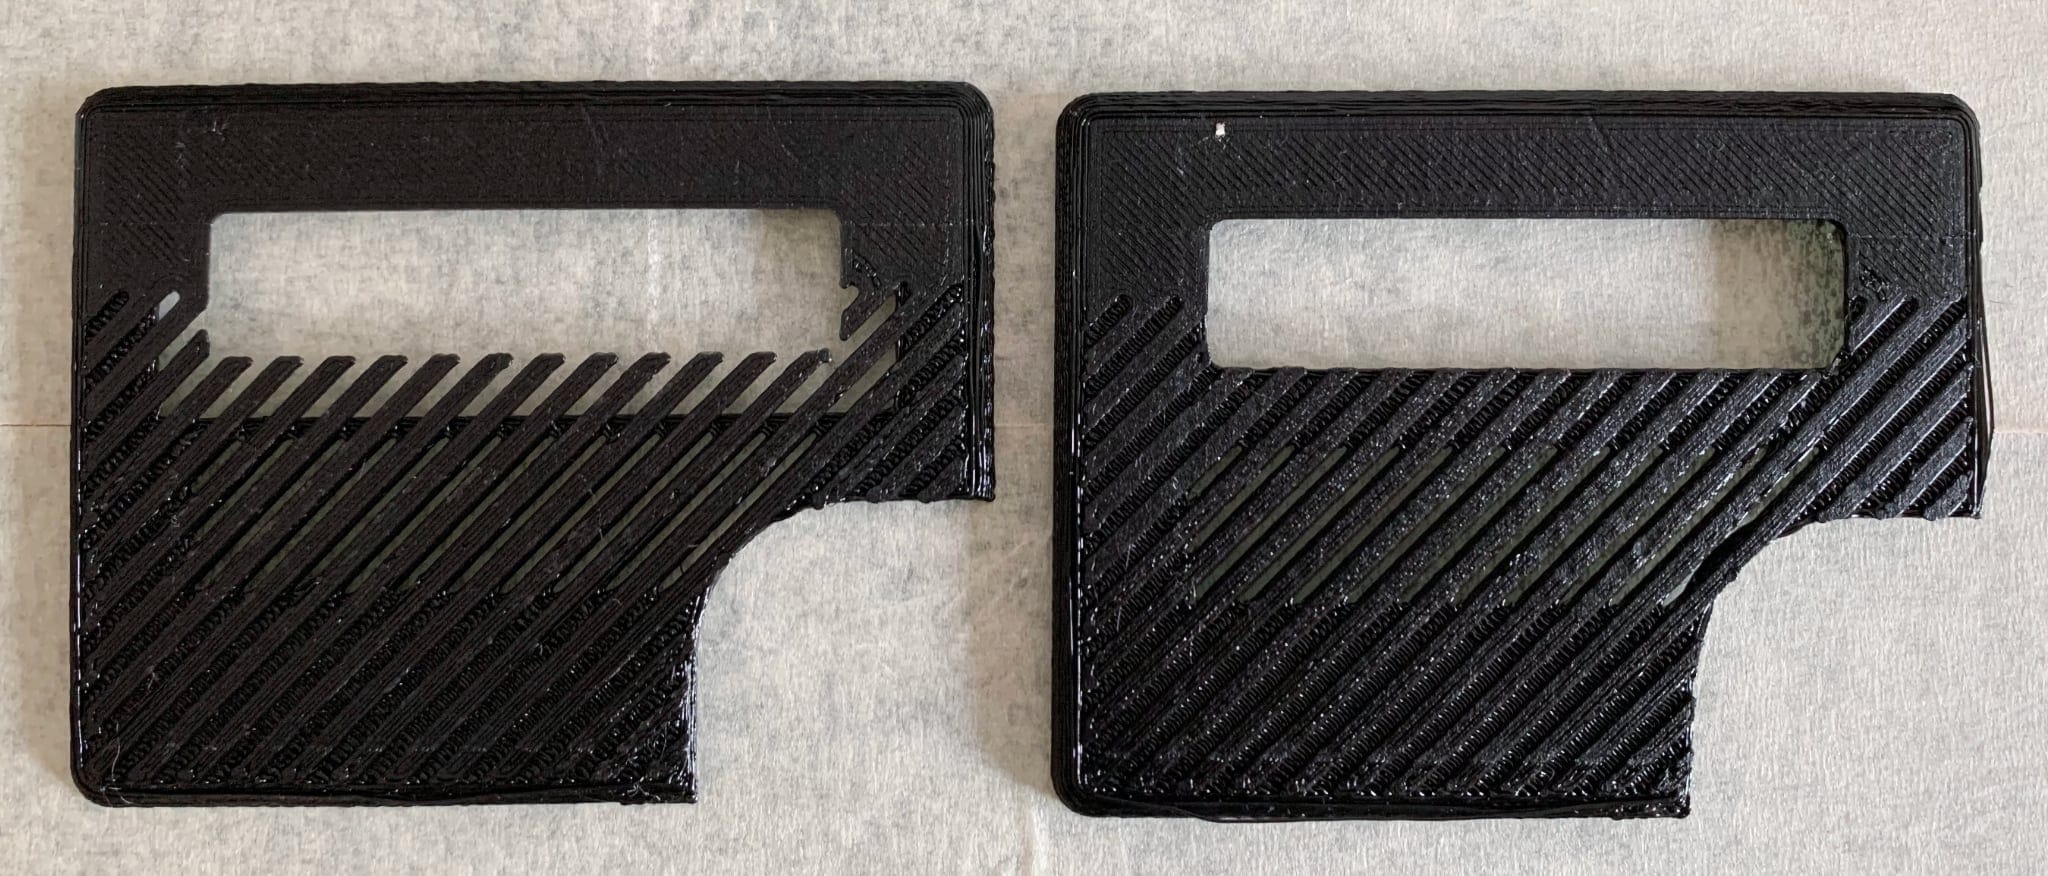
…and it was all slow and frustrating to the point where I strongly considered buying a brand new resin printer (which are all the rage), but held off on it for now for three reasons:
- I don’t have a good place to put it (my office is getting seriously cramped, and even though I’m considering setting up a permanent workbench and soldering station, that has yet to come).
- Resin printing (even with the new water soluble ones that do away with the requirement for having gallons of alcohol at hand) is still a trifle messy and smelly.
- The market is still in flux, and although there are a few €200 printers out there like the Elegoo Mars, they mostly use Chitubox software, and they recently baked DRM into their slicer and some printers–which is ludicrous as I’d rather have zero dependencies between the hardware and the slicing software to ensure I can use both long into the future.
And, of course, the printer is just part of the problem. I am pretty sure I can design a case that prints well and looks the way I want, even with some compromises.
So I picked out some pushbuttons, placed a few more AliExpress orders, put a fresh spool on my printer, and began designing a new case.
Fixing The Design With OpenSCAD Hulls
One of the things people don’t know about OpenSCAD is how insanely powerful it can be when you start using some of its surface primitives.
Want a rounded cube? Position eight spheres at the vertices and invoke hull() on them to get a mesh. Want fillets? Dip into 2D, use offset() and extrude them out. Neither are as visual and straightforward as modeling in Blender, but then again I’m still wary of using “straightforward” in reference to Blender, although I’ve tried doing a few enclosures with it already…
Here’s a very simple example of how hull() works:
$fn=50;
r = 0.7;

// put a sphere at each corner of the hull
for(x = [0, 4], y = [0, 4], z = [0, 4])
    translate([x,y,z])
        sphere(r);

// Now render the actuall hull
translate([10,0,0])
    hull()
        for(x = [0, 4], y = [0, 4], z = [0, 4])
            translate([x,y,z])
                sphere(r);

// Give it a flat bottom instead
translate([20,0,0])
    hull()
        for(x = [0, 4], y = [0, 4], z = [0, 4])
            translate([x,y,z])
                if(z == 0)
                  cylinder(h=r, r=r);
                else
                    sphere(r);
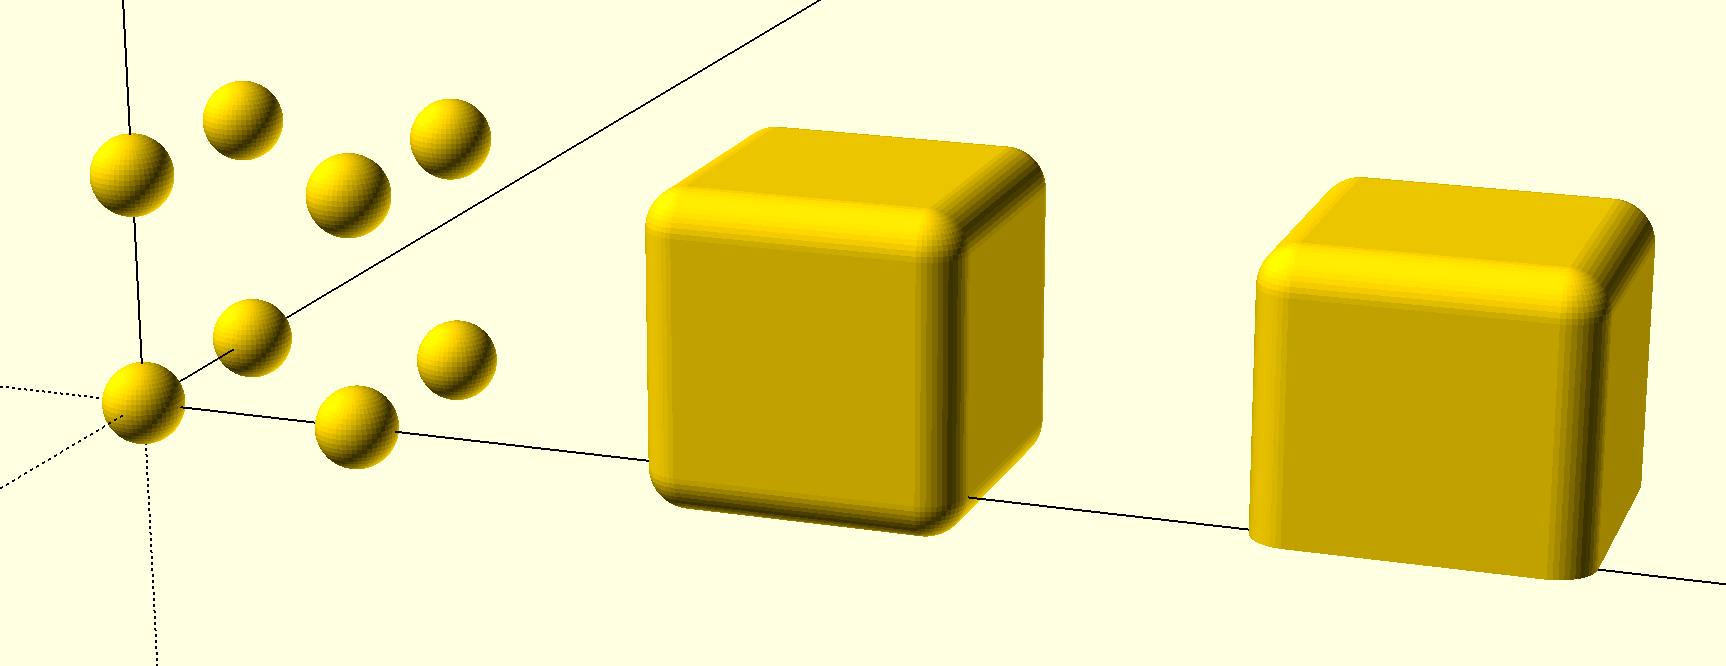
You can then add points and combine hulls to create arbitrarily complex shapes, and hollow them out by subtracting tweaked versions with the control points moved inward.
So making a more desktop-like case with the LCD titled upward and a sloping panel for adding controls is pretty easy:
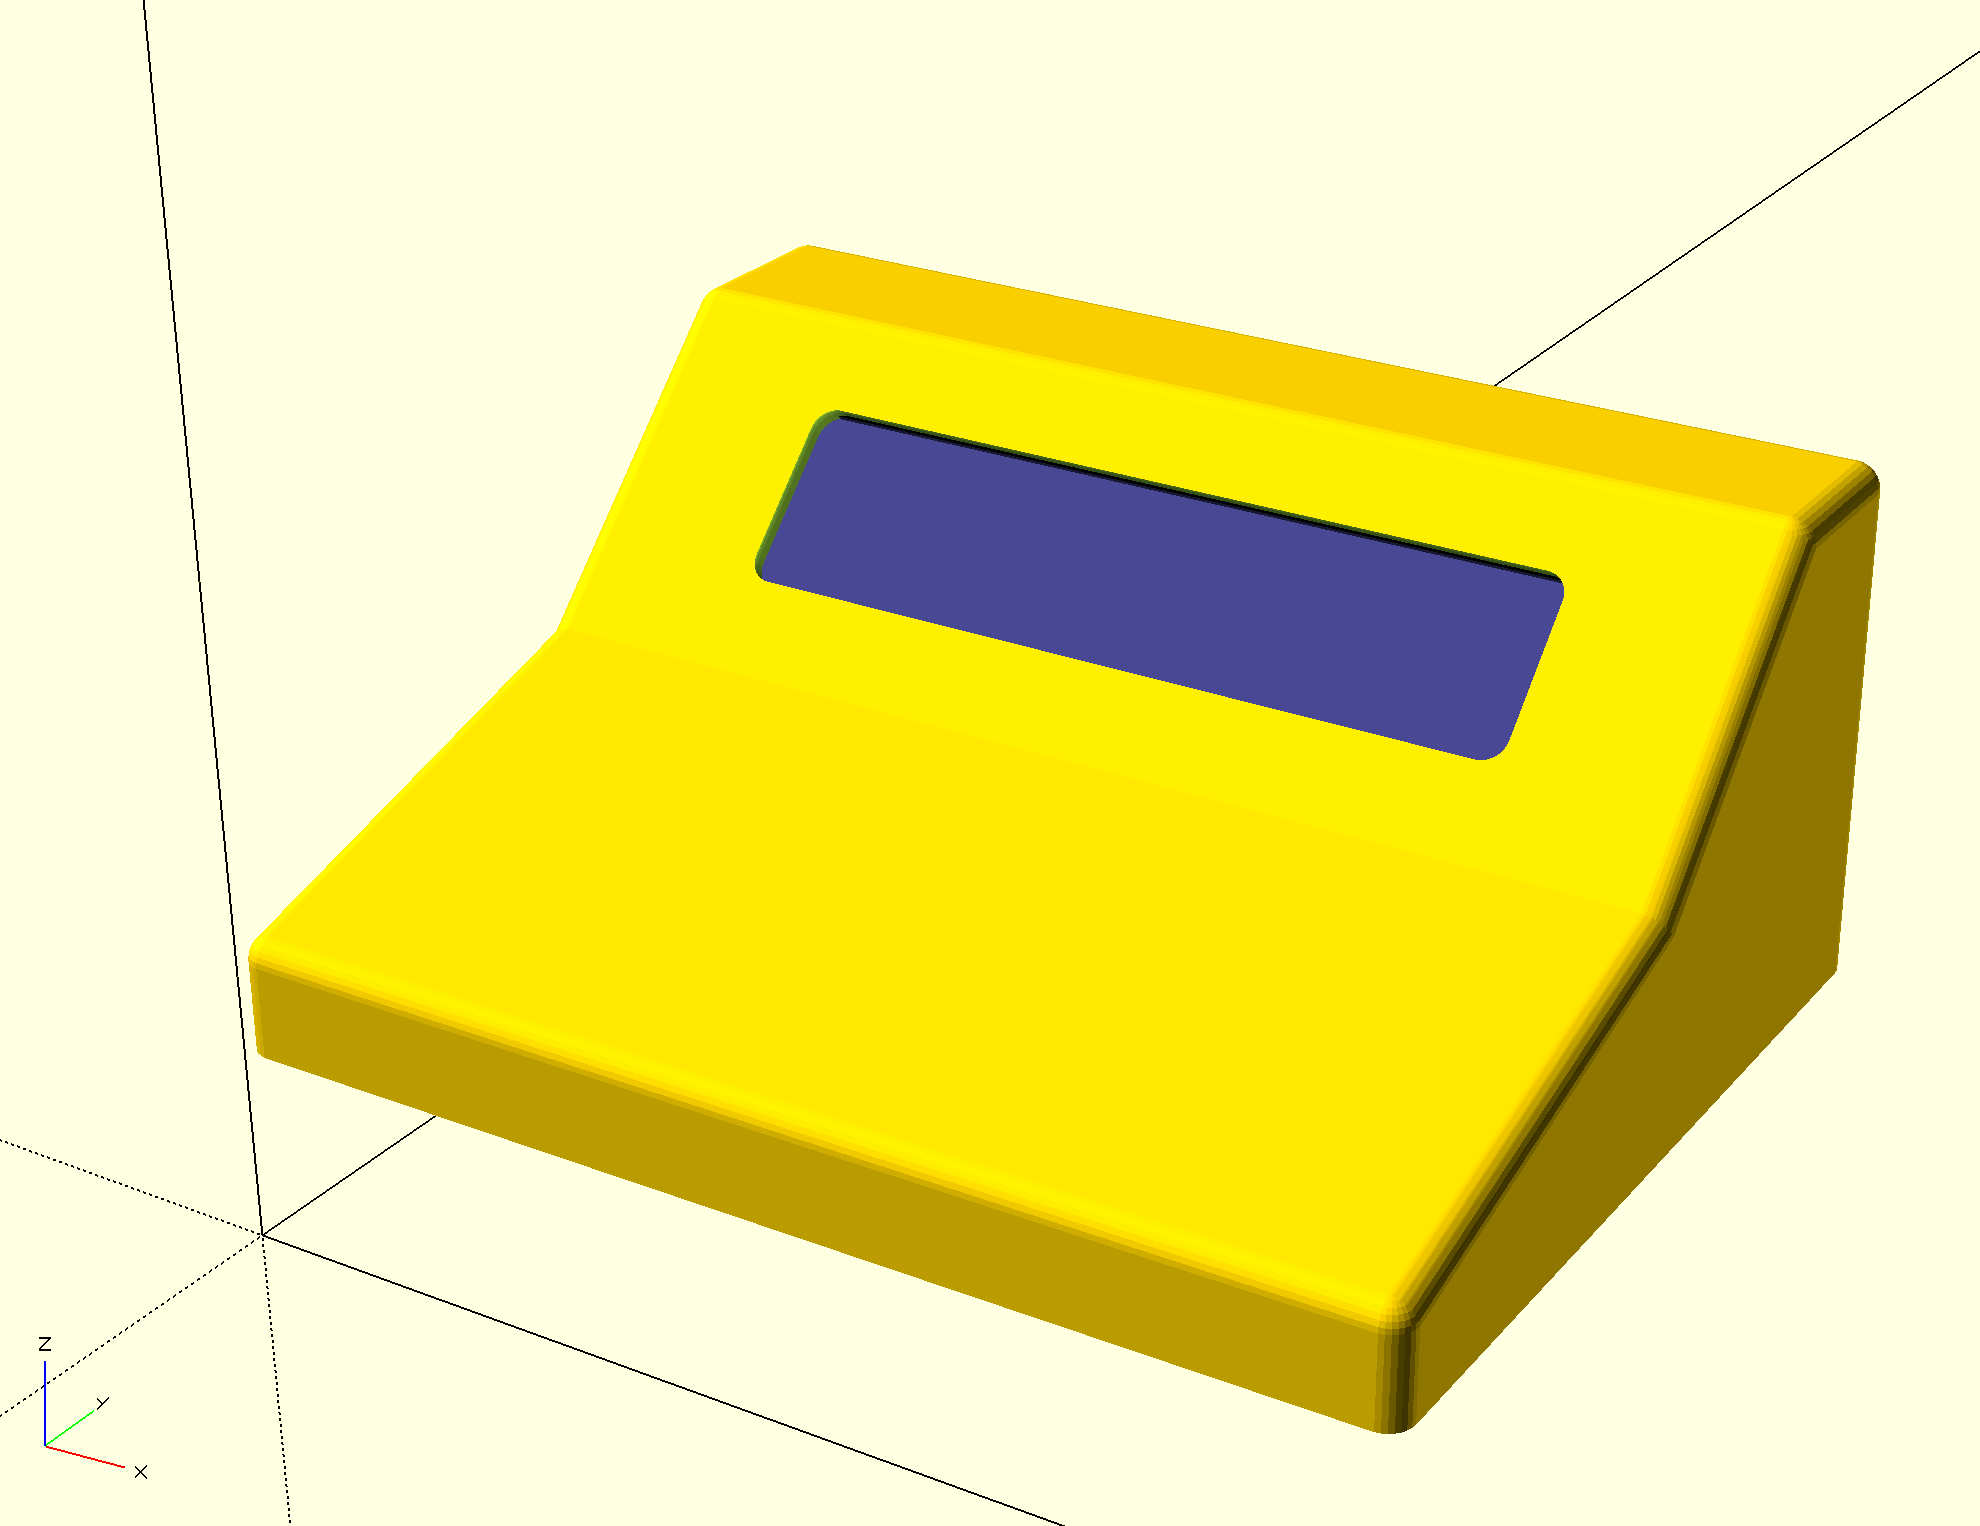
This is not how the final case will look, but enough to start doing some 3D printing tests.
Cura Tree Supports
However, this kind of long, overhanging shape is the kind that needs to be printed with supports. And supports add both printing time and significant hassle with removing them in complex prints.
But as it happens Cura can now do “tree” supports, which have a weird organic look but can be customized to print with very low density and only touch the piece at a limited number of points. And they work great:

Highly recommended, even if they look like something out of a horror movie.
I’m still not happy about some aspects of print quality, so while I’m waiting for the remaining parts to arrive I’m slowly and fastidiously tuning my printer by printing 3D Benchy models. It takes only an hour or so to print one, and it’s a much better tuning aid than I expected.
So it’s all been fun, even if a little slow going.