A couple of days ago I came upon NotesOllama and decided to take a look at how to build a macOS Service that would invoke Azure OpenAI to manipulate selected text in any editor.
Serendipitously, I’ve been chipping away at finding a sane way to build native desktop apps to wrap around a few simple tools, so I was already investigating JavaScript for Automation.
This seemed like a good opportunity to paper over some of its gaps and figure out how to do REST calls in the most native way possible, so after a little bit of digging around and revisiting my Objective-C days, I came up with the following JXA script, which you can just drop into a Run JavaScript for Automation Shortcuts action:
function run(input, parameters) {

    ObjC.import('Foundation')
    ObjC.import('Cocoa')

    let app = Application.currentApplication();
    app.includeStandardAdditions = true

    let AZURE_ENDPOINT="endpoint.openai.azure.com",
        DEPLOYMENT_NAME="default",
        // this is the easiest way to grab something off the keychain
        OPENAI_API_KEY = app.doShellScript(`security find-generic-password -w -s ${AZURE_ENDPOINT} -a ${DEPLOYMENT_NAME}`)
        OPENAI_API_VERSION="2023-05-15",
        url = `https://${AZURE_ENDPOINT}/openai/deployments/${DEPLOYMENT_NAME}/chat/completions?api-version=${OPENAI_API_VERSION}`,
        postData = {
            "temperature": 0.4,
            "messages": [{
                "role": "system",
                "content": "Act as a writer. Summarize the text in a few sentences highlighting the key takeaways. Output only the text and nothing else, do not chat, no preamble, get to the point.",
            },{
                "role": "user",
                "content": input.join("\n")
            }]/*,{
                role: "assistant",
                Use this if you need JSON formatting
                content: ""
            */
        },
        request = $.NSMutableURLRequest.requestWithURL($.NSURL.URLWithString(url));

      request.setHTTPMethod("POST");
      request.setHTTPBody($.NSString.alloc.initWithUTF8String(JSON.stringify(postData)).dataUsingEncoding($.NSUTF8StringEncoding));
      request.setValueForHTTPHeaderField("application/json; charset=UTF-8", "Content-Type");
      request.setValueForHTTPHeaderField(OPENAI_API_KEY, "api-key");

    // This bit performs a synchronous HTTP request, and can be used separately
    let error = $(),
        response = $(),
        data = $.NSURLConnection.sendSynchronousRequestReturningResponseError(request, response, error);

    if (error[0]) {
        return "Error: " + error[0].localizedDescription;
    } else {
        var json = JSON.parse($.NSString.alloc.initWithDataEncoding(data, $.NSUTF8StringEncoding).js);
        if(json.error) {
            return json.error.message ;
        } else {
            return json.choices[0].message.content;
        }
    }
}
Fortunately the symbol mangling is minimal, and the ObjC bridge is quite straightforward if you know what you’re doing. The bridge can unpack NSStrings for you, but I had to remember to use the tiny little .js accessor to get at something you can use JSON.parse on.
You will need to create a keychain entry for endpoint.openai.azure.com and default with your API key, of course. I briefly considering accessing the keychain directly, but the resulting code would have been twice the size and much less readable, so I just cheated and used doShellScript to grab the key.
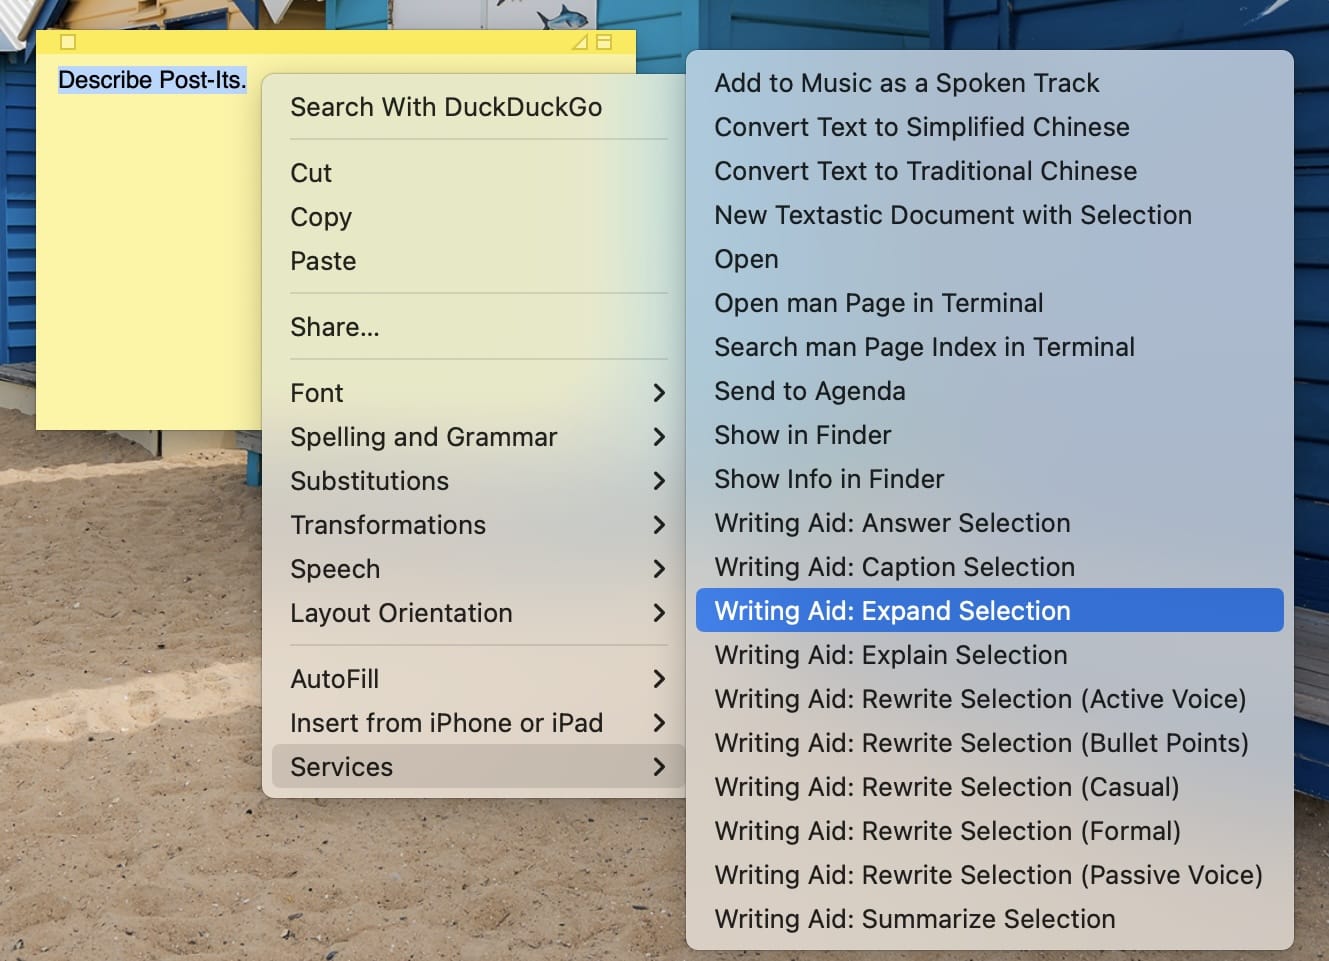
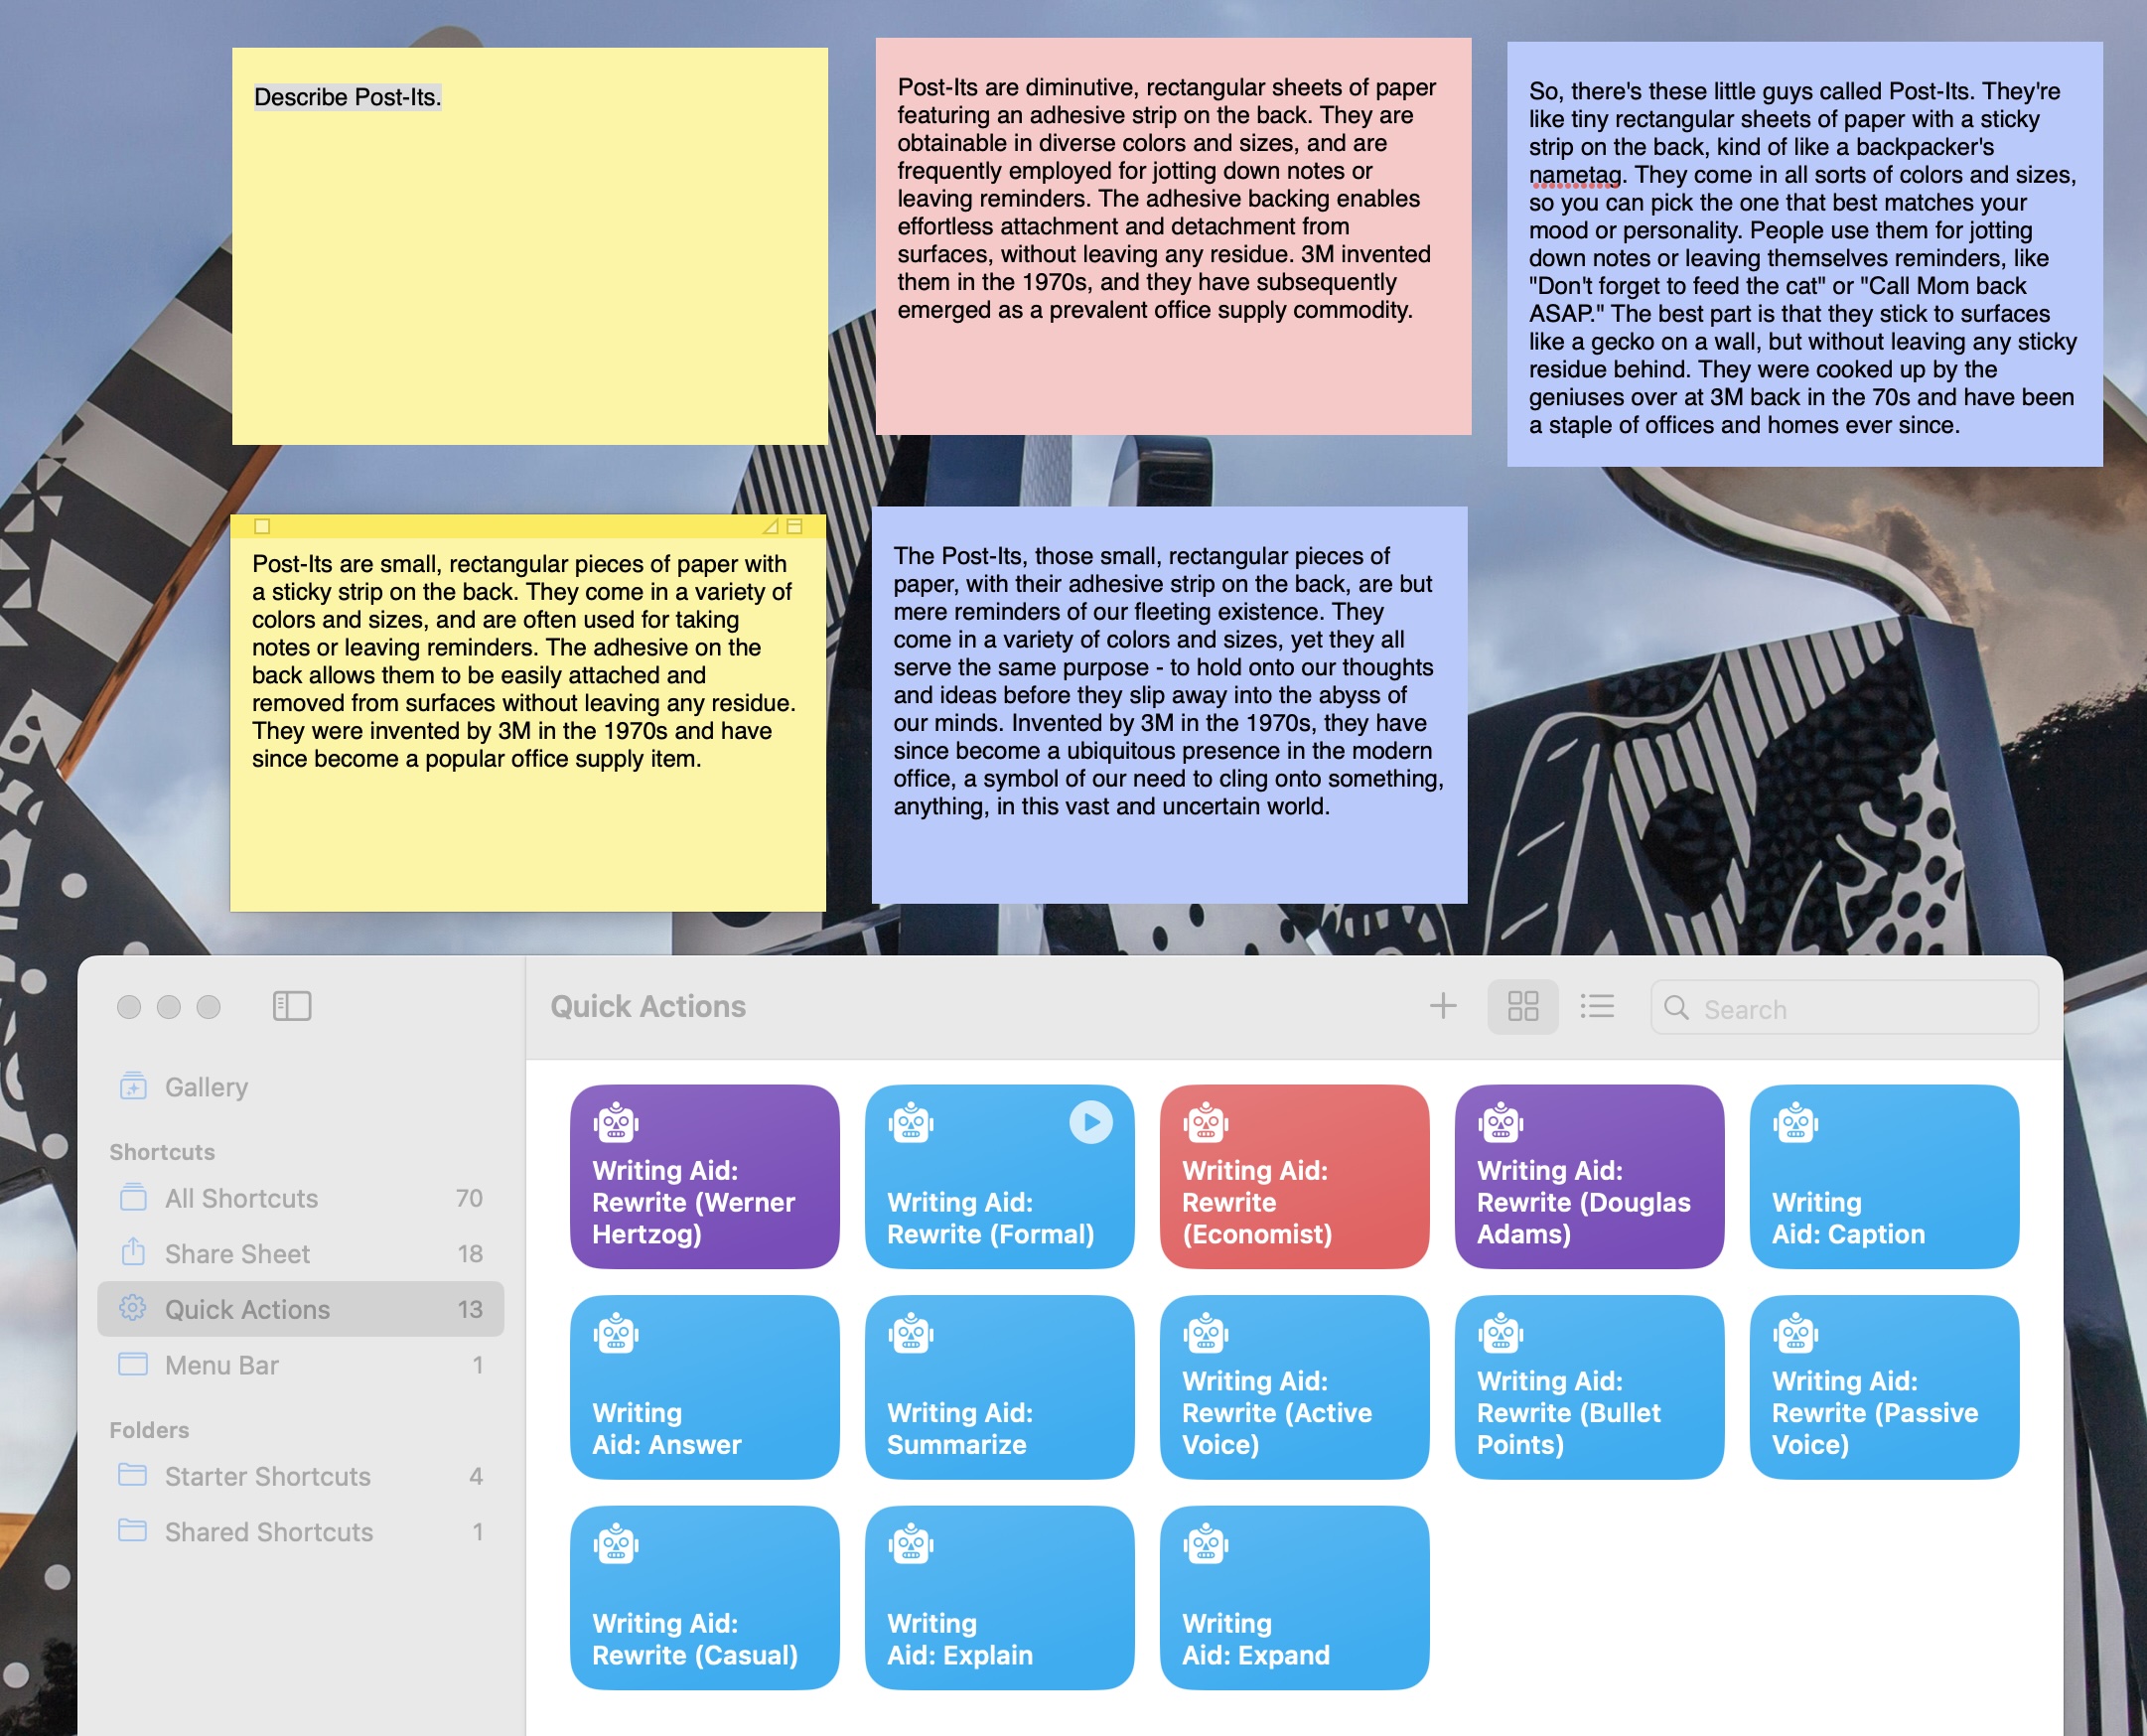
Two minutes of hackish cut and paste later, I had ten different macOS services that would invoke gpt35-turbo in Azure OpenAI with different prompts:

Dropping these into Shortcuts has a few advantages:
- It saves me the trouble of wrapping them manually and dropping them into
~/Library/Services - They sync via iCloud to all my devices
- as system Services, I can now invoke them from any app:

The Prompts
For reference, here are the prompts I used:
# shamelessly stolen from https://github.com/andersrex/notesollama/blob/main/NotesOllama/Menu/commands.swift (MIT licensed)
prompts = [
    {
        "name": "Summarize selection",
        "prompt": "Act as a writer. Summarize the text in a view sentences highlighting the key takeaways. Output only the text and nothing else, do not chat, no preamble, get to the point."
    },
    {
        "name": "Explain selection",
        "prompt": "Act as a writer. Explain the text in simple and concise terms keeping the same meaning. Output only the text and nothing else, do not chat, no preamble, get to the point."
    },
    {
        "name": "Expand selection",
        "prompt": "Act as a writer. Expand the text by adding more details while keeping the same meaning. Output only the text and nothing else, do not chat, no preamble, get to the point."
    },
    {
        "name": "Answer selection",
        "prompt": "Act as a writer. Answer the question in the text in simple and concise terms. Output only the text and nothing else, do not chat, no preamble, get to the point."
    },
    {
        "name": "Rewrite selection (formal)",
        "prompt": "Act as a writer. Rewrite the text in a more formal style while keeping the same meaning. Output only the text and nothing else, do not chat, no preamble, get to the point."
    },
    {
        "name": "Rewrite selection (casual)",
        "prompt": "Act as a writer. Rewrite the text in a more casual style while keeping the same meaning. Output only the text and nothing else, do not chat, no preamble, get to the point."
    },
    {
        "name": "Rewrite selection (active voice)",
        "prompt": "Act as a writer. Rewrite the text in with an active voice while keeping the same meaning. Output only the text and nothing else, do not chat, no preamble, get to the point."
    },
    {
        "name": "Rewrite selection (bullet points)",
        "prompt": "Act as a writer. Rewrite the text into bullet points while keeping the same meaning. Output only the text and nothing else, do not chat, no preamble, get to the point."
    },
    {
        "name": "Caption selection",
        "prompt": "Act as a writer. Create only one single heading for the whole text that is giving a good understanding of what the reader can expect. Output only the caption and nothing else, do not chat, no preamble, get to the point. Your format should be ## Caption."
    }
]
I actually tried doing this in Python first, but Automator stopped supporting it recently.
Nevertheless, I put up this gist, where I cleaned up the original NotesOllama prompts a bit, and also have a Swift version…
Next Steps
These only work on macOS for the moment, but I’m already turning them into iOS actions with the Get Content from URL action in Shortcuts and a bit of JSON templating. Get Dictionary From Input seems to be able to generate the kind of nested JSON payload I need off a simple text template, but I haven’t quite figured out how to get the keychain to work yet, so I’m still poking at that on my iPad.
For the moment, you can try a draft version of the shortcut I’ve shared here that will require you to enter your endpoint and API key manually (as usual with all iCloud links, this one is prone to rot, so if it doesn’t work, ping me).
That wasn’t my first approach since Shortcuts are abominably limited and slow, but primarily because I needed the JXA version so I can eventually build a little native app that uses other Azure OpenAI services but with a simple GUI in the spirit of lua-macos-app.
An interesting thing is that, as far as I can tell, I’m the first person who cared enough to figure out how to go about issuing HTTP requests and invoking APIs from JXA, which is… really awkward.
Update: Well, this escalated quickly:
