 Rui Carmo
Michael Lopp wrote about Gotham again, so I decided to do something about that. Not that I want him to shut up about it, mind you – quite the opposite, in fact.
Because, you see, even though I’ve given up Instagram and haven’t had time to get back into leisure photography, I did love Gotham. So I just had to scratch that itch.
And given that I’m living off the iPad these days, I decided to take a stab at cloning Gotham using Pythonista.
Among many other amazing goodies, Pythonista just happens to ship with the Python Imaging Library. It’s fairly limited (a lot more than, say, ImageMagick, which is my go-to image processing tool since forever), but it supports most common low-level operations like convolutions, luminosity tweaks or tints, so I can tackle (or at least attempt to imitate) Instagram filters with it.
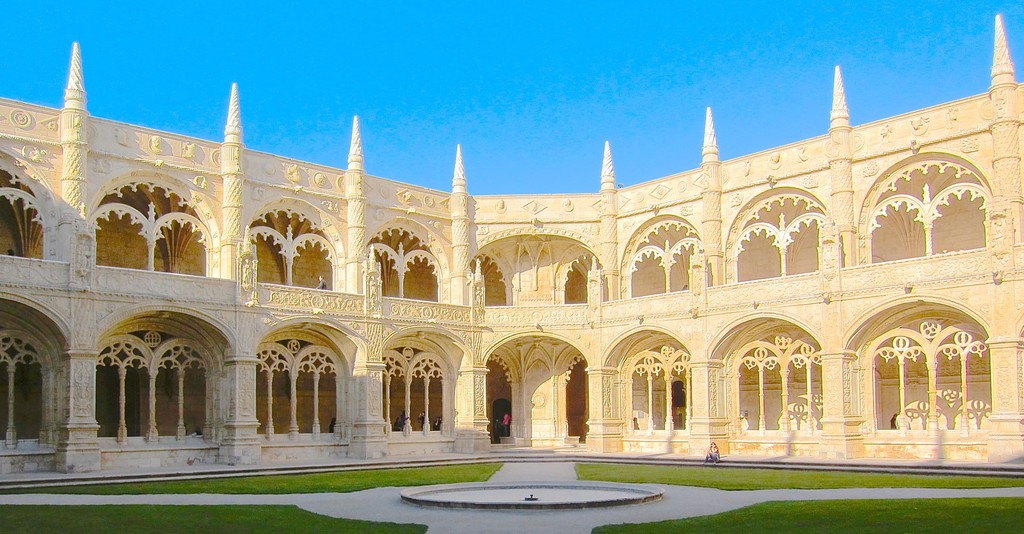
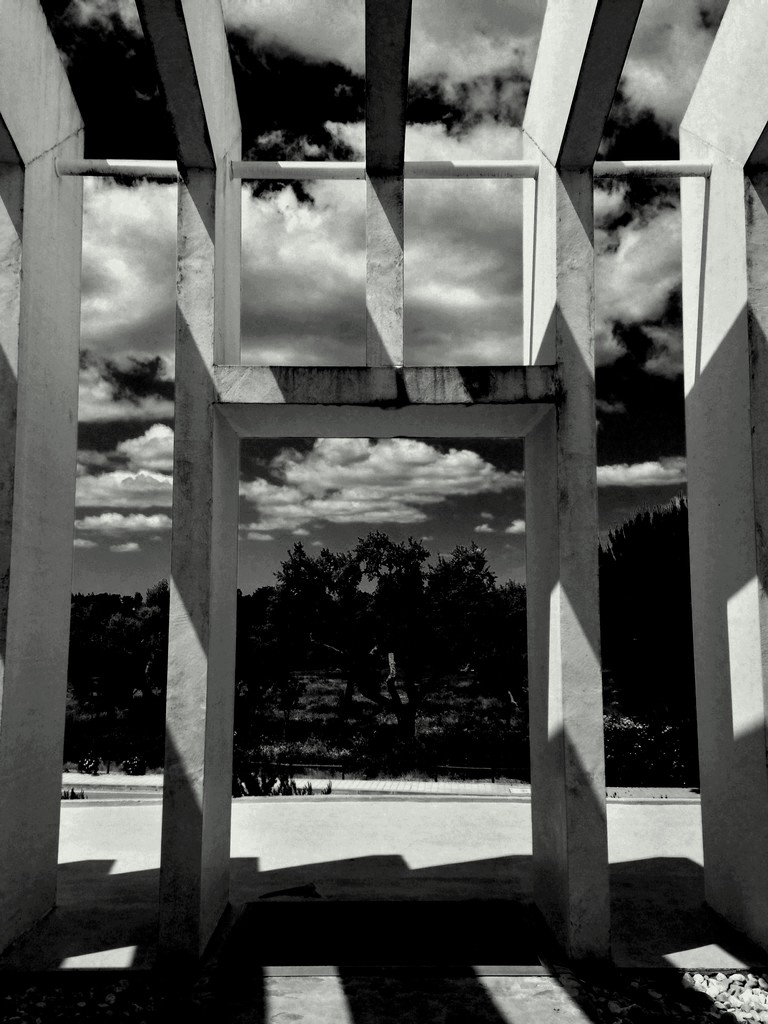
So let’s get started – the original image is a little grainy and over-exposed (I don’t have the source handy and had to pull it off my Photo Stream), but it was one of the few I had handy with a nice blue sky and plenty of architectural detail:
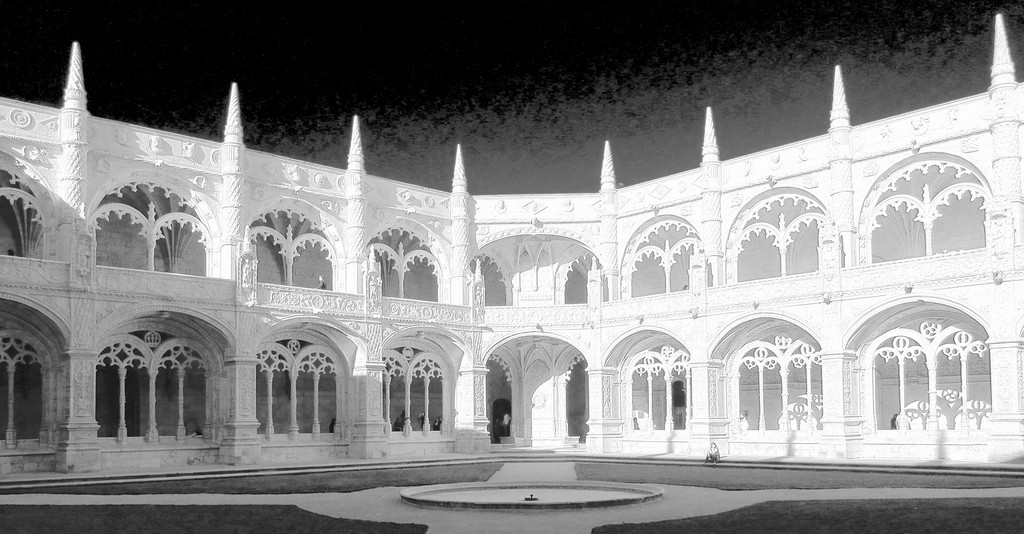
As Michael pointed out, one of the key components of Gotham is a red black & white filter, which is what gives Gotham skies their dramatic dark look.
That’s easy enough to do, since all we need is keep the red component of an image and dim the other two:
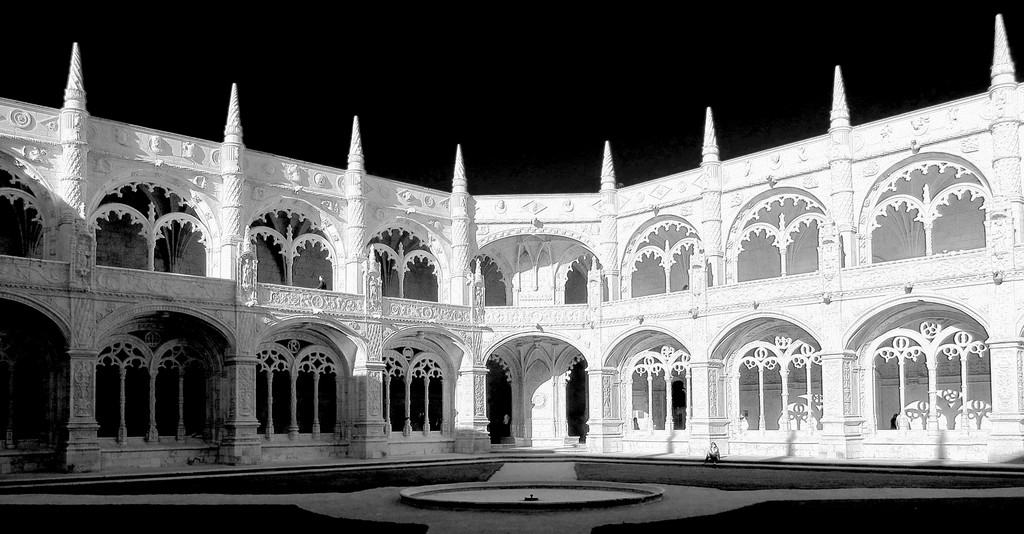
This is actually the result you get after an autocontrast operation – autocontrast tends to fiddle somewhat with the image’s dynamic range – and had the regrettable side effect of emphasising the compression artifacts in this example – but it’s a good way to compensate for the overall dimming when you remove two components.
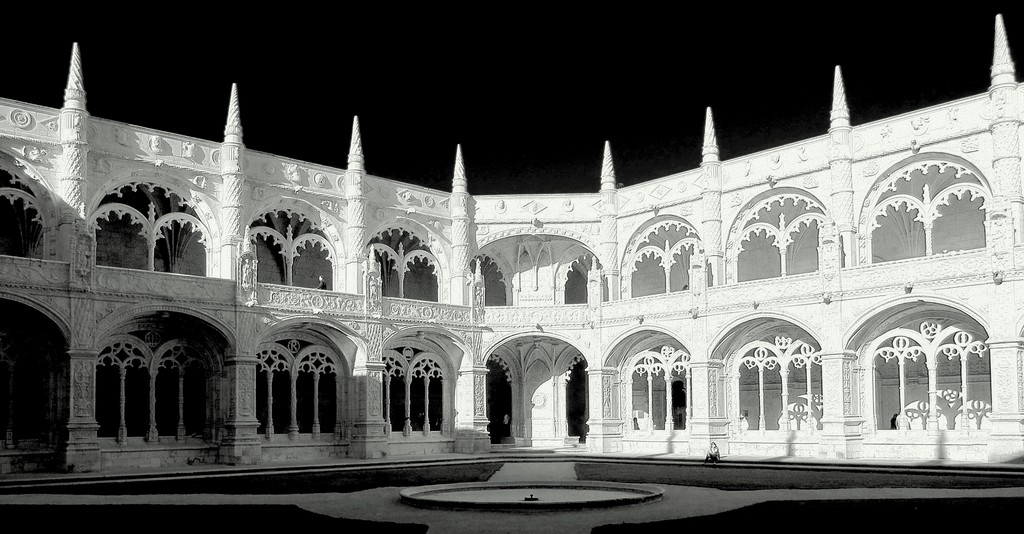
Fortuntately, the artifacts are easy to get rid of by boosting both contrast and brightness a little further – something I have to do anyway to attain an edgy, slightly grainy look:
Another of the key elements in Gotham is the tinting and gel-like effect, which is infuriatingly hard to get right1 – so I punted and added a subtle tint using a palette with a different white point:
Not bad for three simple operations, right? In practice, it all boils down to:
color_tint(boost_levels(autocontrast(red_bw(original))), (248, 255, 250))
But of course Gotham is all about contrasts and clouds, so here’s one of the few photos I had handy with any kind of cloud coverage:
All in all, the results aren’t half bad, and the (relatively) small script, complete with comments is here.
You can build a home screen shortcut to run it by using this page, and the final image is automatically saved to your camera roll.
Evolving It
The above is just the barebones, no frills version. It lacks some subtlety in terms of highlights and the final color tint is merely an approximation – I personally think it needs a few more tweaks for saturation and color curves.
However, those aren’t easy to get right, so I stopped fiddling with it on a pure trial and error basis and started doing something a little more systematic by applying a genetic algorithm to the problem.
The principle is simple – define the filter as a set of operations and parameters (i.e., “chromosomes”), set up a fitness function (that tells us how successful a given combination of chromosomes is), and randomly combine the best individuals from each “generation” to build the next set.
The starting population is trivial to represent like so:
adam_and_eve = [
    (red_bw,None), (boost_levels,(3.14,0.5)), (color_tint,((248,255,250))),
    (red_bw,None), (autocontrast,None), (boost_levels,(3,2)), (color_tint,((238,205,200)))
]
So each “chromosome” is an array of functions and parameters to apply to an image. If you add, remove or change the order of the transformations or “mutate” the parameters, you get a fair amount of diversity. So in each cycle I’d generate 10 new “chromosomes” by:
- running each through the fitness function
- picking the top 3
- randomly combining items from pairs of those arrays (preserving order) until I get 10 new arrays
- introducing a random mutation (by swapping two elements in the array or tweaking a random parameter by a small amount)
This is basic CS stuff (or at least it was back in the ’90s when I was graduating), but it has a few catches.
First off (since it’s not entirely obvious), you can get stuck on local maxima if the mutations take you too far off course – that is, you’re likely to evolve traits that rate high enough to be passed on but aren’t actually what you want.
And, of course, it’s very dependent on start conditions, population size, diversity, and the number of individuals you select to pass on traits to the next generation.
But it’s suprisingly efficient if your fitness function is both fast and reliable – which was actually the problem in this case.
Because, you see, judging the “fitness” of the results depends on having at least two images: a raw image and a Gotham version. You then take the raw image, run it through the operations specified in the “chromosome”, and compare the result with the “true” Gotham, sorting individuals according to how close they got to it.
As it turns out, this was a bit much to do on an iPad. My comparator shrunk (and cached) the images down to 256x256 pixels, then to 128x128, and finally 64x64, but doing pixel-per-pixel comparisons in either RGB or HSV color space took a long time, and the results I got were, quite frankly, way off – I either needed more iterations (doable, but boring), better comparisons (ditto) or better source materials.
Source material turned out to be an additional difficulty, since there are pretty much zero sets of “before” and “after” Gotham shots out there in the wild. But the real deal breaker was that I soon realized that to avoid local maxima I’d very likely need to run the fitness function on more than one set anyway, which made it all go much slower.
Still, it was a lot of fun (even if the resulting code isn’t fit to post), and I’ll eventually clean up the genetic algorithm bit into something more generic and put it up on Github sometime.
-
My best shot at it involved cloning the image, taking the luminosity component, blurring it slightly and re-applying it to the image after another tint, but that took quite long (Pythonista doesn’t expose iOS graphics primitives, so these are all CPU-intensive operations). ↩︎